Actions
Getting Started
Kickstart Training
Working with Dates
Form Designer
Tabs and Tab Permissions
Views and View Customization
Advanced Column Permissions
Item IDs
Associated Items
Print Formatting
Custom Print Headers and Footers
Event Calendar
Connected Lookups
List Search
Voting Columns
Signature
Rollups
Counter
Charts
Import
The Ultimate Forms: Print and export feature allows you to create templates for anything from a simple printed table to very unique and brand-specific reports, invoices, or other documents using your own custom formatted HTML and styling.
Adding custom headers and footers to your printed form enables you to add text, graphics, or images, giving you the ability to create forms to match your company’s branding guidelines.
Instructions
Step 1: Open your Print Template for editing
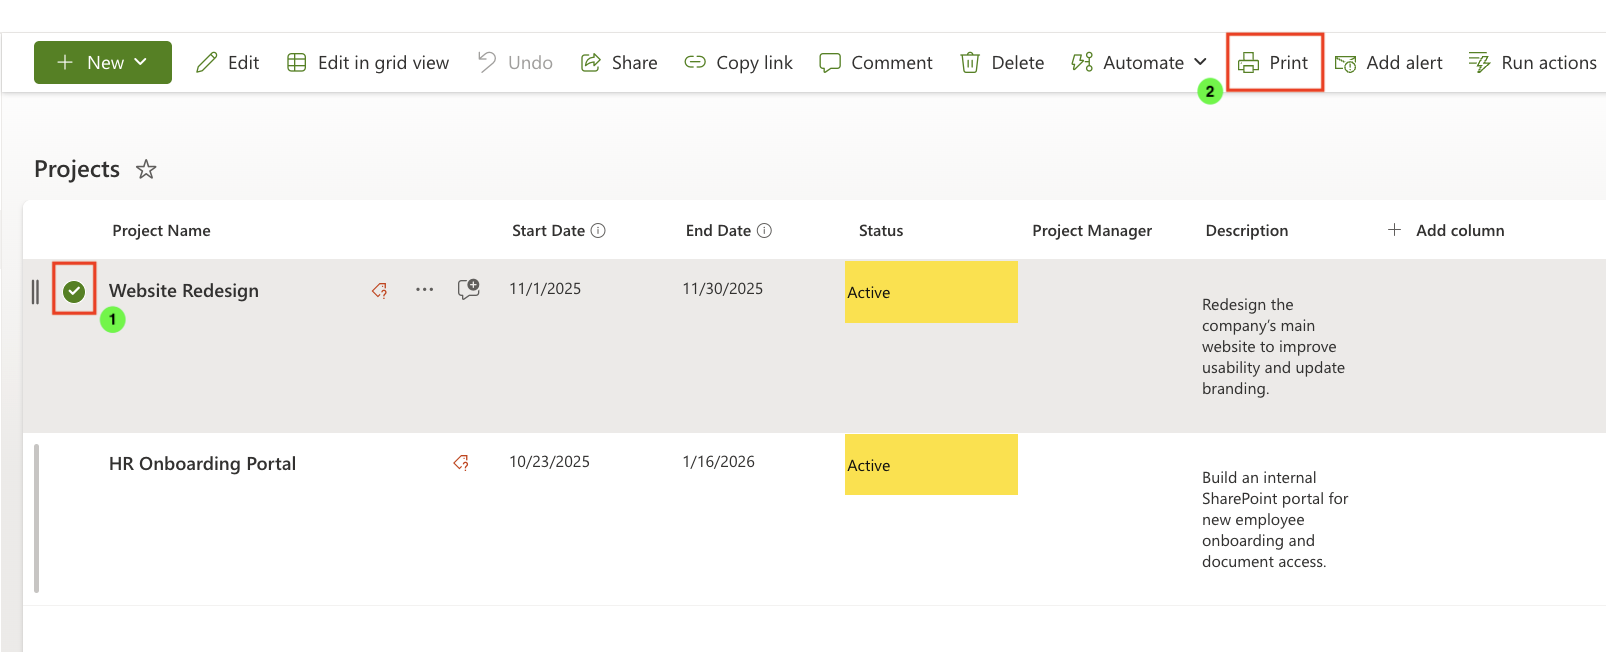
- In your SharePoint list, click Design → Print and Export.
- Locate the template you wish to update, and click the Edit icon next to its title.
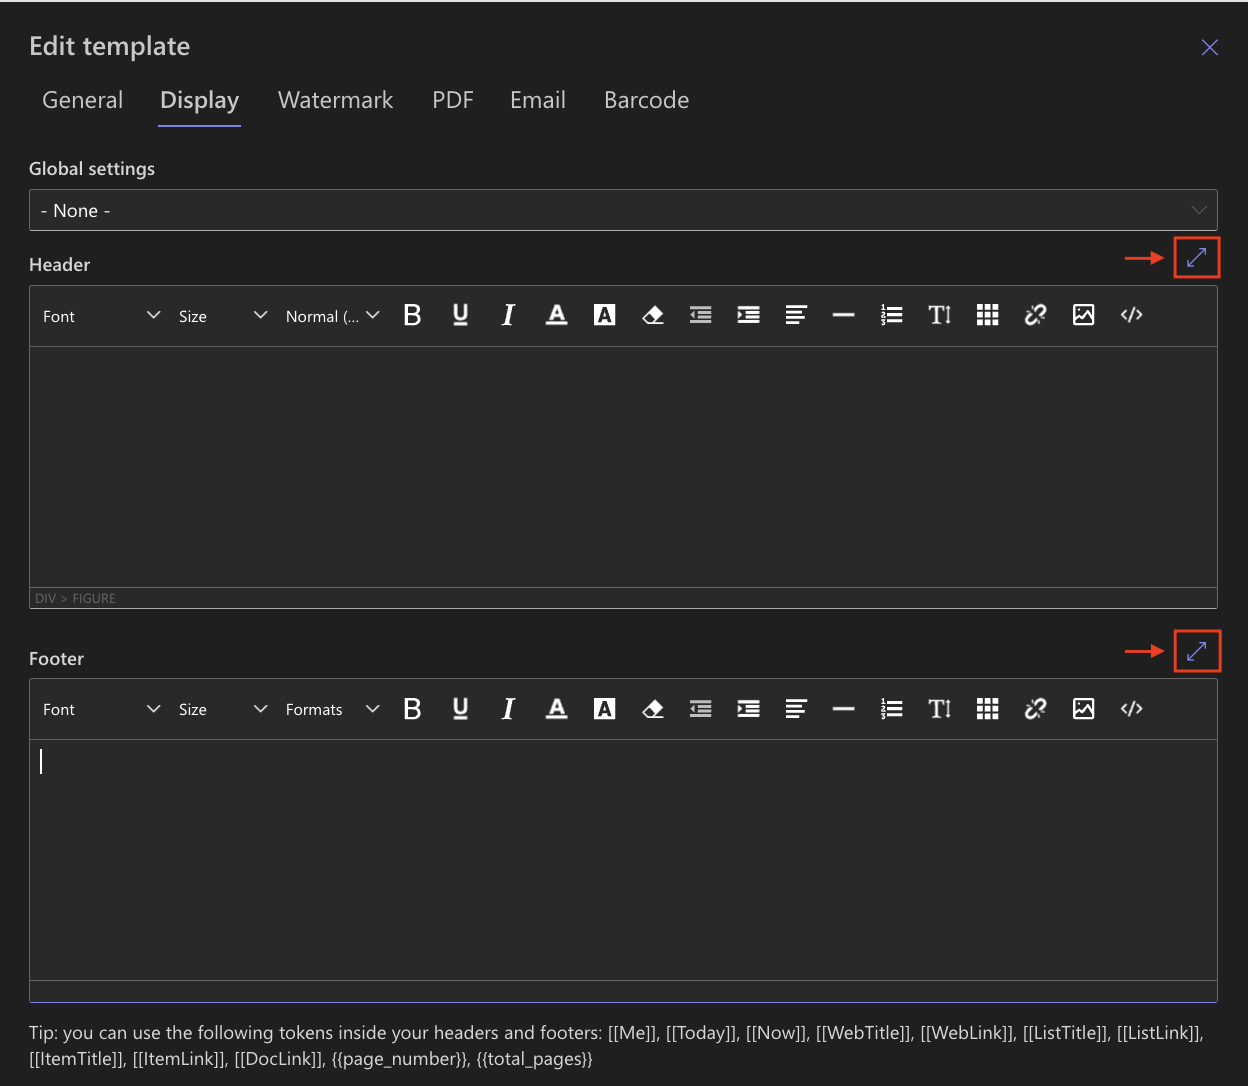
- In the template settings pane, go to the Display tab.

Step 2: Edit Header / Footer zones
- In the Display tab, you will see two rich-text editors: one for Header and one for Footer.
- Initially they show minimized menus; click the diagonal arrow icon to expand them to full view.
- In the editor, you can:
- Insert plain text
- Change font size, style, color
- Use alignment, bullets, indentation
- Insert images and hyperlinks ( images must be stored online to be used in forms, since you need to provide a URL when inserting them. It is probably a good idea to store form images in your site’s Image or Asset library to ensure they are visible to all users).
- Insert tables and format columns, rows, or cells
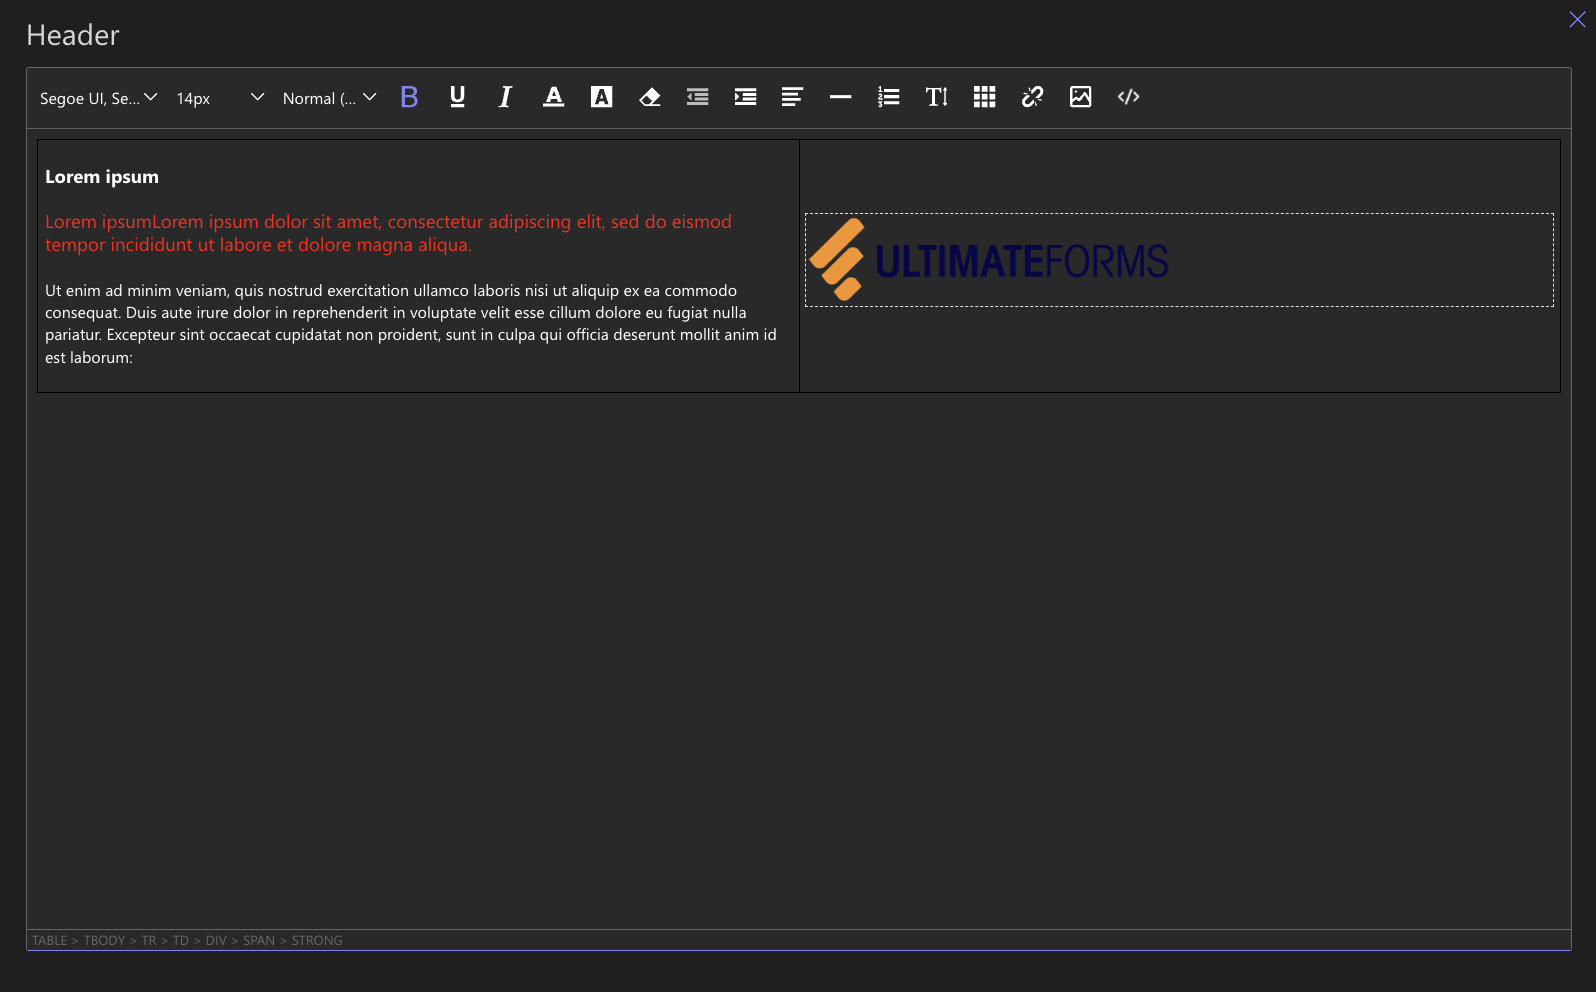
- If needed, switch to HTML/source mode (by clicking the < > icon) to directly edit the underlying markup.
- Be cautious editing HTML — ensure valid tags, paths, and styles.

- Be cautious editing HTML — ensure valid tags, paths, and styles.
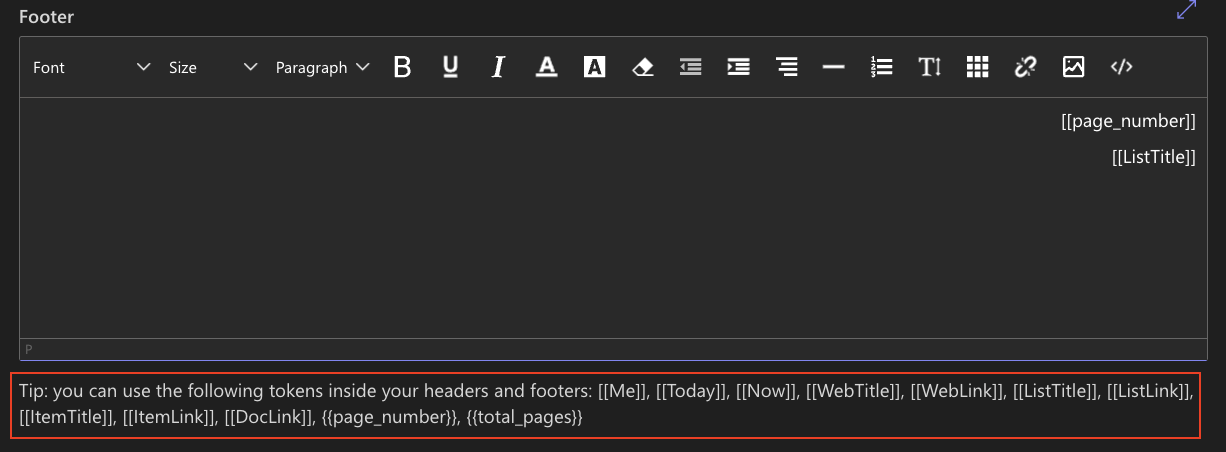
Step 3: Use dynamic tokens / placeholders
You can insert system tokens inside headers and footers to create dynamic content. Common tokens include:
- [[Me]] — current user
- [[Today]] / [[Now]] — current date/time
- [[WebTitle]] / [[WebLink]] — site title & URL
- [[ListTitle]] / [[ListLink]] — list title & URL
- [[ItemTitle]] / [[ItemLink]] / [[DocLink]] — current item/title/document links
- [[page_number]] / [[total_pages]] – current page number/ total pages number
Step 4: Additional Display Tab Controls
In addition to adding headers and footers, there are several extra controls available on the Display tab: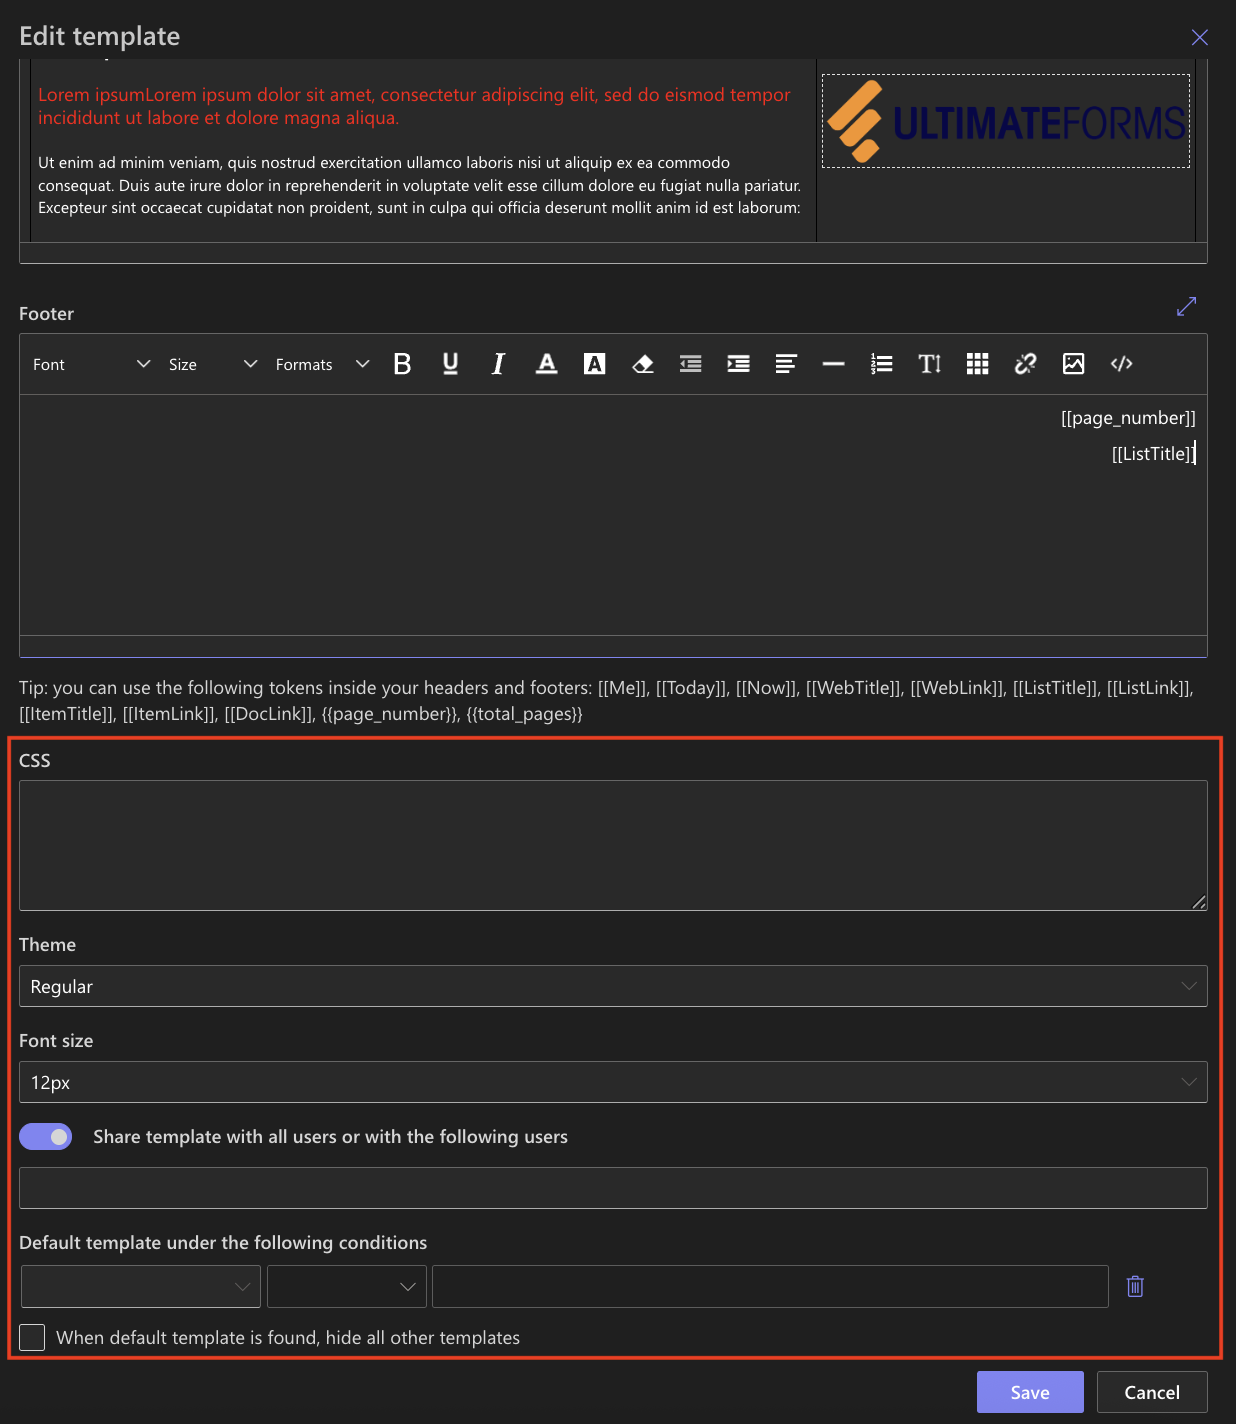
- Custom CSS
You can add custom CSS to your print layout for advanced styling (colors, spacing, typography). - Theme & Font Size
Choose between a Regular or High-Contrast theme, and adjust the default font size of your printed form.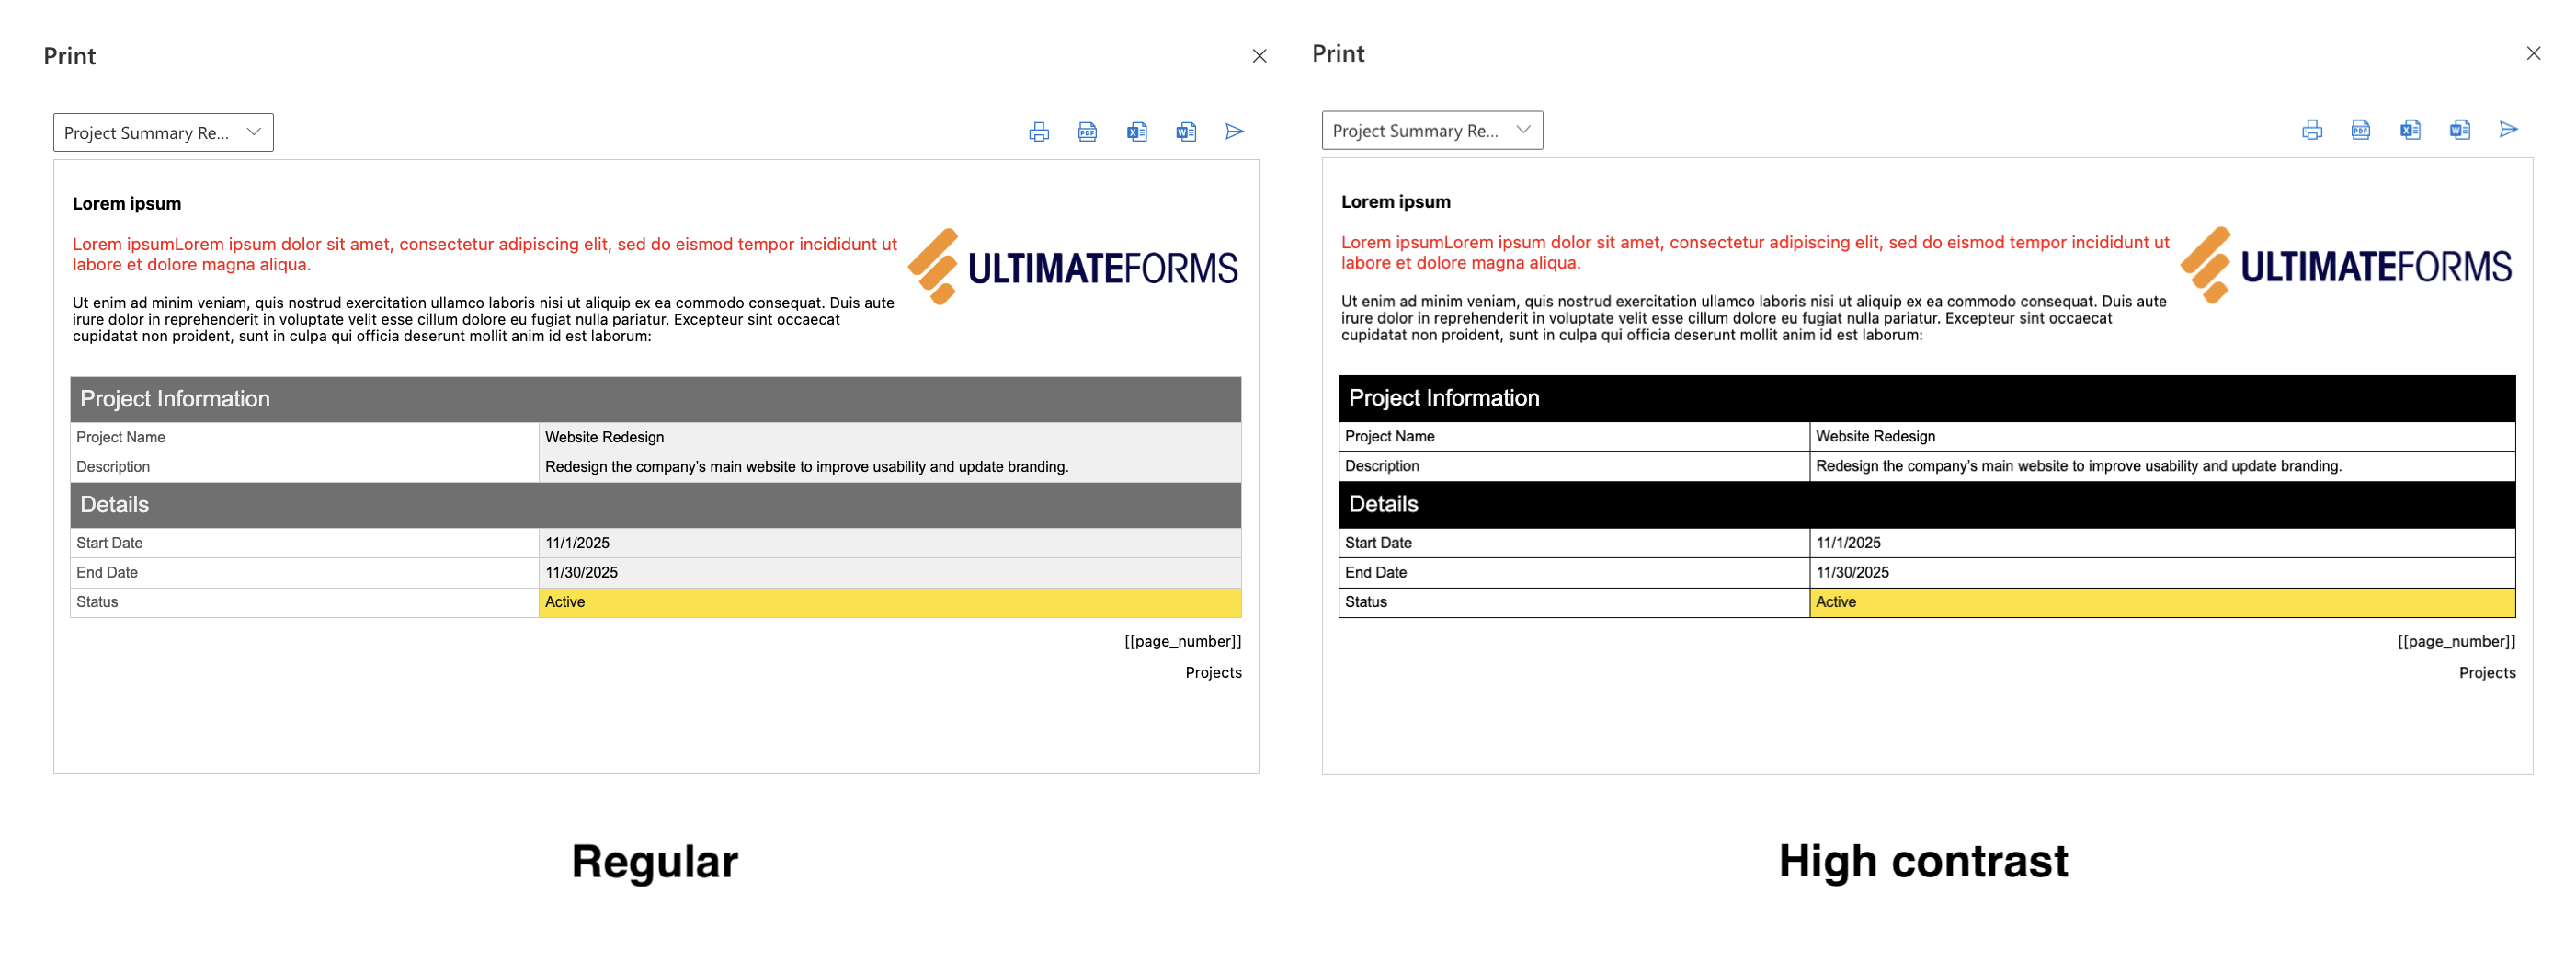
- Template Access Control
You can choose to restrict the availability of your template to certain individuals or user groups. - Conditional Display
You can define conditions that automatically pre-select a Print Template when certain criteria are met.
Step 5: Save and Preview
- Click Save on the template.
- Open a list item → set item → click Print → [Template Name].
- Review the preview to verify header, footer, and theme.
- Export to PDF or Word to confirm formatting and page numbering.
Summary
Custom headers and footers bring your print templates to life — adding branding, context, and professional touch.
Last modified: 10/12/2025 12:26 PM
Loading...
Add your comment
Comments are not meant for support. If you experiencing an issue, please open a support request.
Reply to: from