The Update List Item action is one of the most powerful and widely used features in Ultimate Forms. It allows you to change column values in the current item or other items within your SharePoint lists or libraries, using predefined triggers, dynamic conditions, and formulas. Whether you're auto-filling instructions, updating statuses, or adjusting values in related records, this action enables seamless, automated updates—without writing custom code.
In this tutorial, we’ll walk through a practical scenario: automatically populating a Project Requirements field when a user selects "Sales" in a Category field. This kind of setup ensures consistent input, reduces manual effort, and guides users intelligently through the form experience.
Instructions
Prerequisites
- Ultimate Forms is installed and activated on your SharePoint site
- A SharePoint list with columns like Category and Project Requirements
- Design-level permissions or higher
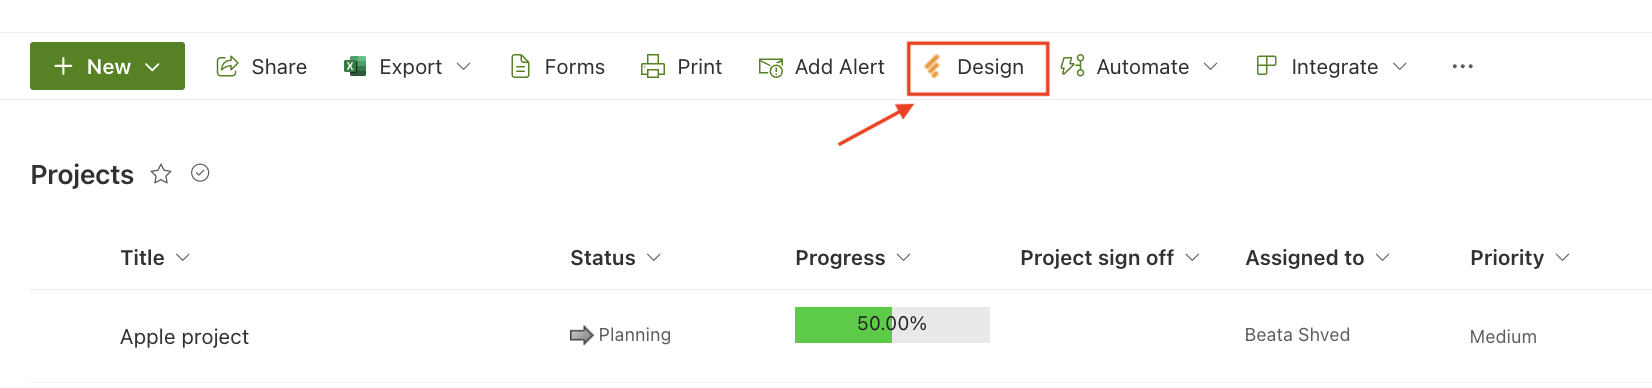
Step 1. Go to the List and Open Actions Designer
- Navigate to your SharePoint list
- Click Design from the toolbar (Modern UI)
- Select Actions under the Business Logic section
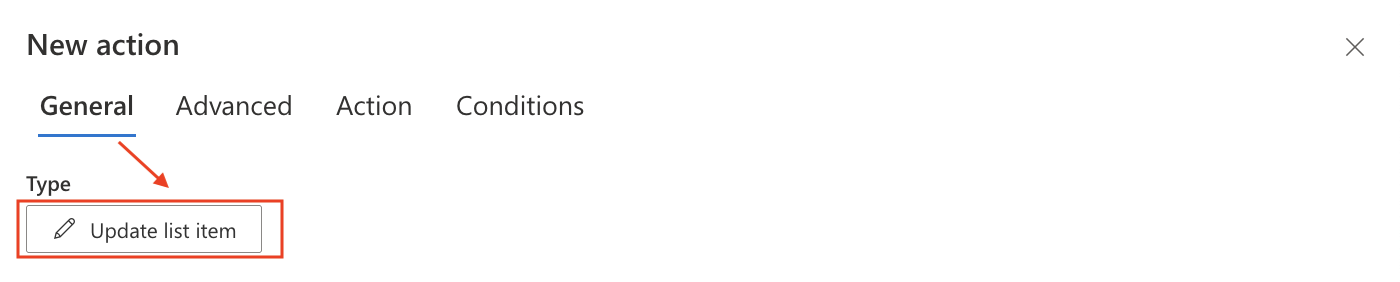
- Click New Action and choose Update List Item
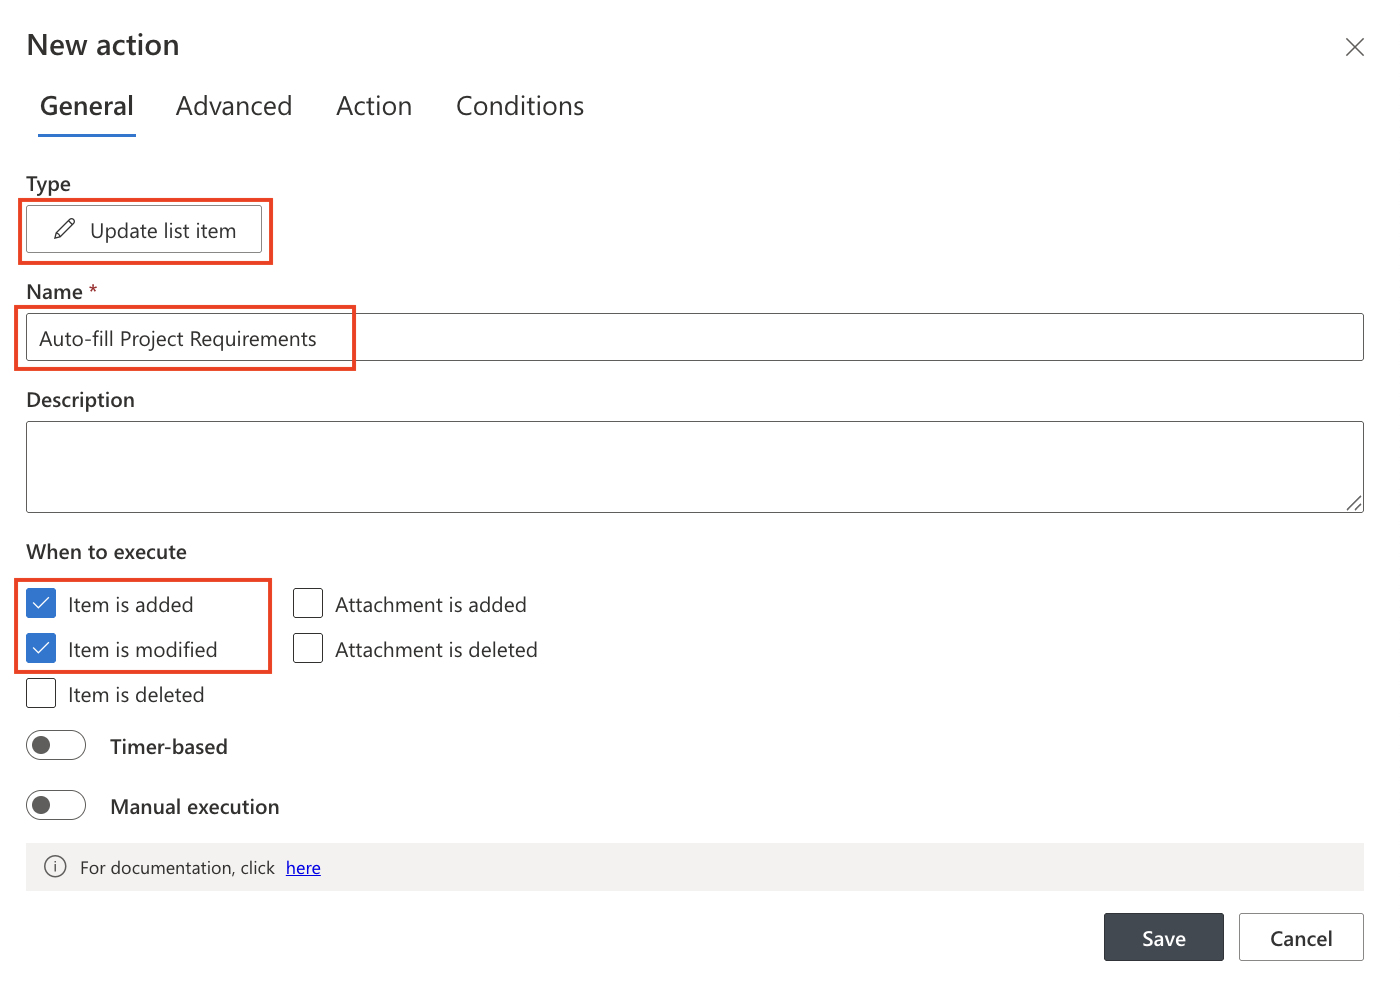
Step 2. Configure the Action
- Name: Auto-fill Project Requirements
- Type: Update List Item
- Execution Trigger: On item added or modified
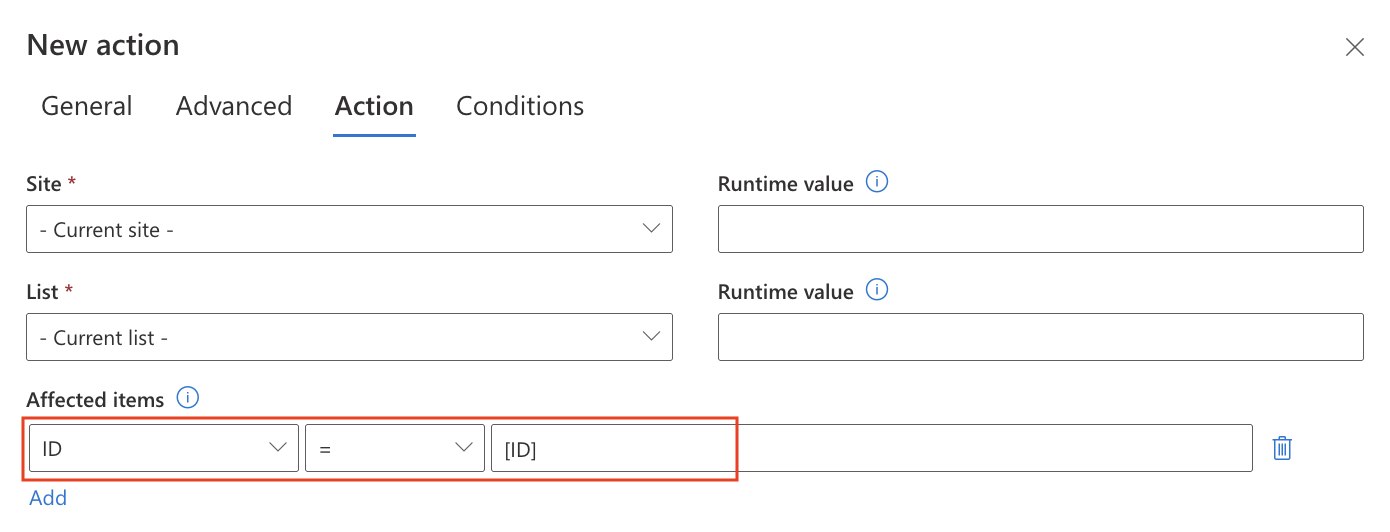
Step 3. Set the Filter
- Source: By default, this action applies to the current list item only. You will see the message: “The action applies to the current item only.” This means you don’t need to configure the Source section unless you want to specify a different source manually.
- If needed, click Change to override the source.
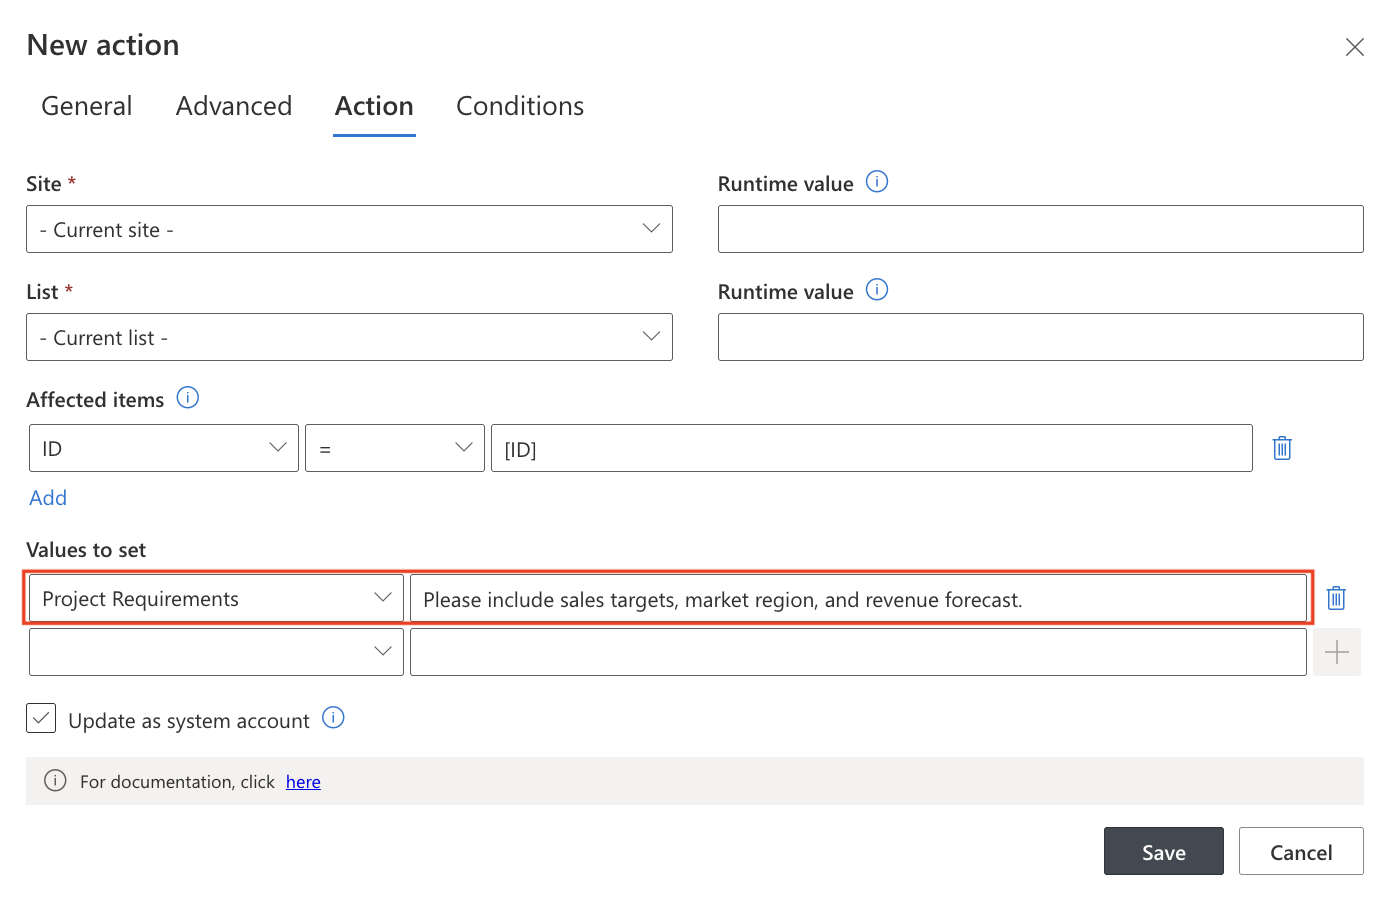
- Affected items: ID= [ID] (This ensures only the current item is updated)

Step 4. Define the Column to Update
In the Values to Set section:
- Column: Project Requirements
- Value: “Please include sales targets, market region, and revenue forecast”.
You can also use tokens like [Created By] or formulas such as [Project Name] & " Details", depending on your use case.
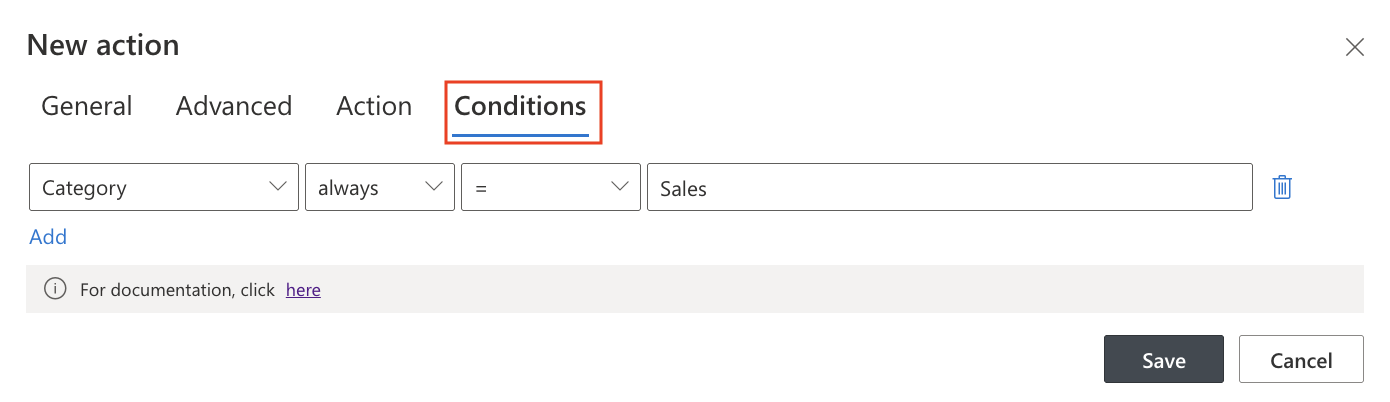
Step 5: Add a Condition
Click the Conditions tab.
Add the following logic: [Category] = "Sales"
Example Use Case Summary:
Goal: Populate the Project Requirements column automatically when "Sales" is selected in the Category column.
Outcome: Improves user guidance, prevents errors, and ensures standardized input.
Watch this quick video walkthrough from Infowise:
Tips & Best Practices
- Always define a unique Item Filter such as ID = [ID] to avoid updating unintended items
- Use conditions to keep logic readable and maintainable
- Combine multiple Update actions for progressive automation (e.g., status changes, date stamps, approvals)
- Use system account mode to keep background updates hidden from users
- Monitor execution via Action History
- Test thoroughly on a copy of your list before enabling in production
Summary
The Update List Item action in Ultimate Forms allows you to create flexible, rule-based automations that change column values in real time. Whether you want to guide users, enforce logic, or simplify your workflow, this action can help you deliver responsive, intelligent form behavior directly in SharePoint—without writing a single line of code.