List Search
List Search Setup

SharePoint is often used as a repository for information. Lists and document libraries grow over time and eventually it becomes more difficult to find the document or record a user is looking for. The Infowise List Search web part makes finding items in SharePoint easy! Using the Infowise List Search web part, a user can search specific columns from a list or library with specific controls for different field types. The Advanced Search feature also lets you chain up to 5 conditions together user the “AND” and “OR” operator and then save these searches for future use. It does all this, while maintaining a fully functional context menu for the user to work out of.

Instructions

The first step in setting up the Infowise List Search web part is to build a Profile. We will start with the Office 365 version.

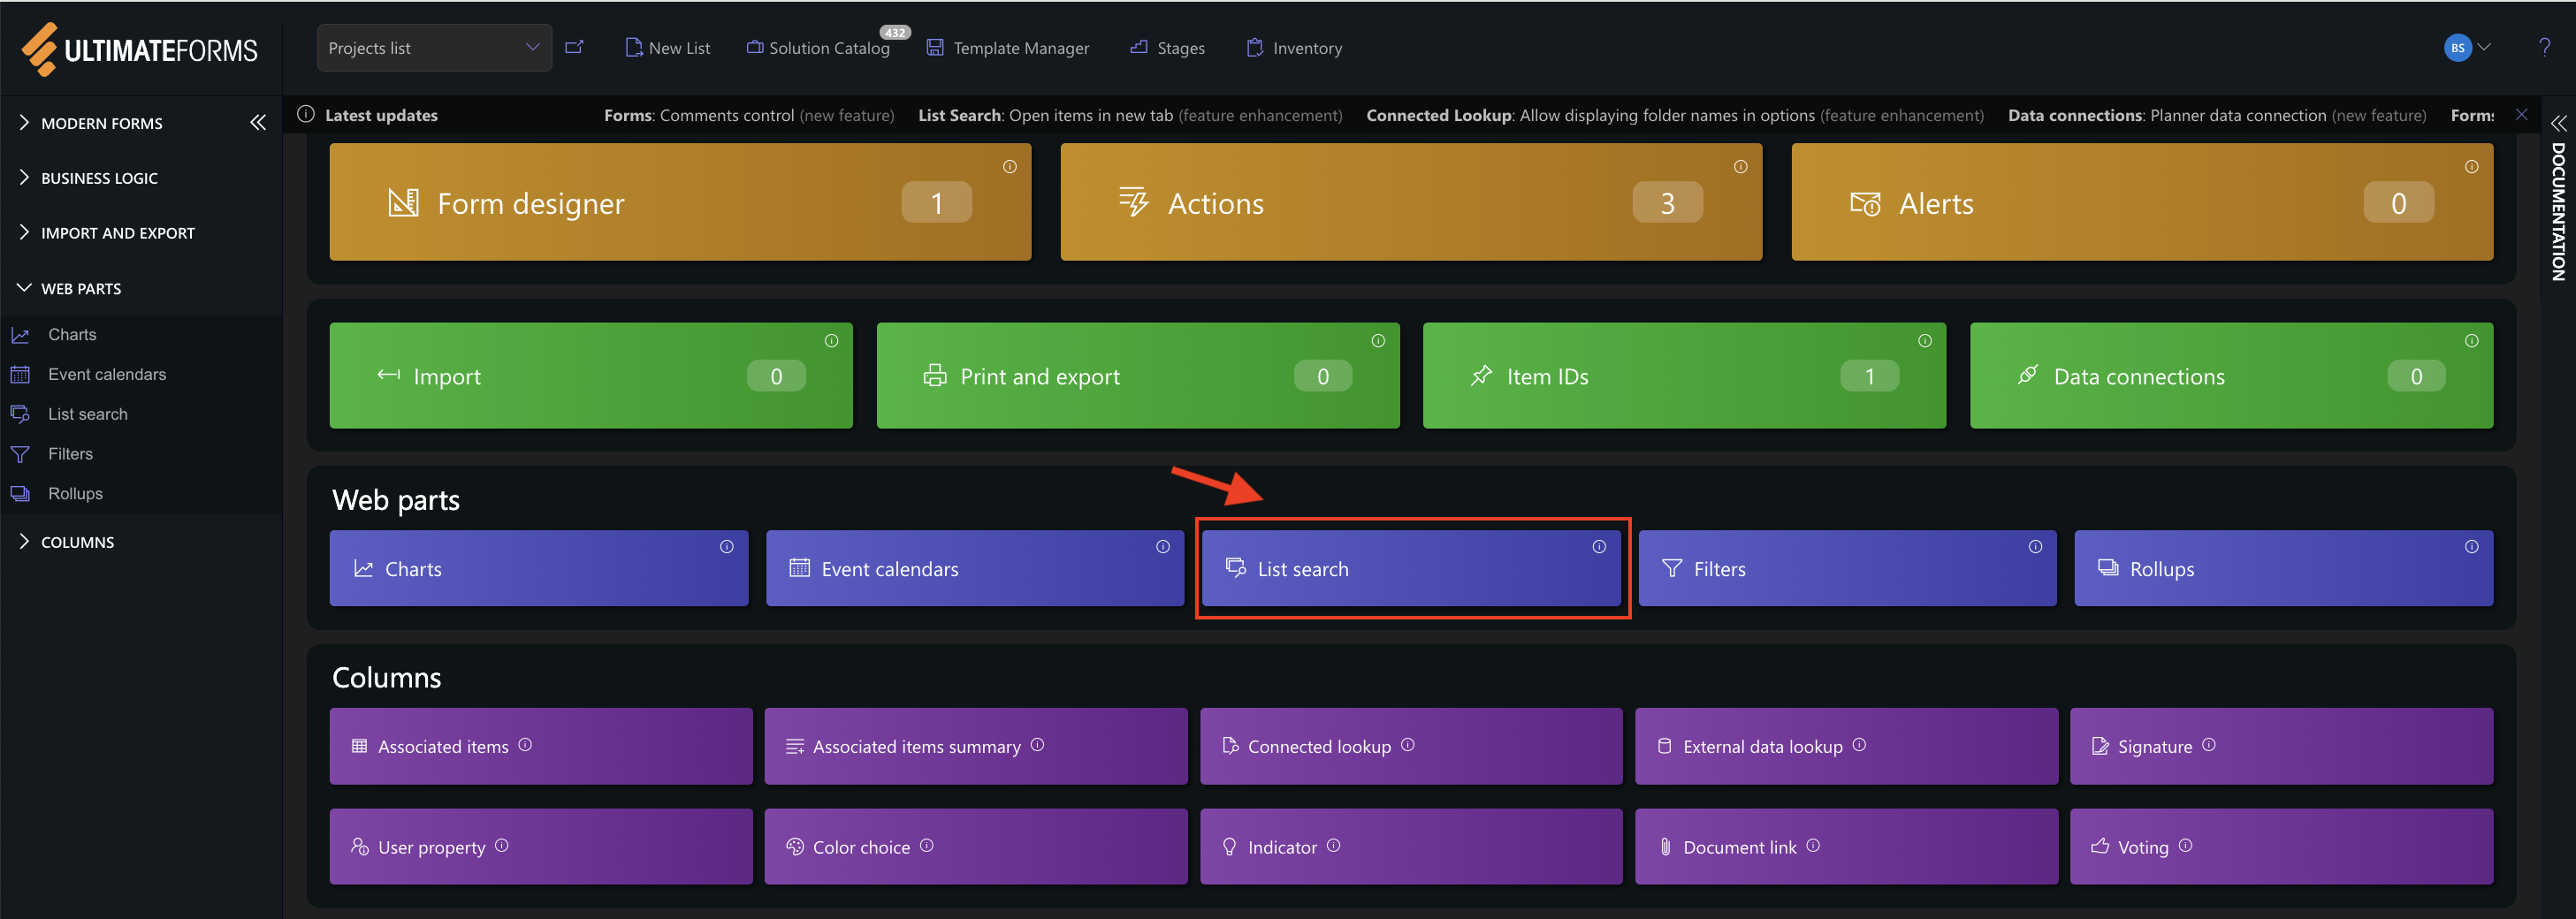
In your Office 365 SharePoint, navigate to your Ultimate Forms Design Screen. Under the Web Parts section, select List Search.

Once in the List Search screen, go ahead and name your Profile. The name of your Profile is important and we will need it later, so make sure and make it something relevant. Below the Title field, we can choose which lists we want to include in our search. This would be extremely useful for building different search pages if you had two groups of users’ that needed to be able to search different lists or libraries.


Check the box next to the lists you would like to bring in. You can only choose one Default list as this is the list that will be searched if the user does not change settings. Click the Add button to create the Profile.

Now we can add the Infowise List Search web part to a page and test how it works. Go ahead and create a page using the gear icon in the upper right-hand corner of SharePoint and select Add a Page from the dropdown.

In this example, I will demonstrate adding the Infowise List Search web part to a modern page. Name your page whatever you would like and click the plus sign below. Save your page once it has been added.

Once the app is added to the page, you should get a message “Use the app to configure a list search profile, then specify its title in the app part properties”. This is because the app has not been configured yet. Click the pencil icon in the top left of your web part to access the Web Part Properties page.

A window will open to the right of your web part. Under the Infowise section, you will add the name of the Profile we created earlier and then click the Apply button at the bottom. I recommend taking some time to figure out what Width and Height work best for your web part. Keep in mind that there should be enough room for users to utilize the context menu to work with the results returned. We will discuss the context menu a bit more in depth later in the article.

Make sure to save the changes to your page. Your new Infowise List Search web part should look similar to the screenshot below. As you can see, it is defaulted to search the Tasks list.

However, if we click the dropdown we will see all the lists and libraries we included in our search Profile.

We can also utilize the Advanced search feature to do things such as search specific columns or combine multiple conditions into one search.

To demonstrate how this works, lets first take a look at the records in our Tasks list.


Next, lets add some conditions to our search one by one to see what the effect is. I added the condition that Task Status = Not Started and the pressed Add next to the condition. Click Search to see the results.


Notice that I selected the AND operator here as well. This means that both my conditions must be true for a record to be returned. Notice the two records below that meet these criteria.


Now let’s see what would happen if we changed our AND operator to an OR operator. We can see below that quite a bit more records meet the OR condition than the previous AND condition.

Infowise List Search allow users to combine up to five different conditions into a single search!


Another amazing feature of the Infowise List Search web part is that it displays records with the full context menu so that users can work directly with the records from the search page.

As you can see, I can view, edit or delete an item directly from the search page. I can also perform custom Infowise Actions directly from this screen!


Setting up an Infowise List Search page in the on-premise version of Infowise is very similar. The first thing you will want to do is create a new page using the gear icon. Name your page whatever you would like. Once your page is generated, click in the empty zone on your page. You will see the Insert tab appear in the top left of your screen. Select the web parts icon and then the Infowise category. Select the Infowise List Search web part and click the Add button.


Your web part should look something like below.

We need to edit the Web Part Properties in order to set up the Profile. Click the drop down arrow in the upper right hand corner of your web part and select Edit Web Part from the dropdown menu.

The Web Part Properties for the Infowise List Search web part look similar to the Infowise Design Screen we saw earlier. Here we can decide which lists or document libraries we want to include in our search. We can also set the default list or library we want searched.

You can name the web part below if you’d like, but the name is not important like it is in the Office 365 version. Make sure to click Apply in Web Part Properties and then Save your page.

Similarly, I know that the Products column of my Groceries list is a lookup column. If I add this column into one of my conditions, Infowise automatically adds the possible values from my Products list into my search!


Summary

In this example, we walked through how to set up a basic Infowise List Search web part in both the Office 365 and on-premise version of Infowise. We walked through the differences in the set up and features of the two products.

Last modified: 11/15/2024 10:07 PM
Loading...

Add your comment

Comments are not meant for support. If you experiencing an issue, please open a support request.
Microsoft partner logo
© 2005-2025 Infowise Solutions Ltd. All rights reserved.
Privacy | Cookie Policy | Accessibility | Cloud SLA