The Send Email action in Infowise Ultimate Forms allows you to send rich, dynamic emails from SharePoint lists or libraries. These emails can be triggered by a wide range of actions—such as item creation, updates, attachments, or even scheduled events—making them perfect for approvals, reminders, file notifications, and much more.
Instructions
Step 1: Create the Action
- Go to your SharePoint list or library
- Open Ultimate Forms Design → Actions
- Click New Action
- Choose action type: Send Email
- Name your action, e.g., Notify on Attachment Upload

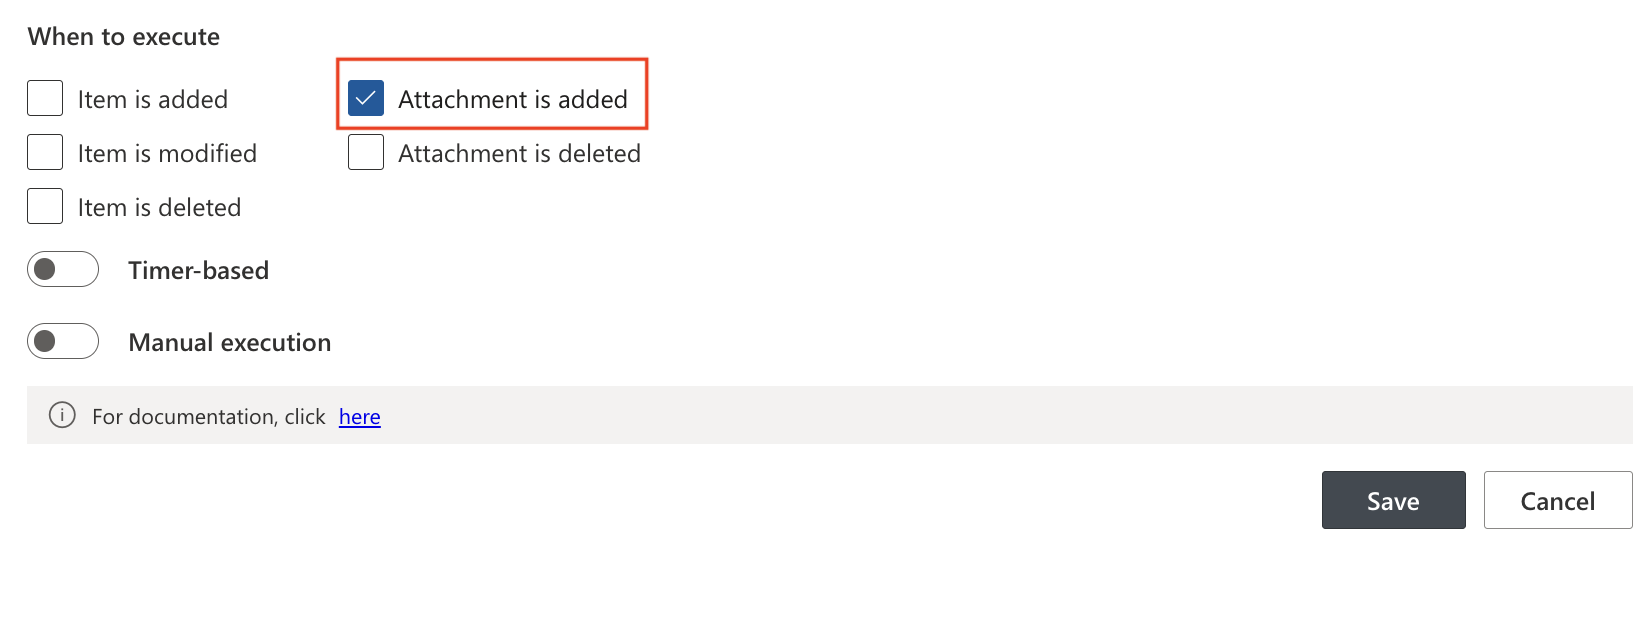
Step 2: Configure Trigger
Choose when email should be sent:
- On item add/edit/delete
- Attachment added or deleted
- Manual or timer triggers
📎 Use Case: Set for “Attachment added” to notify when a new file is uploaded
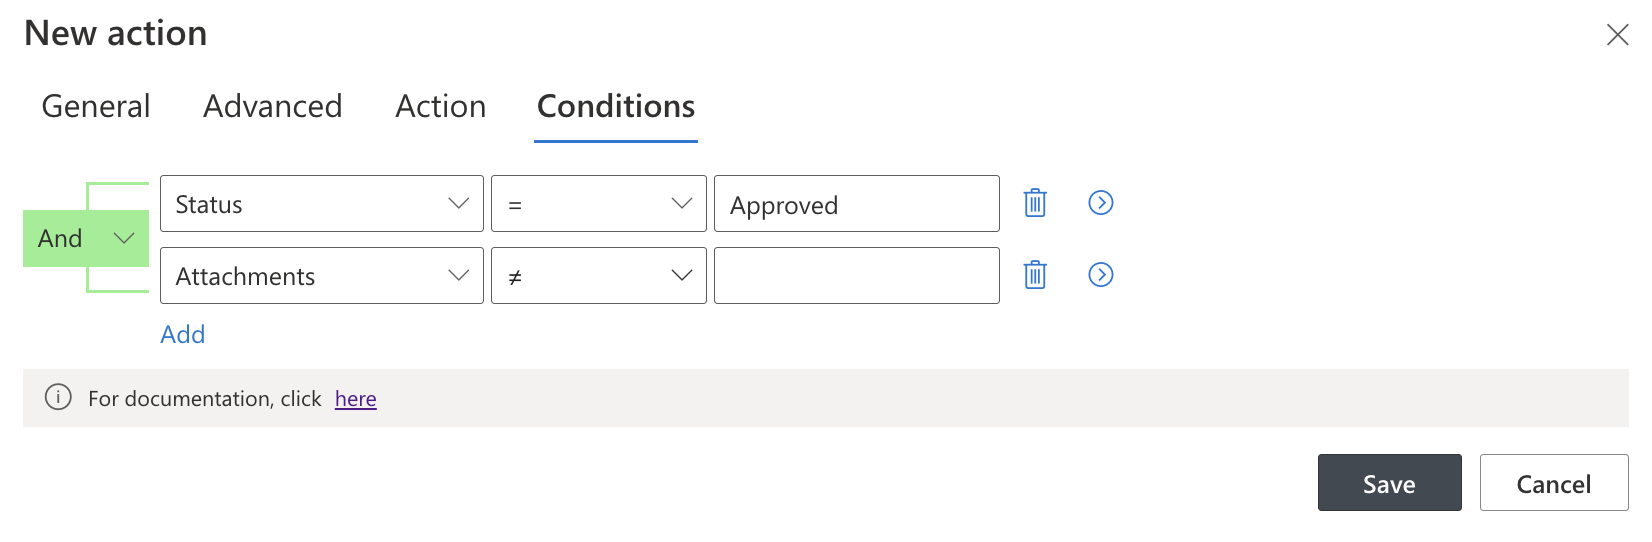
Step 3: Add Conditions (optional)
Use conditions to send the email only when specific logic applies.
Example:
[Status] = Approved AND [Attachments] is not empty
This ensures the email only sends when needed.
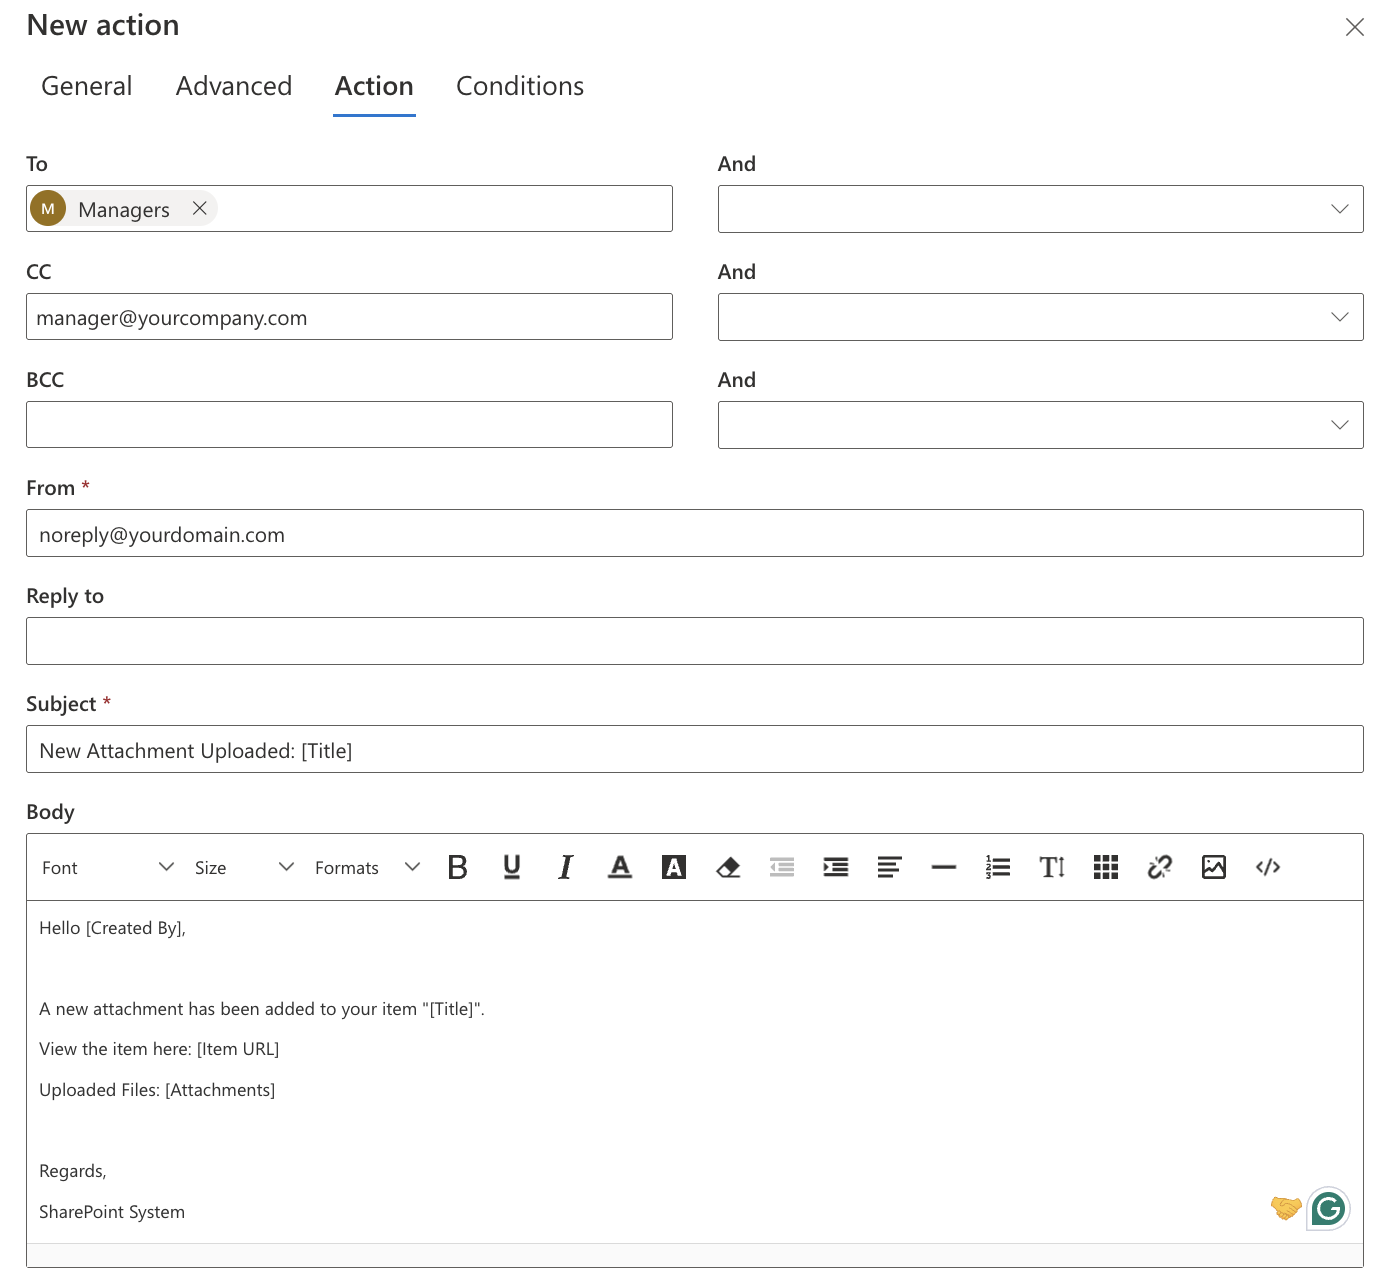
Step 4: Set Email Details
Here's a real example for a file upload notification:
- To: [Created By]
- CC: manager@yourcompany.com
- From:
noreply@yourdomain.com(required on SharePoint Online)-
Must be a valid Exchange Online mailbox or shared mailbox
-
On-premises, this column is optional
-
- Subject: New Attachment Uploaded: [Title]
- Body:
Hello [Created By],
A new attachment has been added to your item "[Title]".
View the item here: [Item URL]
Uploaded Files: [Attachments]
Regards,
SharePoint System
- You can format the body using the rich text editor (bold, lists, tables, links, etc.).
Tip: Use tokens like [Title], [Created By], [Item URL], or [Attachments] to inject dynamic content directly into your emails.
Step 5: Save and Test
- Click Save
- Upload a test attachment to your list item
- Check your inbox (or the recipient’s)
- Use Action History to troubleshoot or confirm success
Tips & Best Practices
- Use Person/Group columns to dynamically route messages
- Always test email actions with your own email first
- Include [Item URL] to help users quickly open the item
- Use Action History to confirm delivery status or review failures
Watch this quick video walkthrough from Infowise:
Summary
The Send Email action is the most flexible way to notify users directly from SharePoint without external tools. Whether you're alerting someone about uploaded files, due dates, or approval changes, you can configure email messages with complete control over content, triggers, conditions, and recipients—all in a no-code interface.
This action is ideal for project tracking, HR requests, issue resolution, and many other scenarios where communication is key.