Introduction
In our previous blog, we introduced the concept of building a Power Apps dashboard integrated with Infowise Ultimate Forms to empower non-developers like HR managers, controllers, and business owners. Today, we’ll dive into the essential first step of this process - integrating Power Apps with Infowise Ultimate Forms data. This integration is crucial for pulling real-time information from your SharePoint lists into Power Apps, which will be the foundation of your interactive and user-friendly dashboard.
This post will provide a step-by-step guide on how to connect Power Apps with your SharePoint data, managed by Ultimate Forms, ensuring that the information your dashboard displays is accurate, up-to-date, and relevant.
Why Integrate Power Apps and Infowise Ultimate Forms?
The combination of Power Apps and Infowise Ultimate Forms gives you the best of both worlds. Power Apps is excellent for creating visually appealing apps with custom interfaces, while Infowise Ultimate Forms offers robust data management capabilities within SharePoint. By integrating these platforms, you enable seamless access to real-time data, allowing HR managers and business owners to make quick, informed decisions using an intuitive dashboard.
Step-by-Step Guide to Integration
Set Up SharePoint Lists with Infowise Ultimate Forms
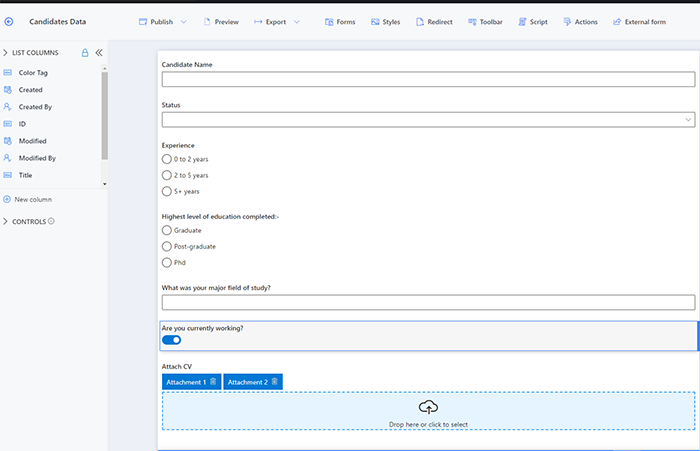
Before integrating Power Apps, ensure your data is properly managed within SharePoint using Infowise Ultimate Forms. Ultimate Forms allows you to create custom forms, workflows, and lists that contain the information you want to display on your Power Apps dashboard. This includes Candidates data, Interview Scheduling, and more. For more details on how to set up forms, click here.
Key Steps:
- Create and configure SharePoint lists using Infowise Ultimate Forms.
- Set up any custom fields or workflows (e.g., advanced search conditions, filters).
- Test the SharePoint list to ensure data is being properly stored and organized.
For more details on using Infowise Ultimate Forms to customize SharePoint lists, check out our article on advanced filtering and search functionality.

Connect Power Apps to SharePoint Lists
Once your SharePoint lists are set up, it’s time to connect Power Apps to those lists. Power Apps provides a seamless integration with SharePoint, allowing you to pull data from your lists into your app. Here’s how to do it:
- Open Power Apps and create a new app.
- Start with page design and select blank canvas (Make sure it’s in Tablet format).
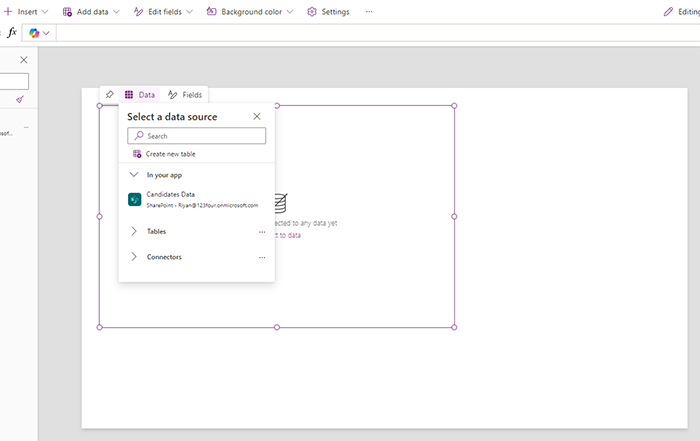
- Select Data Sources and choose SharePoint as your connection.
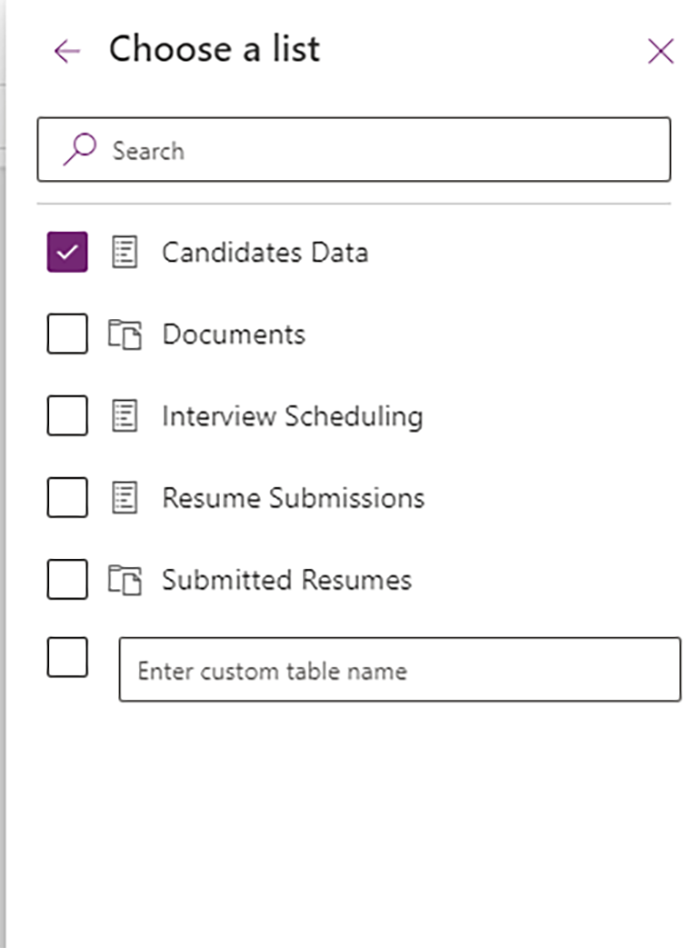
- Provide the URL or select your SharePoint site and select the relevant lists (those you set up with Infowise Ultimate Forms).
- Once connected, you can now use this data within your Power Apps app to display and interact with your SharePoint content.
This step enables Power Apps to pull real-time data from SharePoint, ensuring that your dashboard reflects the latest updates.

Configuring Data Fields in Power Apps
Once Power Apps is connected to your SharePoint lists containing Infowise Ultimate Forms data, the next step is configuring how this data will be displayed and interacted with. This involves setting up forms, adding filters, and configuring sorting options to ensure users can easily navigate the dashboard.
Displaying Data in Forms
Power Apps makes it easy to display data using forms that can be customized to show the most important information. Here’s how you can display Ultimate Forms-managed data in Power Apps:
- Add a Form Control to Your Power App:
- In Power Apps Studio, go to the Insert tab and select Form under Forms.
- Choose whether you want a Display Form (for viewing data) or Edit Form (for updating data).
- Link the Form to Your SharePoint List:
- Once the form is added, set the Data Source of the form to the SharePoint list you connected earlier.
- Power Apps will automatically pull the fields from the SharePoint list and display them in the form.

- Customize Fields:
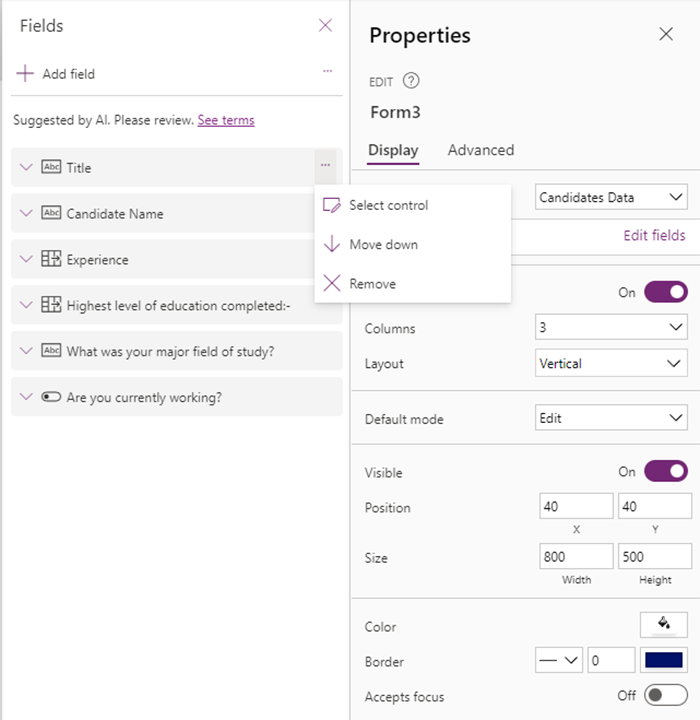
- You may not want to display every field from the list, so customize the form by selecting which fields you want to display. In Form Properties, click on Edit Fields, then add or remove fields as necessary.
- Adjust the order and visibility of fields. For example, if you’re building a dashboard for HR managers, you might want to highlight fields like employee name, department, experience, and status.

Final Thoughts
Integrating Power Apps with Infowise Ultimate Forms data is a powerful way to create real-time, interactive dashboards that are both visually appealing and functional. With this connection in place, you can now build a dynamic dashboard that allows HR managers, business owners, and other stakeholders to make informed decisions using up-to-date data.
In the next post, we’ll focus on designing a user-friendly dashboard in Power Apps, with best practices for creating intuitive interfaces tailored to non-technical users.
