Hi,
The best way to show off your product is of course letting your potential customers try it out. In our case, Ultimate Forms is a Microsoft SharePoint application, so it needs SharePoint to run.
Of course, potential customers can easily install it and we even provide an installation wizard that will completely automate and streamline the process. But for many that would require an approval from the IT department, security clearance and various additional steps that might make the whole process much more cumbersome and lengthy, causing potential customers to bail out.
That's why we also provide an option of a hosted trial. We create a SharePoint site for the potential customer in our own dedicated tenant, give them access, optionally install one of our many solution templates and let them interact with it for 30 days. Once the trial is up, the system also automatically cleans up and removes the site.
The whole process of creating the trial site only takes a few seconds, but there is lot going on behind the scenes! So here I'd like to describe how we did it, to help other developers and vendors out there!
General Design
The main moving parts are the user interface, where the customer fills out their details and tracks the progress in real time, and the backend process, that actually does all the heavy lifting.
Our user interface is just a part of our general website. The signup form collects some basic information from the customer (name, email and optionally, which solution template they would like to install on the new site).
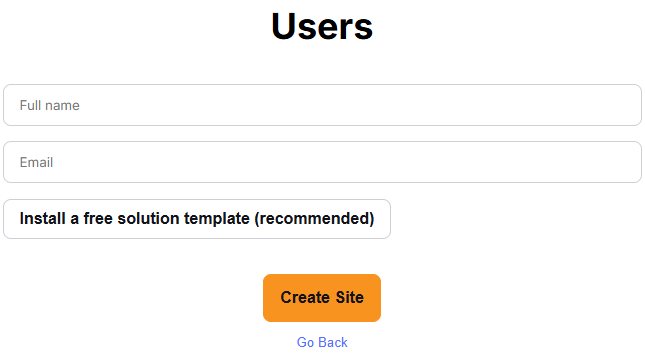
It will then create a new message in the message queue for the backend function and register the process in the tracking database. Once that part is done, it simply polls the database for progress information and displays it to the customer in real time.
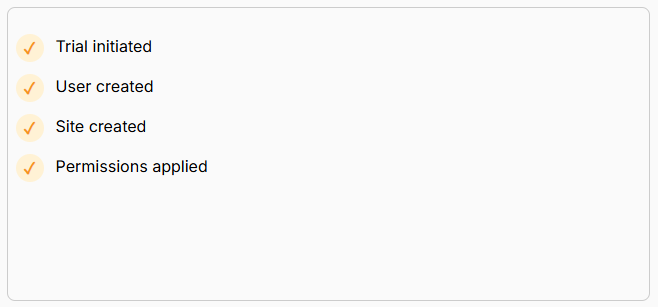
Once the final step is accomplished, users are provided with a site URL and trial user credentials (we also invite the user as a guest account through the usual email address, so the trial user is more of a backup).
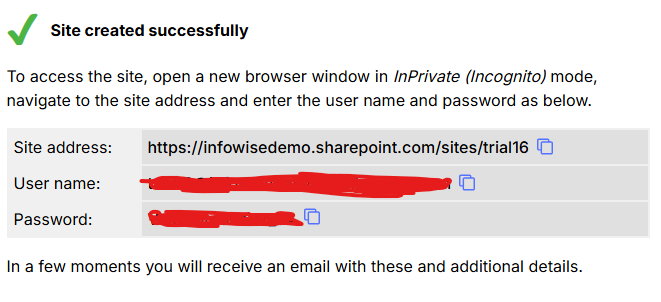
And of course, it looks so easy!
Steps of the process
Well, it's a bit more involved in the backend.
A Microsoft Azure Function app monitors the message queue and springs into action once it detects a new message. It will then perform the following steps:
- Create a list item in a tracking SharePoint list - here we monitor the progress of site creation, store customer details, track site usage and every couple of days send out follow-up emails. We do most of it using our product :). The trial cleanup function also monitors this list and deletes sites with an expired trial.
- Create Entra ID user - create the backup trial user. We send these credentials to the customer to allow access if they are unable to log in with the their usual credentials as a guest.
- Create site - create a new site collection in our dedicated tenant.
- Assign permissions - invite the user to the new site, then add the guest user and the backup trial user to the Owners group of the new site.
- Optionally, install a solution template. It uses our Template Manager internally, the same component that our users normally use to save and apply templates.
- Add "How to get started" web part to the homepage, with simple instructions for novices and a link to enter the app.
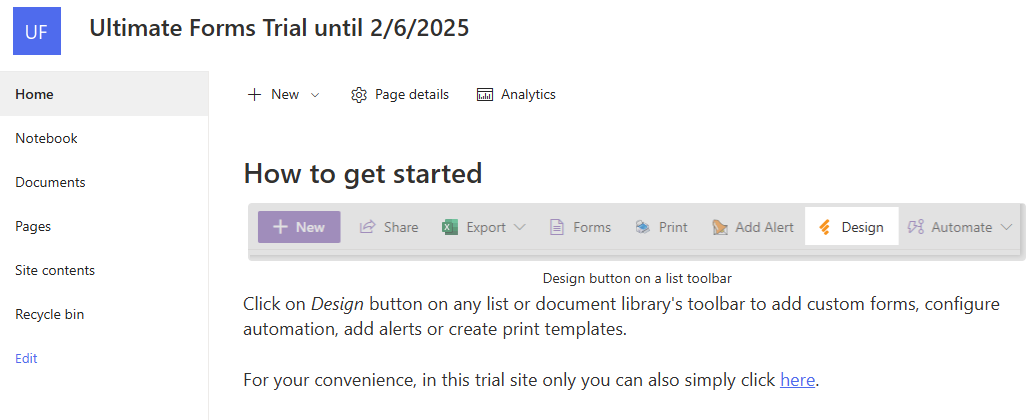
Some of these steps are simple and obvious, but some, such as applying a solution template, are much more complex and outside of the scope of this article. The things I'd like to cover are steps 2 to 4. These could be a bit of a challenge due to sometimes spotty documentation.
Enterprise Application
The first thing you need to create is an enterprise application in your Entra ID. It will allow our function to obtain access tokens to the resources we need to access, such as Entra ID itself and SharePoint (both using traditional and Graph API).
I created a fairly simple application with most settings being default. There are two things that I did change:
- I uploaded a self-signed certificate for authentication purposes. The function will be provided with the same certicate and that how it is going to authenticate itself via OAuth against Entra ID to retrieve access tokens using the enterprise application's client ID. It is more secure than using client secrets and the expiration dates are much farther in the future, simplifying maintenance.
- I specified all the permissions I would need for all the steps of the process.
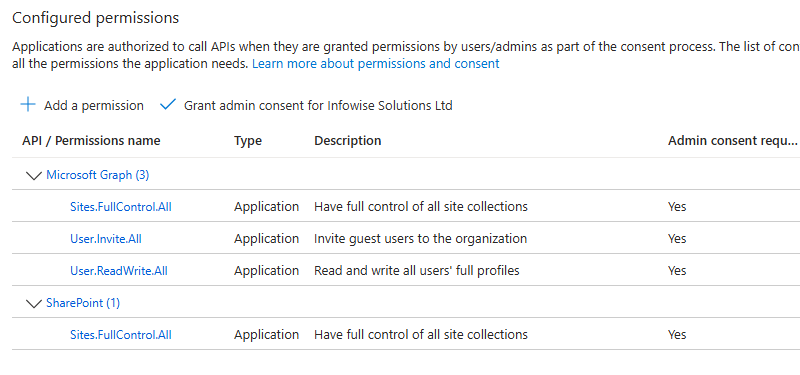
- MS Graph: Site.FullControl.All - most of our code uses CSOM, so we don't really use Graph to interact with SharePoint. But we do need it to register site collection for Sites.Selected permissions that our product itself uses for granular access.
- MS Graph: User.Invite.All - allows us to invite external users as guests.
- MS Graph: User.ReadWrite.All - allows us to create backup trial users in Entra ID.
- SharePoint: Sites.FullControl.All - we use it to create and modify the site.
Function App
We didn't actually create a brand new function app for this, but just added a new function with Message Queue trigger to our existing function app. It is configured to listen to the message queue that the website writes to. I will not go into the configuration details, but just mention that for security purposes I would recommend storing the certificate in the Key Vault and providing access to the vault based on the managed identity of the function app.
Creating Trial User
First, we use the Microsoft.Identity.Client.ConfidentialClientApplicationBuilder class by calling its Create method and passing the client ID of our enterprise app and our certificate from the vault. With the newly generated Builder object we can fetch an access token for accessing the Graph API.
Next, we execute a REST API call to create a new user. We will pass "Trial" as first name and "User <trial ID>" as last name and require that the user changes the password on the first log in. Once the call is executed, a new user is created.
Create Site
We are going to be using a different access token here, as we are using the SharePoint API, not the Graph API. The difference is in the resource parameter. With Graph, it's always https://graph.microsoft.com, whereas with SharePoint it's the URL of the top level site, such as https://demo.sharepoint.com/.
Technically we are creating what used to be called a site collection, Microsoft really confused us all with this one! We use the spsitemanager/create REST API endpoint. We chose the STS#3 web template to create a regular team site. The important part is to set ShareByEmailEnabled property to true to allow inviting guest users. Don't forget to include the access token in the Authorization header as Bearer token, as well as Content-Type: application/json header.
We then register the site for the Sites.Selected access of our product's enterprise application, using Graph API access token and the Sites.Permissions API endpoint.
Inviting External User
We use the Create invitation API to create and send out an invitation to the customer's email. We are setting the inviteRedirectUrl property to the site URL we are creating and also adding a short message to the invitedUserMessageInfo property. Once the invitation is sent out, the customer receives an email with a link to access the site. We can use the same Graph API access token we already retrieved.
Apply Permissions
Here we are adding both the external and the backup users to the Owners group of the site. We are using a slightly different approach for each. For the external user, we are going to be using the REST API, and for the backup users, it's easier to use CSOM.
First, we retrieve the ID of the Owners group via CSOM. Then we execute a POST request to "<site URL>/_api/web/sitegroups/GetById({<group ID>})/users", passing the following JSON object: {"LoginName": "i:0#.f|membership|<customer email>"}. Don't forget to include the headers!
With the backup users, we simply retrieve the Principal using Web.SiteUsers.Add call, passing UserCreationInformation object. Then add that principal to Web.AssociatedOwnerGroup collection.
And that is basically it. Add some more error handling and retries (because things can and will go wrong), and you're good to go. You just automated the whole process of online trials for your SharePoint product!
