
Introduction
When you create an item in a SharePoint list, the form will normally redirect you back to the list itself. But there are cases where you want the form to redirect the users someplace else. For example, you might want to do the following upon form submission:
- Open a new form to create another item
- Continue editing the item just created
- Or even some custom page.
A common requirement is to redirect to a Thank You page. This is a specially designed page that thanks the user for their submission. It can also provide some additional instructions.
That is especially true in cases where you don't need the user to see the actual list of items. For example, some users may not have View access to the SharePoint list. They can only create new items.
Many of our customers, who use modern forms created in Ultimate Forms, requested a custom page redirect option. Here you are specifying any URL to the form and the form will take users there after submission.
Of course, you can create a thank you page as a custom page. You can accomplish that outside Ultimate Forms. Then, you would set the page's URL as the redirect target. The form will take you to that SharePoint page after submit.
Unfortunately, it's not always easy for everyone. In some cases there is no technical way of doing it. The best example would be External forms. Here you don't even allow external public form users to view internal web part pages.
We needed to come up with a better solution that offers a simple addition for our modern forms. It should not go beyond their limits.
Thank You Pages
The Thank You pages feature solves the issue directly from our Form Designer. You can define your own Thank You page as part of the actual SharePoint form, preserving its look & feel.
You also have the full set of features of modern forms at your disposal, such as buttons, rules, column values, etc. You can create great looking, dynamic Thank You pages in literally minutes!
Sample Walkthrough
I will now guide you through the process. I am using our Bug Tracker pre-configured solution. You can install this solution from the Solution Gallery directly in your Ultimate Forms app.
- Select the list you want to add the Thank You page to.
- On the toolbar, click on Design to enter Ultimate Forms.
- Enter Form Designer for the list. You will see the option to switch to Thank You page design mode in the bottom right corner.

- A blank canvas is now showing instead of the form. This is where we are going to be designing our Thank You page.
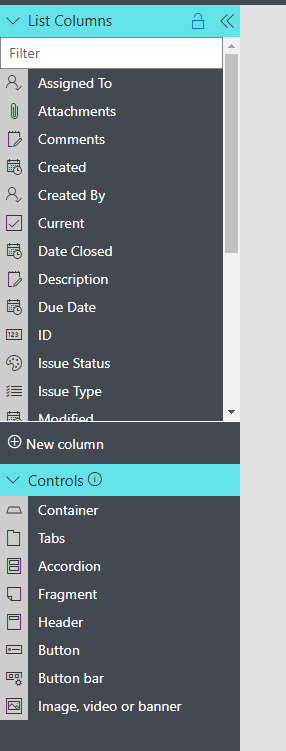
- Take a look on the column and control pane on the lefthand side. As you can see, most columns and controls are available. You can drag and drop them onto the design canvas of the Thank You page.
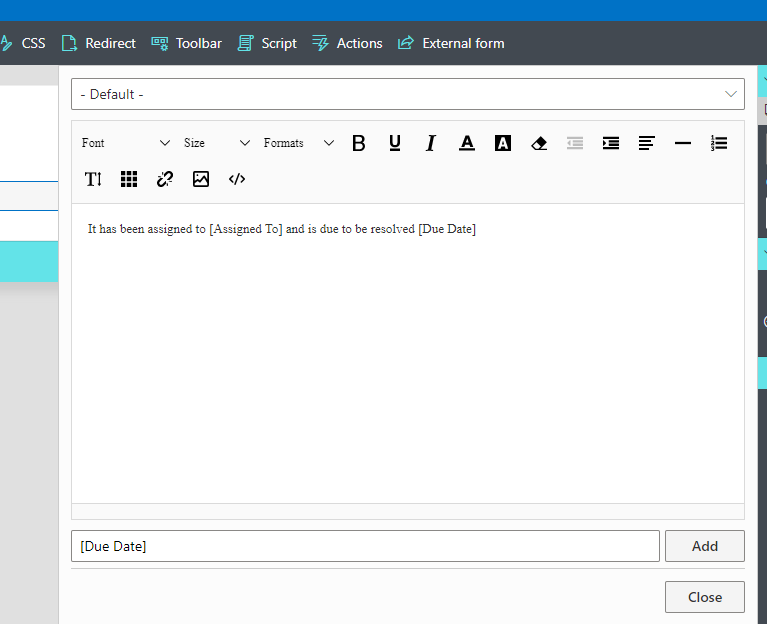
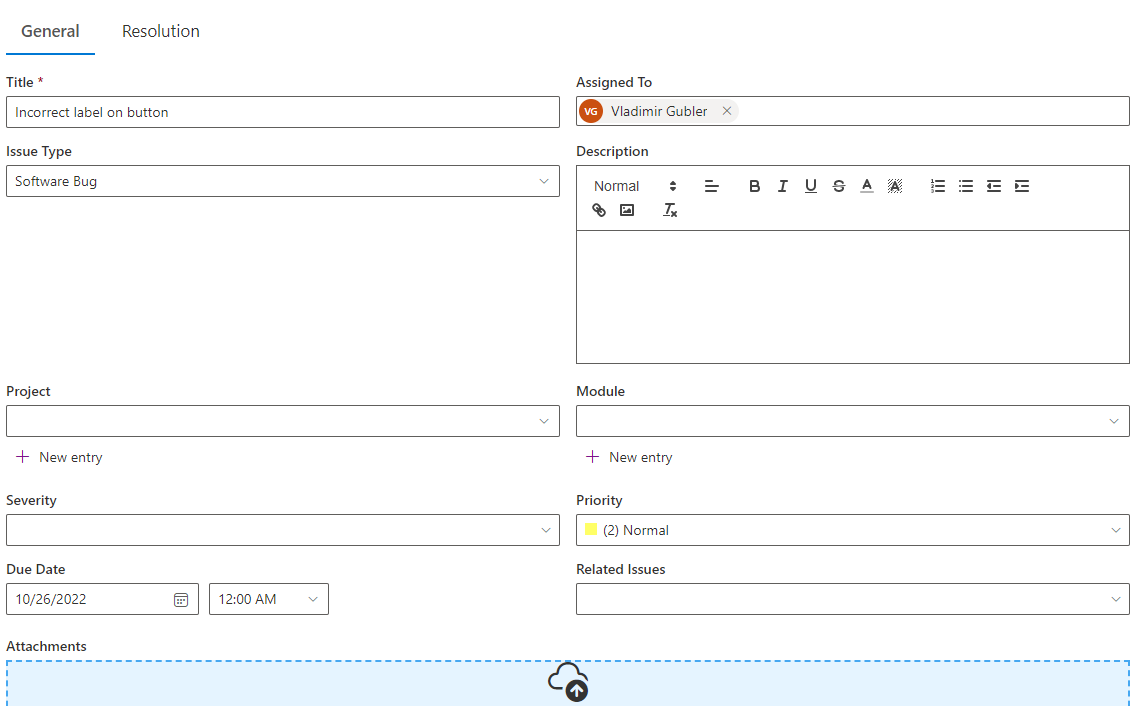
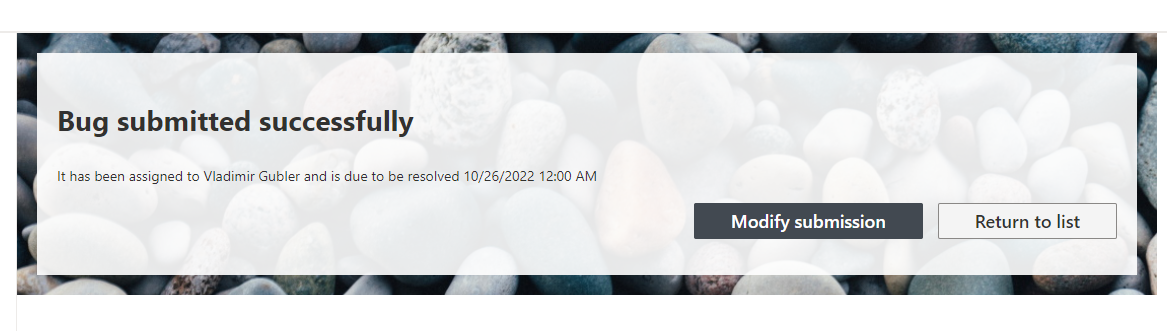
- My Thank You page will contain two controls, Header and Fragment. In the fragment i will be using column values from the form. That will make it appear individualized and dynamic.
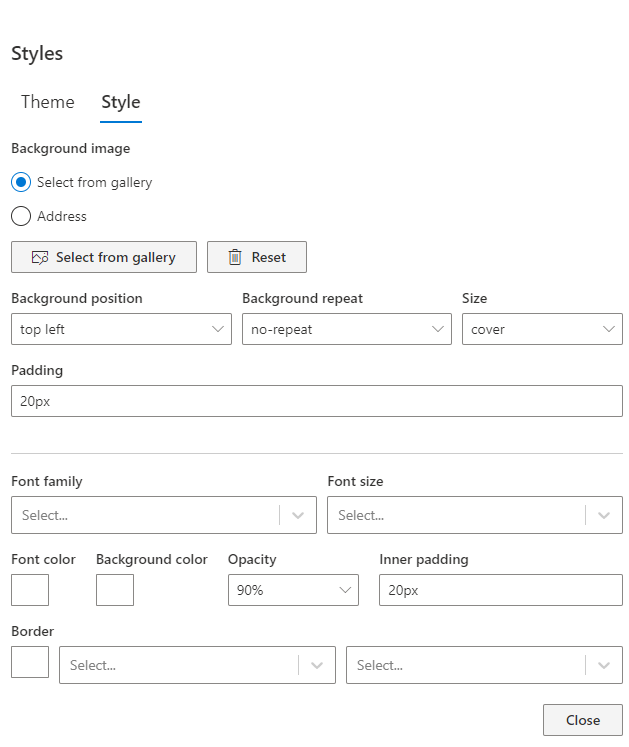
- Next, I would like to apply some styling to my page. Using Styles toolbar button I opened the Styles pane. There I added background image from the gallery and content section's inner padding. Feel free to experiment with all the styling options we offer.
- I also added a Button Bar, renaming Edit button to "Modify submission" and Close button to "Return to list". You can also see my header in the same screenshot below. My Thank You page design is now complete.

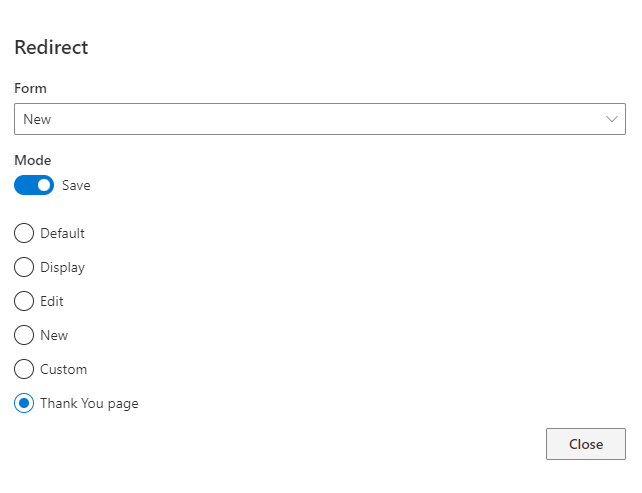
- Now it's time to allow the form to use our new Thank You page. Click on Redirects in the toolbar to enter the redirection settings. I modified the Redirect for New form to point to the new Thank You page.
- The next step is optional. I might also want to make the form publicly accessible. Customers outside the organization will be able to fill it out without signing in. To achieve that, I enabled External form functionality.
- Using external forms, anyone can submit information into the SharePoint list from outside your organization. They do not need to sign in. External forms make sure that this access is completely safe and secure.
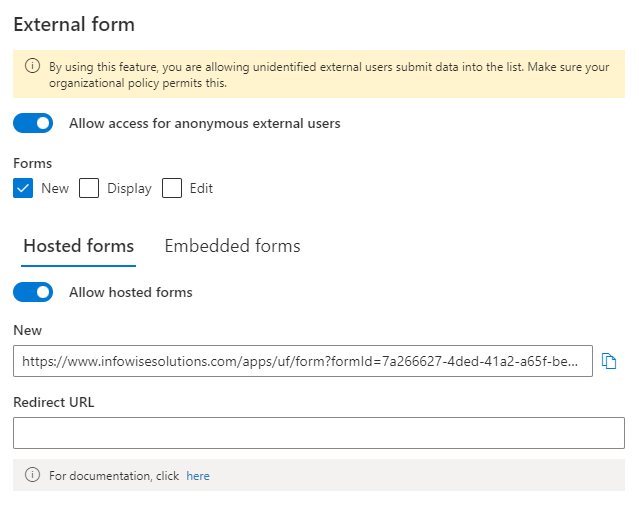
- Here I allowed external users access to New form. You can also copy the form URL from here to provide it to the external users. Note that I didn't configure Redirect URL, external forms use Thank You pages automatically.
- Publish the form and we are ready to try it out.
- I'm filling out the form.
- Once I save it, I am shown the new Thank You page.
Conclusion
As you can see, Thank You pages are extremely easy to configure and deploy. Yet they provide another powerful tool for creating engaging, dynamic forms!
I suggest you always include column values within the Thank You page. This way, you create a personalized experience for the user. It also lets them double-check their submission.