Efficient resource scheduling is critical for ensuring that projects run smoothly and team members remain productive. However, managing schedules manually can lead to double bookings, missed deadlines, and unnecessary conflicts. By leveraging SharePoint and Infowise Ultimate Forms, you can streamline resource allocation with automated workflows, customized scheduling forms, and conflict-resolution tools—all without writing code.
In this guide, you’ll learn how to create a SharePoint-based resource scheduling system to automate bookings, reduce conflicts, and improve overall productivity.
Step 1: Setting Up the Resource Scheduling System
Create a Resource Scheduling List
1- Create a New List in SharePoint:
- Log into your SharePoint site and navigate to Site Contents.
- Click New > List, and name it Resource Scheduling. This list will serve as the central repository for all resource booking entries.
2- Customize the List with Infowise Ultimate Forms:
- Open the Resource Scheduling list and click on the Design button in the top menu
3- Add Relevant Fields:
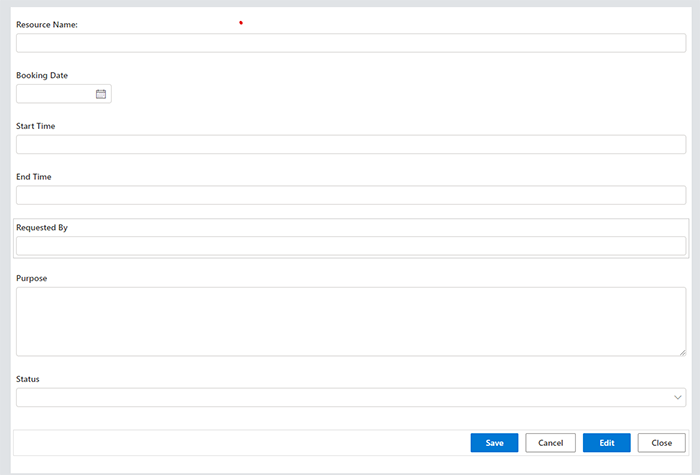
- Resource Name: To specify the resource being booked.
- Booking Date: Date field to record the booking date.
- Start Time: Time field for the booking start time.
- End Time: Time field for the booking end time.
- Requested By: User picker field to identify the person making the request.
- Purpose: Multiline text field to describe the purpose of the booking.
- Status: Dropdown field with options like Pending, Approved, and Denied.
- Use the Form Designer to add fields that capture essential information for resource scheduling, such as:

Step 2: Automating Booking Approvals Using Infowise Actions
Efficient resource scheduling relies on automated workflows for approval and status updates. With Infowise Actions, you can create workflows to update statuses, notify requesters, and maintain an action history for transparency.
Configuring Approval and Denial Workflows
1- Access Actions in Infowise Ultimate Forms:
Navigate to Actions under the Business Logic menu.
2- Create an Approval Action:
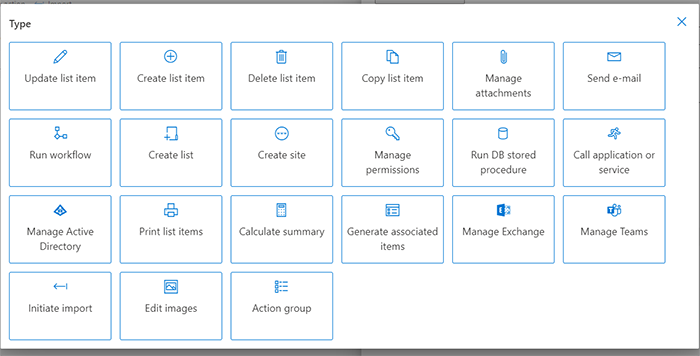
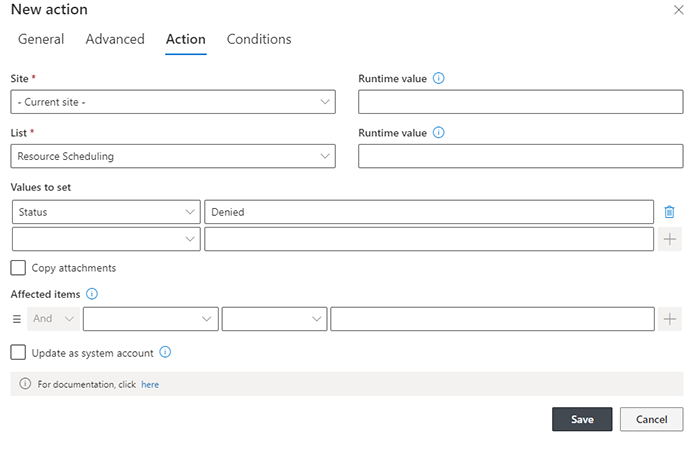
- Action Type: Update List Item.
- Values to Set: Update the Status field to "Approved".
- Notification: Add a Send Email action to notify the requester of the approval. Include dynamic placeholders like Resource Name, Booking Date, and Time Slot in the email body.
- Define an action to approve booking requests, update the status, and notify the requester.

3- Create a Denial Action:
- Action Type: Update List Item.
- Values to Set: Update the Status field to "Denied".
- Notification: Add a Send Email action to inform the requester of the denial, including a Reason for Denial field.
- Define an action to handle denied bookings.

4-Trigger Actions via Ribbon or Context Menu:
Execute approval or denial actions via the Run Action button in the List Ribbon or the context menu for each item.

5- Enable Track History for Approval and Denial Actions:
- Action Name (e.g., Approve Booking).
- User: Who executed the action.
- Time: When the action was triggered.
- Outcome: The result of the action (e.g., status updated to Approved or Denied).
- Open the Action Settings for both actions and enable the Track History option.
- This feature logs details of each action, including:
6- Reviewing Action History
- Access Action History:
- Go to Design > Actions, and click Action History to view the log of all actions executed on the list items.
- Filter Action Logs:
- Filter by User, Date, or Action Name to review specific events, ensuring full traceability.
- For example, check which user approved or denied a booking and when.
Step 3: Add Validation to Check Input Fields
Steps to Set Up Validation:
- Open the Validation Tab:
- In the Form Designer, go to the Validation settings for the relevant fields, such as Start Time, End Time, and Resource Name.
- Set Validation Rules for Basic Input:
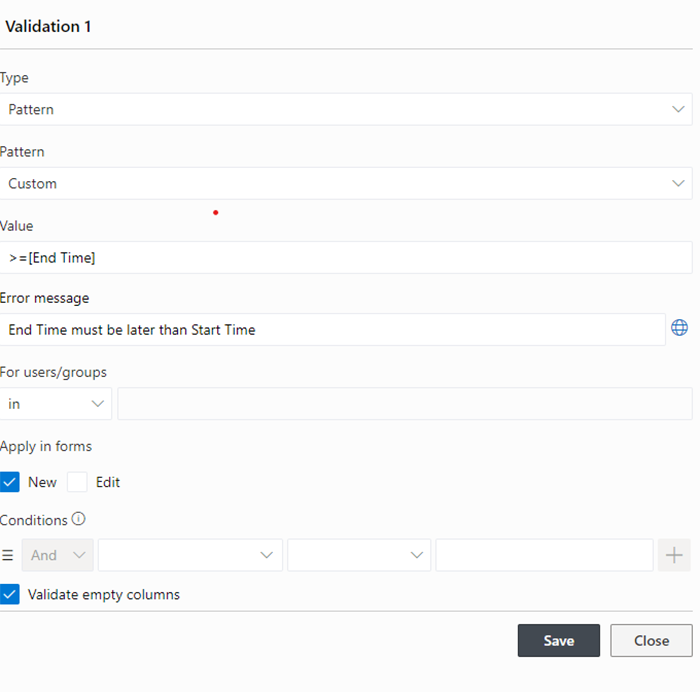
- Example: Validate that the End Time is always later than the Start Time:
- Field: Select Start Time.
- Condition: >= or <.
- Value: Reference End Time.
- Type: Pattern
- Pattern: Custom
- Conditions:
- Error Message: “End Time must be later than Start Time.”
- Example: Validate that the End Time is always later than the Start Time:
- Use Validation to ensure logical relationships between fields:

3- Test the Setup:
- Save the settings and verify the validation on the form. Ensure the error messages and workflow actions are functioning as intended.
Conclusion
Streamlining resource scheduling with SharePoint and Infowise Ultimate Forms helps reduce conflicts, automate workflows, and improve efficiency across your organization. By setting up custom forms, automating approvals, and tracking resource usage, you can ensure smoother operations and better allocation of your team’s time and assets.
