Introduction
Customer feedback is vital for improving services, understanding customer needs, and driving business growth. However, collecting and managing feedback can be cumbersome without an efficient system. With SharePoint and Infowise Ultimate Forms, you can create a seamless workflow for gathering and analyzing customer feedback.
In this guide, you’ll learn how to set up a custom feedback form in SharePoint, automate notifications for incoming feedback, and organize sentiment analysis using Infowise tools. The result? A streamlined process to ensure your customers’ voices are heard and acted upon.
Step 1: Setting Up the Customer Feedback Form in SharePoint
Creating the Feedback List
1- Create a New List in SharePoint:
- Log into your SharePoint site and go to Site Contents.
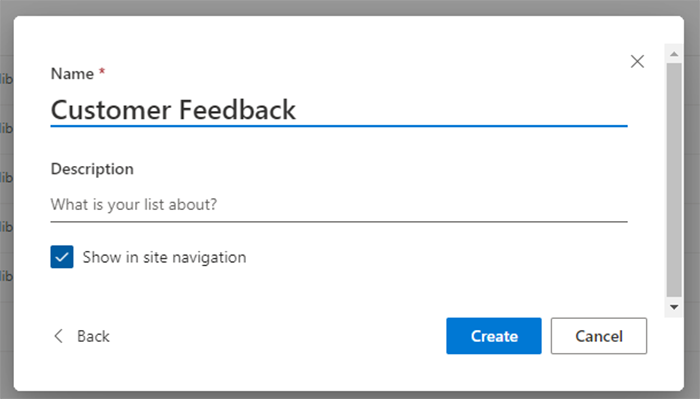
- Click New > List, and name the list Customer Feedback.
- This list will serve as the repository for all customer feedback entries.

2- Open the Form Designer:
- Navigate to the Customer Feedback list and click on the Design button in the top bar.
- This opens the Infowise Ultimate Forms interface for customizing.
Accessing Prebuilt Forms via the Solution Catalog
Use the Solution Catalog in Infowise Ultimate Forms to access prebuilt feedback form templates.
1- Access the Solution Catalog:
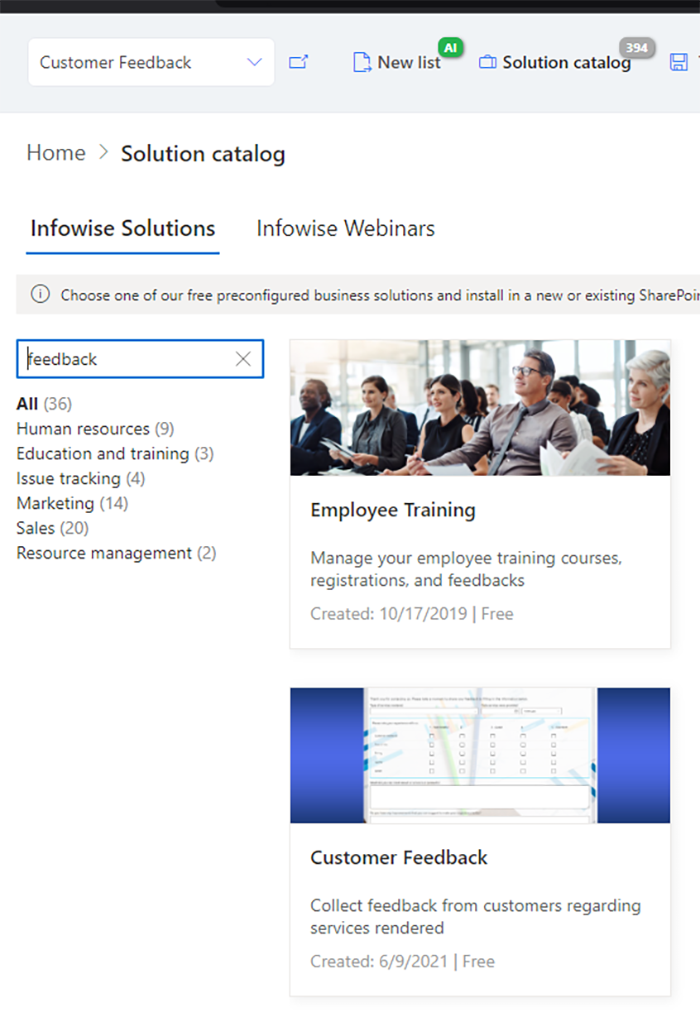
- In the Infowise Ultimate Forms interface, locate the Solution Catalog in the top menu. This catalog provides prebuilt templates for common business processes, including feedback collection.
2- Search for Feedback Form Templates:
- Use the search bar in the catalog to find a prebuilt form for Customer Feedback.

3- Choose Installation Option:
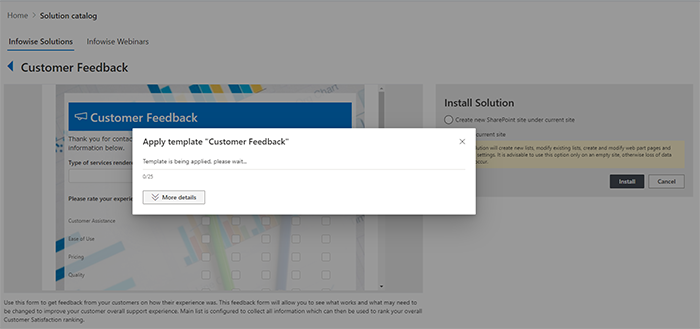
- Once you’ve selected a template, choose one of the following installation options:
-
-
- Install to the Current Site: Add the form directly to the SharePoint list you’re working on.
- Create a New SharePoint Site Under the Current Site: Use this option if the feedback process requires isolation or complexity.
-
- Tip: Installing the form to the current site is quicker and ideal for single-team use cases.

4- Customize the Installed Form:
- After installation, open the Form Designer to modify fields, layout, and validation rules to fit your business requirements.
Step 2: Automating Notifications Using Infowise Alerts
Automating notifications ensures that feedback is quickly shared with the relevant teams for review and action.
Setting Up Feedback Notifications
1- Access Alerts in Design:
- In your Customer Feedback list, click on Design and select Alerts under Business Logic.
2- Create an Alert for New Feedback:
- Configure an alert to trigger when a new feedback item is added.
- Customize the email notification to include dynamic fields such as Customer Name, Feedback Type, and a direct link to the SharePoint item.

3- Set Up Notifications by Feedback Type:
-
- Use conditions to route feedback to specific teams based on the Feedback Type:
- Complaints go to the Customer Support team.
- Suggestions go to the Product Team.
- Queries go to Sales or Operations.
- Use conditions to route feedback to specific teams based on the Feedback Type:
Step 3: Routing Feedback Using Actions
Categorizing customer feedback into actionable insights helps ensure that positive feedback is celebrated while negative feedback is addressed promptly. Using Actions, you can automate the routing of feedback to the appropriate teams based on the sentiment selected by users.
Setting Up Sentiment Classification and Routing
1- Add a Sentiment Field to the Form:
-
- In the Form Designer, create a dropdown field named Sentiment with predefined options such as:
- Positive
- Neutral
- Negative

- In the Form Designer, create a dropdown field named Sentiment with predefined options such as:
2- Manually Select Sentiment During Review:
- The person reviewing the feedback selects the sentiment manually based on the feedback content.
3- Automate Feedback Routing:
-
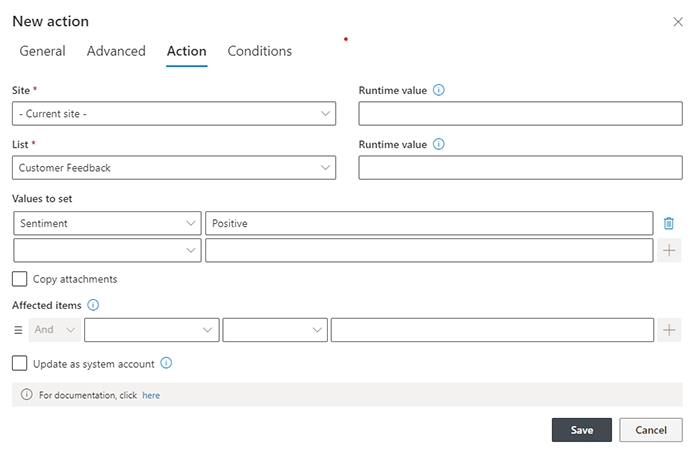
- Navigate to Actions in Infowise under Business Logic.
- Create actions for each sentiment category:
- Positive Feedback: Configure an action to notify the Marketing Team of potential testimonials or case studies.
- Negative Feedback: Set up an escalation alert to the Customer Service Team for immediate resolution.
- Neutral Feedback: Route to the Product Team for insights into potential improvements.
Resources
Before we wrap up, let’s look at a few key resources Infowise provides to help you get the most out of Ultimate Forms. These tools are designed to support every level of user, making it easy to customize and automate workflows in SharePoint.
Templates
Infowise provides free templates to help you quickly launch solutions for common workflows like employee onboarding and approvals. These templates integrate smoothly with SharePoint, so you can start building effective processes immediately. Explore available templates here: Infowise Templates.
Tutorials
Infowise’s tutorials cover everything from setup to advanced customization, making it easy for users at all levels to leverage Ultimate Forms fully. View the full tutorial library here: Infowise Tutorials.
Webinars
Join Infowise’s webinars to learn directly from experts about real-world use cases, including automation for HR and custom workflows. Watch live or on-demand here: Infowise Webinars.
Training
Infowise offers training resources to equip your team with best practices and essential skills. Choose from guided courses and self-paced options to fit your schedule. Learn more here: Infowise Training. These resources provide valuable support to ensure you can easily set up, customize, and optimize your SharePoint solutions.
Conclusion
With Infowise Ultimate Forms and SharePoint, collecting, organizing, and acting on customer feedback becomes seamless. From automated notifications to sentiment tracking and reporting, this workflow helps your team focus on what matters most—delivering excellent customer experiences.
