Managing physical and digital assets effectively is crucial for any organization to minimize waste, optimize usage, and ensure smooth operations. Yet, manual tracking often leads to inefficiencies and errors. By leveraging SharePoint and Infowise Ultimate Forms (UF), you can build a powerful, no-code solution to track, monitor, and optimize asset usage—all in just a few clicks.
In this guide, we’ll walk you through setting up a SharePoint-based asset management system with UF, helping you streamline asset tracking and improve overall productivity.
_______________________________________________________________________________________
Step 1: Setting Up the Asset Management System
- Create a SharePoint Asset List
- Log in to your SharePoint site and navigate to Site Contents.
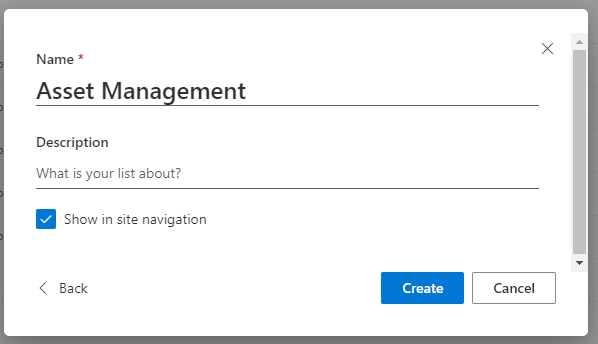
- Click New > List and name it Asset Management.
- This list will serve as the central repository for all your physical and digital assets.

- Customize the List with Infowise Ultimate Forms
- Open the newly created list and click the Design button in the top menu.
- Use UF's tools to design forms and workflows tailored to your asset management needs.
- Add Asset Tracking Fields
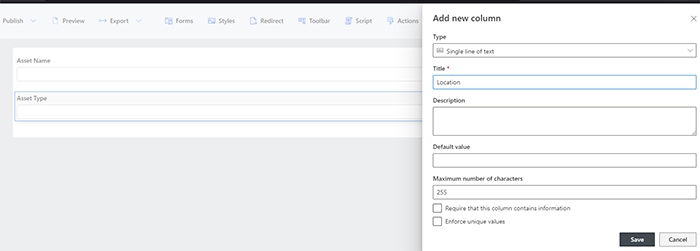
Use the Form Designer to include essential fields such as:
- Asset Name: Title of the asset (e.g., Laptop, Software License).
- Asset Type: Dropdown (e.g., Physical, Digital).
- Location: Text or Lookup field for physical assets.
- Status: Dropdown with options like Available, In Use, or Retired.
- Assigned To: User Picker to assign assets to team members.
- Purchase Date: Date picker to track when the asset was acquired.
- Warranty Expiry: Date picker for physical assets with warranties.
- Notes: Multiline text for additional details.

_______________________________________________________________________________________
Step 2: Automating Asset Status Updates with Infowise Actions
- Create Automated Workflows
Use UF’s Actions to keep asset statuses up to date:
- Update an asset’s status to In Use when it’s assigned to a user.
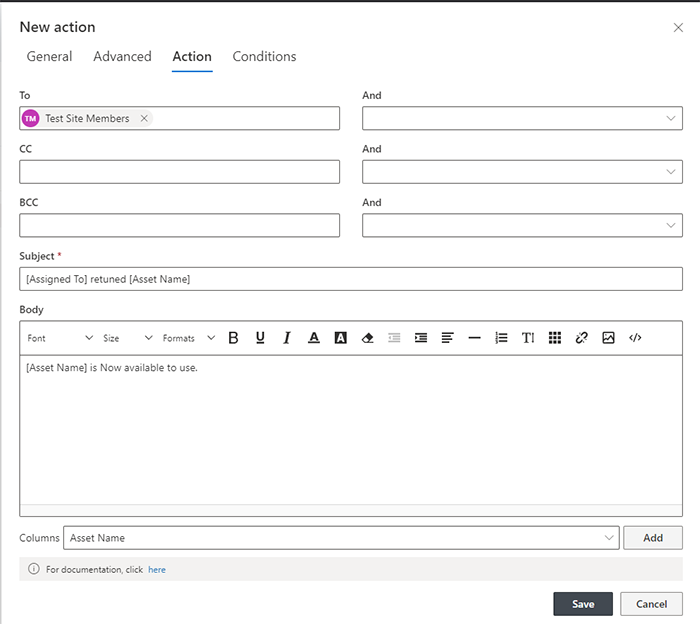
- Automatically send a reminder email for upcoming warranty expirations.
- How to Set It Up
- Navigate to Business Logic > Actions in the UF interface.
- Create an Update List Item action to modify the Status field based on conditions.
- Use the Send Email action to notify team members about asset assignments or warranty deadlines.

- Enable History Tracking (Optional)
Track all asset updates for full transparency:
- Open Action Settings and enable the Track History option.
- This logs who performed the action, when it occurred, and the outcome.
_______________________________________________________________________________________
Step 3: Setting Up Validation to Prevent Errors
Validation Rules
Use UF’s validation features to ensure correct data entry:
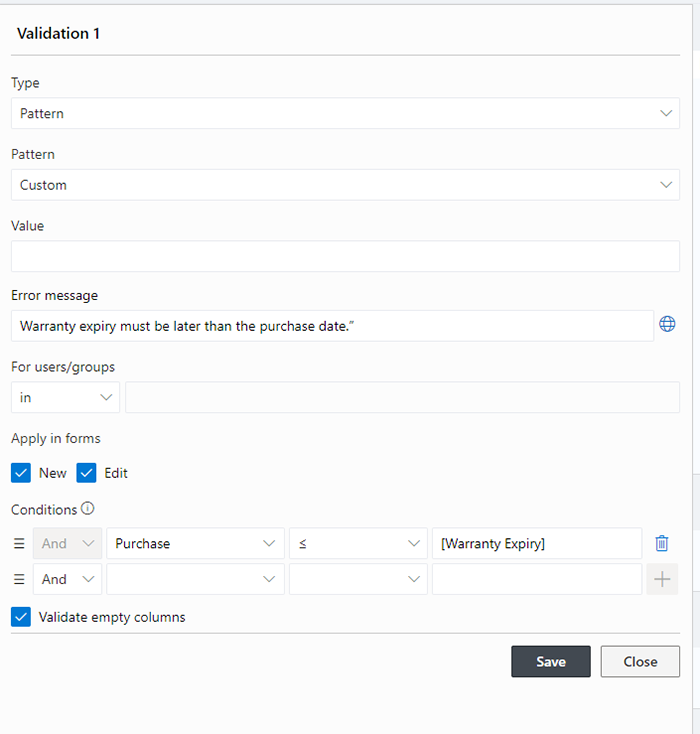
- Ensure the Warranty Expiry date is always later than the Purchase Date.
- Field: Purchase Date
- Condition: <=
- Value: Warranty Expiry
- Error Message: “Warranty expiry must be later than the purchase date.”

_______________________________________________________________________________________
Step 4: Organize the Form with Tabs for Easy Navigation
By adding Tabs, you can categorize form fields into sections, making the form cleaner and easier to fill out for users. This is particularly useful for large forms like Asset Management, where different types of information (e.g., asset details, status, history) need to be captured.
Steps to Set Up Tabs:
- Open the Form Designer:
- Navigate to your Asset Management list and open the Form Designer.
- Add a Tabs Control:
- From the Controls menu on the left, drag and drop the Tabs control onto the form.
- By default, the Tabs control will create two tabs. You can rename and add more tabs as needed.
- Customize the Tabs:
- Rename the tabs to reflect the sections of your form:
- Tab 1: Asset Details
- Tab 2: Status & History
- (Optional) Tab 3: Additional Information
- To rename a tab, click its header and edit the text.
- Move Fields into Tabs:
- Drag and drop fields into the appropriate tabs:
- Asset Details tab:
- Asset Name
- Asset Type
- Created By
- Created Date
- Status & History tab:
- Asset Status
- Modified By
- Modified Date
- Additional Information tab:
- Attachments
- Save and Test:
-
- Save your changes in the Form Designer.
- Test the form by opening a new item in the Asset Management list. The form should now display the fields under the appropriate tabs.

Benefits of Using Tabs:
- Improves the usability of the form by decluttering the layout.
- Makes it easier for users to focus on relevant sections of the form.
- Enhances the overall user experience, especially for forms with many fields.
_______________________________________________________________________________________
Resources
Before we wrap up, let’s look at a few key resources Infowise provides to help you get the most out of Ultimate Forms. These tools are designed to support every level of user, making it easy to customize and automate workflows in SharePoint.
Templates
Infowise provides free templates to help you quickly launch solutions for common workflows like employee onboarding and approvals. These templates integrate smoothly with SharePoint, so you can start building effective processes right away. Explore available templates here: Infowise Templates.
Tutorials
Infowise’s tutorials cover everything from setup to advanced customization, making it easy for users at all levels to leverage Ultimate Forms fully. View the full tutorial library here: Infowise Tutorials.
Webinars
Join Infowise’s webinars to learn directly from experts about real-world use cases, including automation for HR and custom workflows. Watch live or on-demand here: Infowise Webinars.
Training
Infowise offers training resources to equip your team with best practices and essential skills. Choose from guided courses and self-paced options to fit your schedule. Learn more here: Infowise Training. These resources provide valuable support to ensure you can easily set up, customize, and optimize your SharePoint solutions.
_______________________________________________________________________________________________
Conclusion
Streamlining asset management with SharePoint and Infowise Ultimate Forms provides a powerful, no-code solution for tracking, monitoring, and optimizing both physical and digital assets. By customizing forms, automating workflows, and organizing data with features like tabs for better navigation, businesses can achieve a more efficient, transparent, and user-friendly asset management process. With the ability to easily update asset details, manage statuses, and capture history, this approach enhances productivity and ensures that resources are tracked and utilized effectively.
Start building your asset management solution today and experience the benefits of a smarter, more streamlined system!
