
Managing expense reports efficiently is critical for any business, but many non-developers find it daunting to set up custom workflows and forms. Luckily, Infowise Ultimate Forms offers a range of prebuilt SharePoint forms that can be easily customized to suit any organization’s needs without the need for coding.
In this guide, we'll show you how to use, customize, and automate prebuilt SharePoint forms for expense reports. This step-by-step tutorial ensures that even first-time users can set up an efficient system for managing expense reports with ease.
Step 1: Creating a SharePoint List and Accessing Prebuilt Forms
Before you can start customizing expense reports, the first step is to create a SharePoint list and access the Solution Catalog in the Infowise Ultimate Forms app. This is where you’ll find the prebuilt forms that can be customized for your expense reporting needs.
Steps to Create a SharePoint List:
- Log into your SharePoint site where you plan to manage your expense reports.
- Navigate to the Site Contents and select New > List from the top bar to create a new SharePoint list.
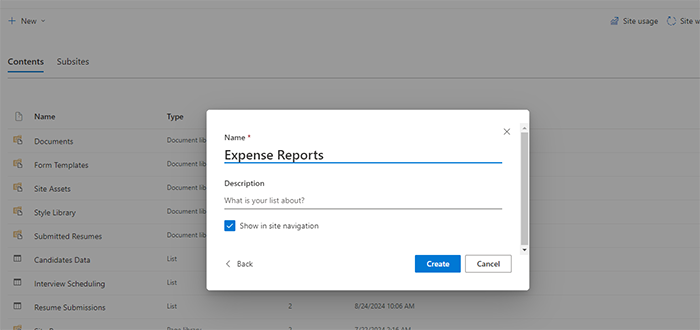
- Ensure Infowise Ultimate Forms is installed in your SharePoint environment. Once installed, you’ll see an option for Design in the top bar after creating the list.
- Click on the Design Button: This will open the Infowise Ultimate Forms customization interface for the list you just created.
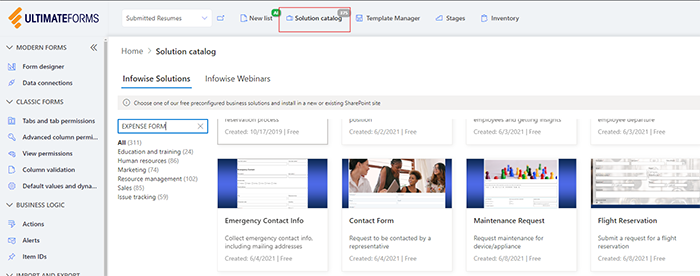
Accessing Prebuilt Forms via the Solution Catalog:
- In the Infowise Ultimate Forms interface, look at the top bar and locate the Solution Catalog option. This catalog provides access to various prebuilt forms, including templates for expense reports.
- Click on Solution Catalog and use the search bar to look for prebuilt forms related to Expense Reports. Once found, you can select the template that best fits your business needs.
- Choose Installation Option: When you select the form, you’ll be presented with two options for installation:
- Install to the Current Site: This installs the form directly to the current SharePoint site where you are working (this is the option we’ll use).
- Create a New SharePoint Site Under Current Site: If you need to manage a more complex or isolated process, you can create a new sub-site under the current site and install the form there.
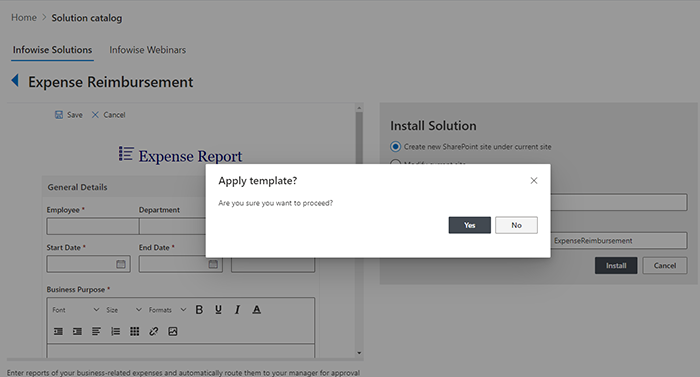
- Tip: If you’re new to SharePoint, it’s generally easier to install the form to the current site, especially if you’re managing expense reports for the same team or department.
- Once the form is installed, you can proceed to customize it according to your business needs.
- Tip: If you don’t see the Design button, make sure that Infowise Ultimate Forms is properly installed and activated for your tenant.
Step 2: Customizing Your Expense Report Form
Now that you've Installed the prebuilt form, it's time to customize it for your specific business needs. You can easily tweak the form fields, layout, and validation rules using the Form Designer in Infowise Ultimate Forms.
- Open the Form Designer
- Drag and Drop Fields: Modify your form by dragging fields like "Expense Category," "Date," "Amount," and "Receipt Attachment" into the form layout. You can also add a "Manager Approval" section.
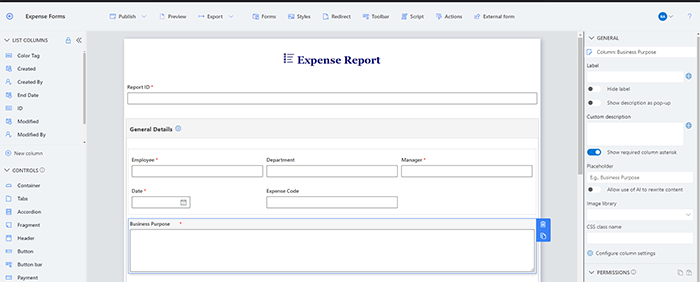
- Set Default Values and Validation Rules:
- Set default values for fields like “Date” to today’s date.
- Add validation to ensure fields like "Amount" cannot be left empty or that attachments are required for expenses over a certain limit.
- Create Tabs for a Cleaner Layout: You can divide the form into sections by adding tabs, like General Info, Expense Details, and Approval. This makes the form easier to navigate.
Step 3: Automating Approvals and Notifications
Automation is key to reducing manual workload, and Infowise Ultimate Forms provides powerful tools for this. You can set up automatic notifications and approval workflows for the expense reports.
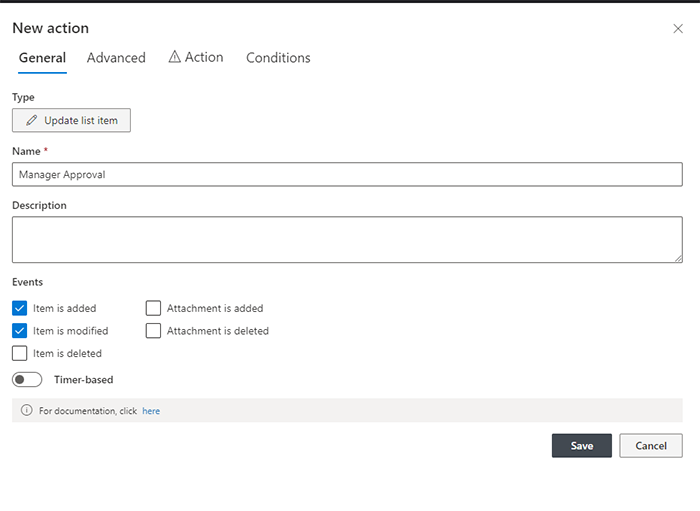
- Go to the Actions section under Ultimate Forms.
- Set up an action for Manager Approval:
- When an expense report is submitted, trigger an automatic email to the relevant manager.
- Automate Alerts:
Create a New Action for Amount Threshold Alerts:
- In the Actions panel, click on New Action to create an alert for when an expense report exceeds a predefined amount (e.g., $1,000).
- Name the action (e.g., High-Value Expense Alert).
Set Conditions:
- In the Conditions section, configure the rule:
- Set it to trigger when the Amount field is greater than your specified threshold (e.g., Amount > 1000).

Step 4: Finalizing and Testing the Expense Report Form
Before deploying the form to your team, it's essential to test its functionality and ensure everything works as expected.
- Preview the Form: Use the Preview option in Infowise Ultimate Forms to see how the form will look to end users.
- Submit a Test Report: Fill out the form with sample data to test the submission, approval, and notification workflows.
- Review Submission Process: Ensure that the form flows smoothly from submission to approval and that documents are stored correctly.
Once you're satisfied with the form, publish it for your team to start using!
Conclusion
With Infowise Ultimate Forms’s prebuilt form capabilities, managing expense reports has never been easier. This guide has walked you through the process of customizing and automating expense report workflows—ensuring you can streamline approvals, document storage, and notifications with minimal effort.
For businesses looking to enhance their SharePoint capabilities without coding, Infowise Ultimate Forms is the perfect solution.