Introduction
When we enter information into our SharePoint sites, we often have a requirement that certain actions have to take place when this information is entered. We might need to set specific permissions on a document based on its properties. We might need to update our ERP application or create a new site for a project. SharePoint contains a workflow infrastructure and we can also add custom event receivers to our lists, but in both cases we are talking about costly development, with many workhours (and money) spent on requirement analysis, coding and testing, not to mention deployment in multiple environments. And all we wanted to do was a simple one-step task!
Thankfully, you can now leverage the power of Infowise Ultimate Forms: Actions to your advantage. Using one of our 21(!) possible action types, you can perform a multitude of actions within SharePoint sites and in any external application. And most importantly - there is no coding involved, just some easy settings from within the familiar List Settings page.
Example Use Case:
Let me show you an example to demonstrate the power, versatility and the ease of use of Ultimate Forms: Actions. In our system, we enter a new project name to the list of projects. The same second the following actions take place automatically:
- Task is created for a reviewer with due date in 30 days.
- Specific permissions are set for that task.
- The new project is registered in our LOB (line-of-business) application using a stored procedure call (or you can use web services as well).
- A new site from a preset template is created for the project.
- A task is created within the new site.
- The projects list entry is updated with the link to the new site.
- You receive an email saying that your tasks have completed successfully.
Getting Started
Now let's see how it's done:
Step 1: Create the Necessary Lists and Columns
- Сreate a Project Center site, just create a Blank site.
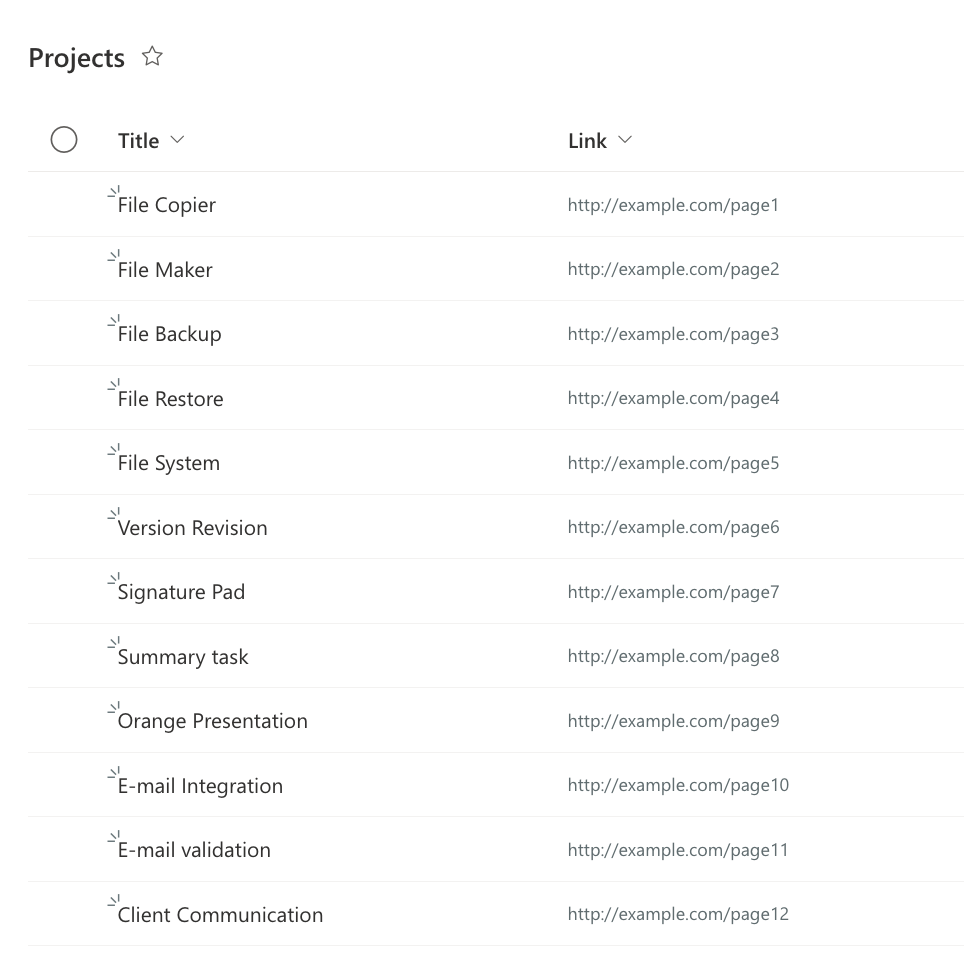
- Create a list of Projects, based on a Custom list template.
- Create a Review Tasks list based on Tasks list template. Create a lookup column to
- the list of Projects called Project.
- Add Hyperlink column to hold links to project sites.
Step 2: Create Actions
You can now start creating actions.
- Let's create an action for creating a review task in our Tasks list.
- Open our Task list.
- Open Design -> Actions -> Add new action.
- Select Create List Item action type.
- Enter a user-friendly name, such as Create review task.
- Enter a description, description are intended to give some extra info to your users regarding the task about to be performed.
- You do not need to enter the Advanced Settings tab now, but you can use it to set some advanced properties of tasks, such as making them hidden from users, allowing multiple execution or allowing tasks to run with high privileges.
- Select Item is added and deselect Item is modified, so that our task only runs when the project is created, not when it's updated.
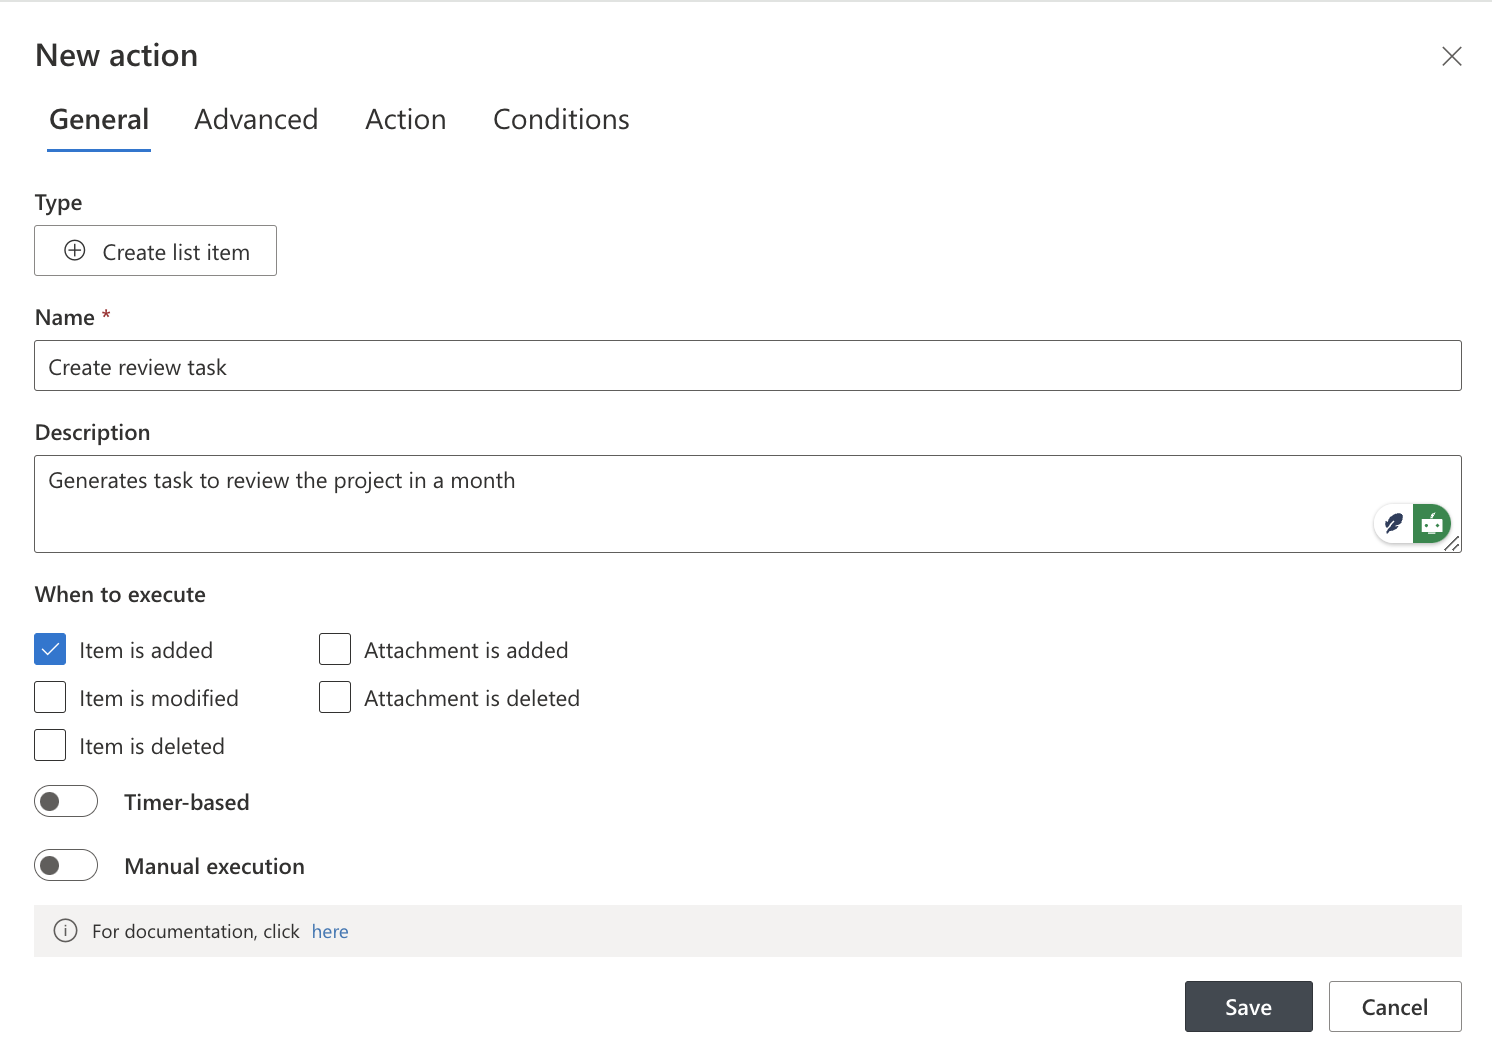
- Enter the In our case, we need to choose the site where our list is (Current Site in our case), select the list where the review task is created (Review Tasks list) and enter the column value for the new task.As this action will run in all cases, there is no need to specify conditions, but you could use a set of conditions to make actions run in certains cases only.
-
- Task Name = Review for [Task Name] - value in square brackets indicate column values of the current list, in this case the name of the new project. You can also use the value picker to select the column values and functions from a list instead of typing them in manually
- Project = [ID] - project ID for the lookup column
- Due Date = [Today] + 30 - creates a due date for the task in a month from the date project was created
- Assigned to = email address of the reviewer.
10. Save the new action.

Step 3: Set Permissions
Now you can create an action to give specific permissions to the review task
- Select Manage Permissions action type.
- Enter user-friendly name and description.
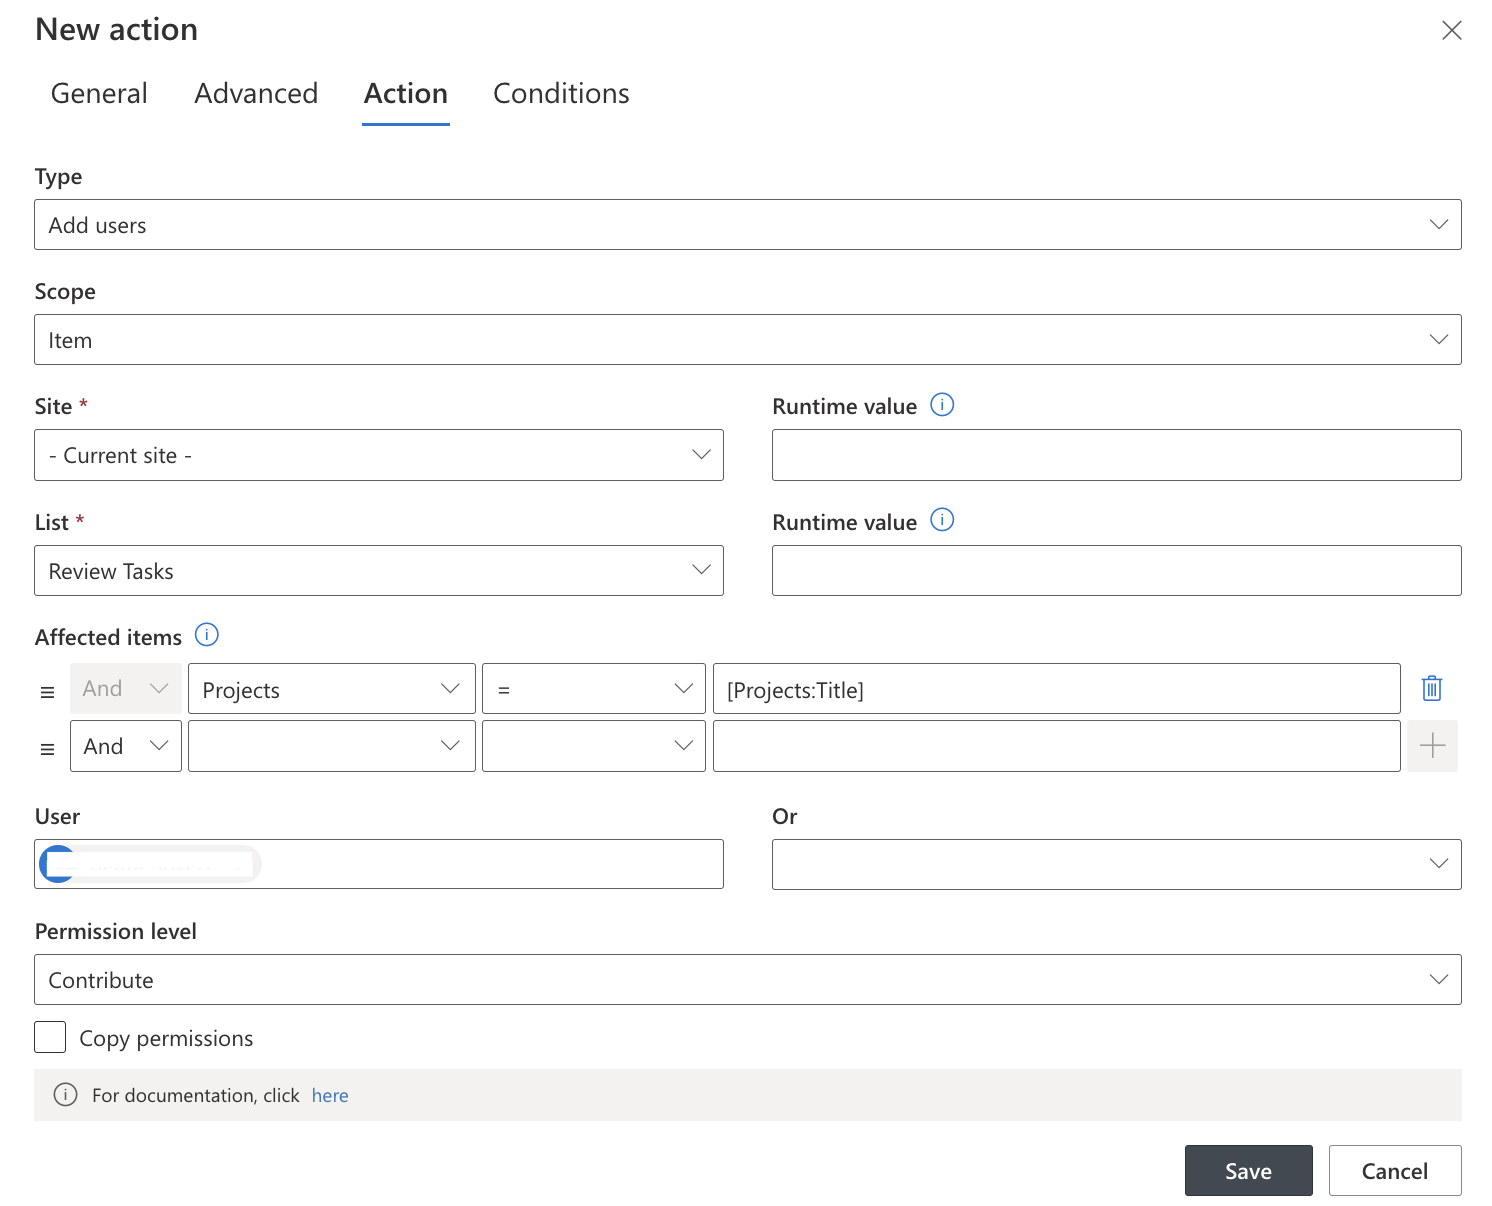
- Under Action Type select Add Users.
- Under Affected items, enter Project=[Title], so that only the review tasks related to the current current project (which is actually only the task we create in the previous action) is selected.
- Enter a user to give specific permissions to.
- Select a permission level.
- Save the action.
Step 4: Register in a Database
Let's add an action for registering the new project in an SQL database:
- Select Run DB strored procedure action type.
- Enter name and description.
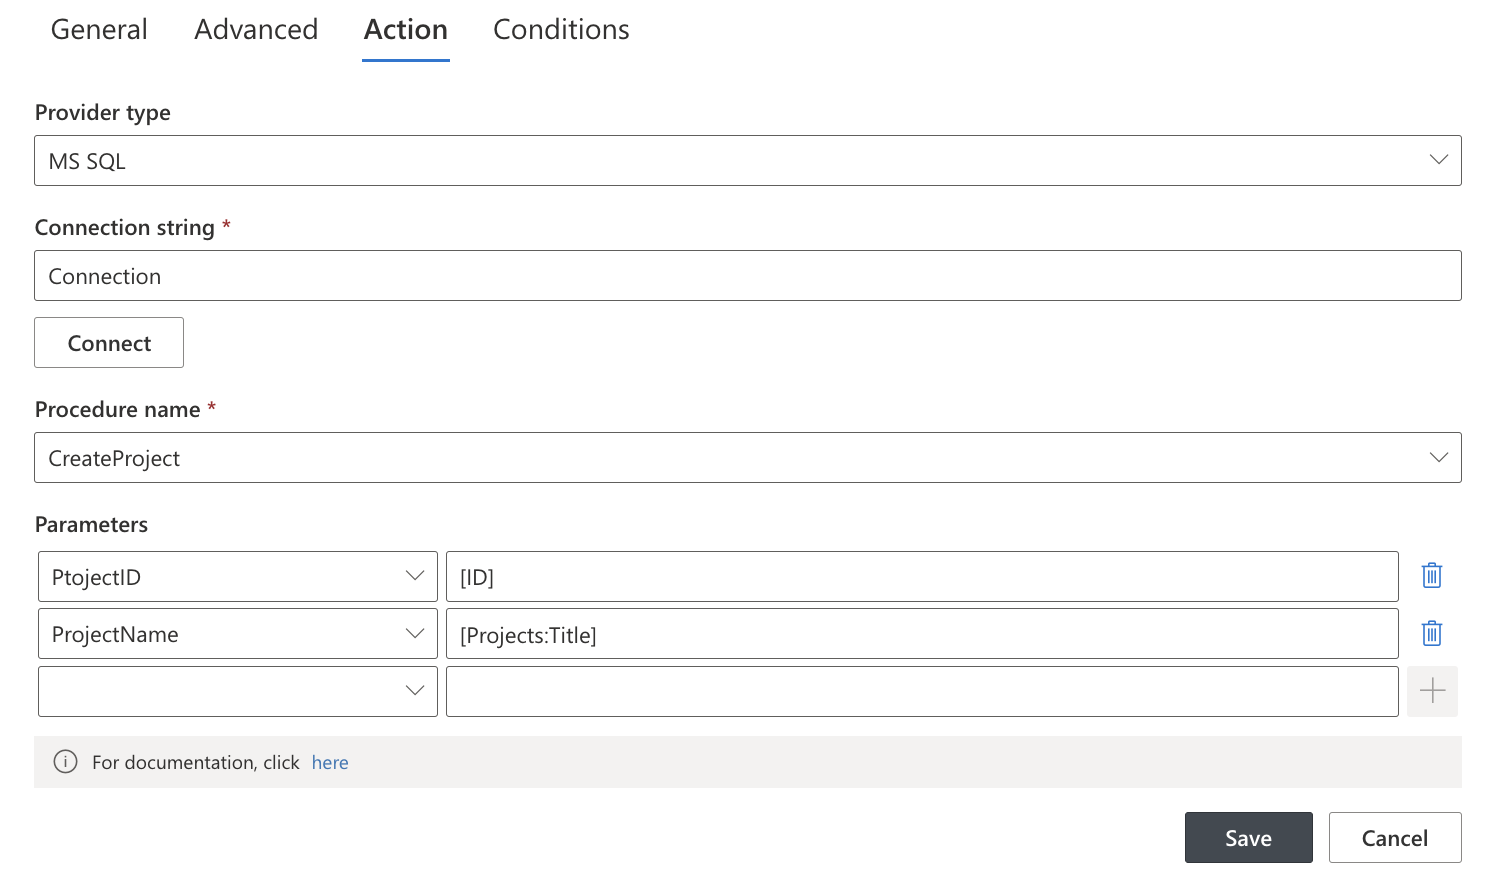
- In Action Settings select MS SQL provider type. You can use any other provider type as well, such as Oracle.
- Enter a connection string for your database and click Connect to populate the list of stored procedures.
- Select a stored procedure from the list.
- Specify value for the procedure parameters using current item's column values, text and functions. You can use the value picker for this values as well.
- Save the action.
Step 5: Create a Site
Now we create a site for the project:
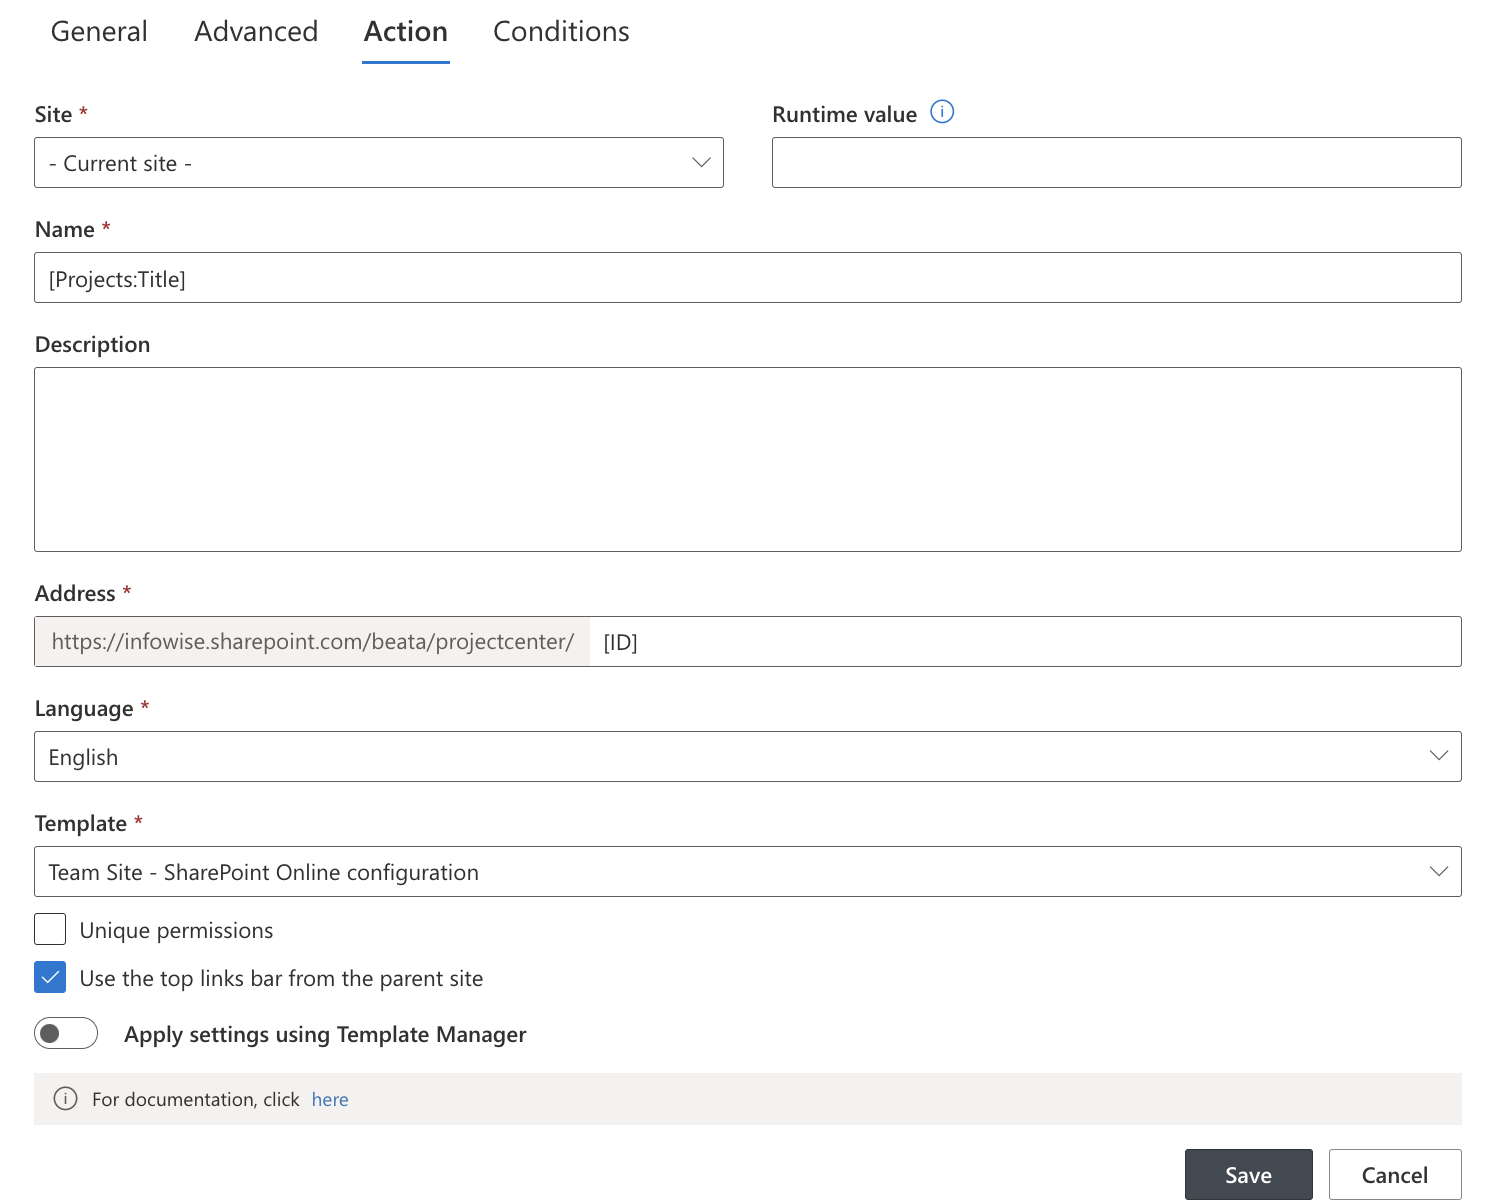
- Select Create site action type.
- Enter name and description, switch to Action Settings tab.
- Enter [Title] in the site Title box to create a site named after the project.
- Enter [ID] in the URL field to ensure unique site URL.
- Select a site template from the list.
- Save the action.
Step 6: Add a new item to the task list for the new site.
A new item is added to the Tasks list of the new site by the following action:
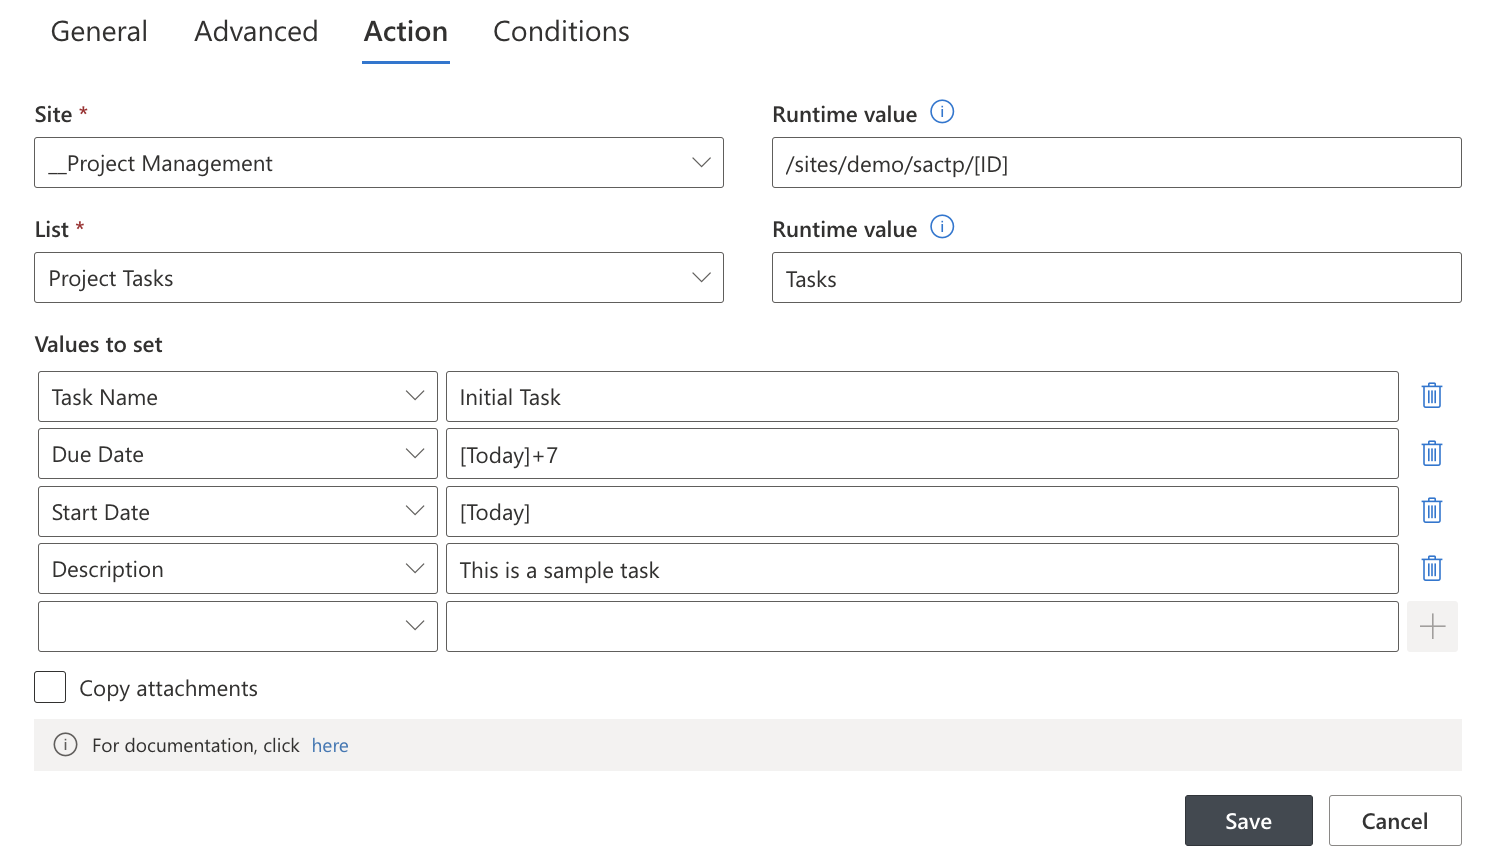
- Select Create list item action type.
- Enter name and description, switch to Action Settings tab.
- Because we are adding an item to a site that does not exist yet, we need to use an existing site for specifying values and condition. Then we enter a Run-time value for both the site URL and the list name, this value will be used when the task is actually performed.
- Select any existing site created from the same template as our Project site
- Select the Tasks list
- Enter values for Title, Due Date, Start Date and Description columns using text and column values.
- Enter server-relative (or absolute) URL for the run-time value of the site URL, remember to use the [ID] token we used in the previous action.
- Enter Tasks as a run-time value for list name. You must always enter a run-time value for the list name if you entered one for the site URL.
- Save the action.
Step 7: Update Current Item with Link.
Let's update our current item with a link to the new project site:
- Select Update list item action type.
- Enter name and description, switch to Action Settings tab.
- Set Current Site and Current List.
- In Value to set, enter Link = URL to the new site, including the [ID] token.
- In Item selection settings, enter ID=[ID], this will select the current item.
- Save the action.
Step 8: Send Email Notification.
Let's create an action to inform the project creator of successful execution of all tasks:
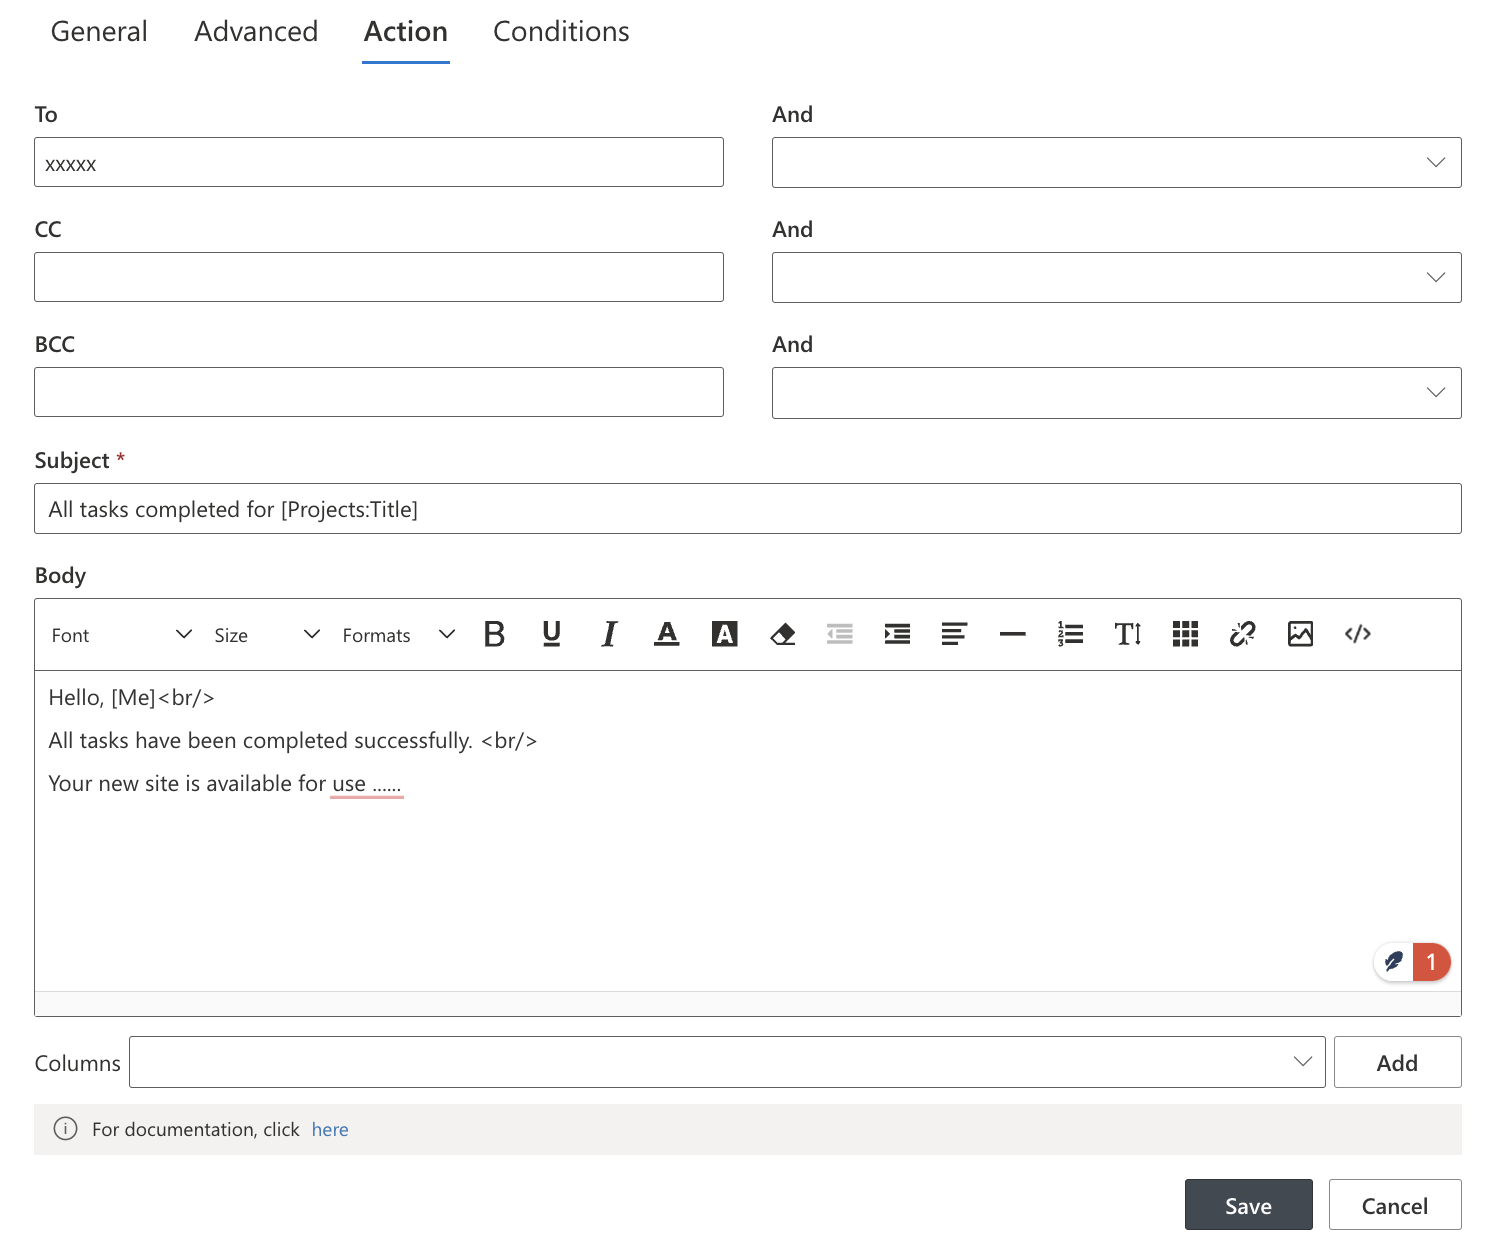
- Select Send e-mail action type.
- Enter name and description, switch to Action Settings tab.
- Select Created by in To field.
- Enter Subject and Body. You can use column values and functions.
- Save the action.
This is it. We now have all the actions in place. Whenever we create a new project name, we will have the whole working environment set up automatically for us! And no coding, as promised!
