
Introduction
The Actions component of Ultimate Forms helps you automate a wide variety of common scenarios inside and outside SharePoint. And the best part is you do not need to be a developer and you need not to know how to program workflows. With Actions, you simply pick the action you need, configure its settings (no JSON required) and specify when you want it to run. Save the action and it's ready to run!
Edit Images Action
One of the most recent additions to the Actions component of Ultimate Forms: Edit Images action type. Using this action type, you can easily automate image manipulation in your lists and document libraries. We support the following automated image processing operations:
- Resize - change the image to dynamically specified dimensions, optionally preserving proportions (aspect ratio).
- Crop - cut out the important part out of the image, using dynamically specified position and size.
- Rotate - rotate the image using dynamically specified angle.
- Flip - flip the image vertically or horizontally.
- Straighten - automatically identify potential vertical lines and rotate the image accordingly.
- Adjust - change brightness, contrast and color gamma.
- Grayscale - remove color from image.
- Sharpen - automatically sharpen the image.
- Smoothen - remove small details for a smoother image.
- Blur - use Gaussian blur algorithm on the image.
- Change background color - automatically detect background and replace it with a provided color.
- Watermark - automatically add dynamically specified text inside the image (the rest of the blog demoes this process).
- Add logo - embed the specified logo image inside the main image.
You can run the action on both SharePoint list item attachments and images in image/document library. You also have a few options of what to do with the resulting image:
- Replace the original - you will still have the previous version saved in the version history of the image file.
- Place beside the original (with a new name) - usually you would add a new suffix to the image file name.
- Upload to a SharePoint document library of your choosing (including dynamically determined site/list).
You can also choose to save the image in a variety of file formats. We support all major image file formats, as well as HTML, PDF, AutoCAD, etc.
A Quick Demo
In my demo, I will use a combination of image file and a Location column in its properties. Once you select the location on the map and set, SharePoint will automatically trigger the action in the background.
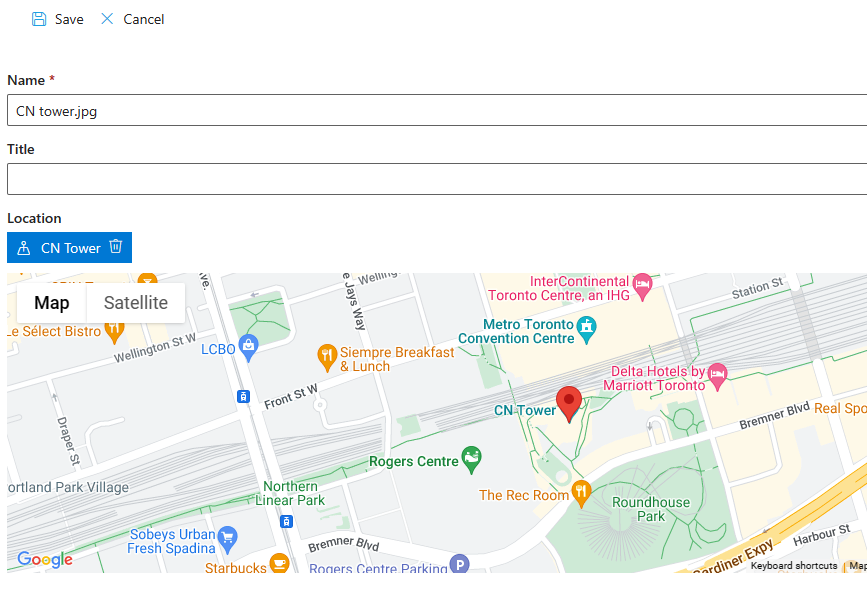
It will then create a full address from the location and embed it in the top left corner of the image. The updated image will then replace the original one.

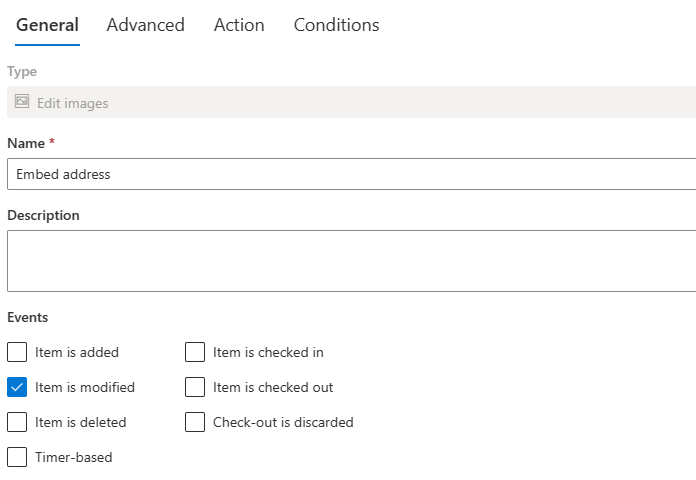
So all we need to do is create a new action that runs on Item is modified. The action will then monitor changes to the Location column. Once a user sets a value in this column, the action embeds the address inside the image.
Action Configuration
What makes Actions easy and sets them apart from traditional workflows, such as Power Automate, is that you don't need to create a flowchart. You create and deploy each action separately, with its own triggers and conditions. Action do not interfere with each other and simply run in sequence, controlled by their conditions. In my case, I'm using both a trigger (under the General tab) and conditions (under the Conditions tab).
All action types have identical configuration on all tabs, except Action tab, which is unique to each action type. Actions require no programming and no complex JSON-based configuration.
Most action can run on any number of items in any list and in any site. By default, actions will run on the current item (the item that triggers the action). But you can easily set almost any action to run on any list and any SharePoint site.
You can even use runtime value to specify the site and/or list dynamically. The system will calculate the dynamic value at runtime, based on column values of the current item.
- Create a new Edit images action. The important parts here are the action type and the event type.
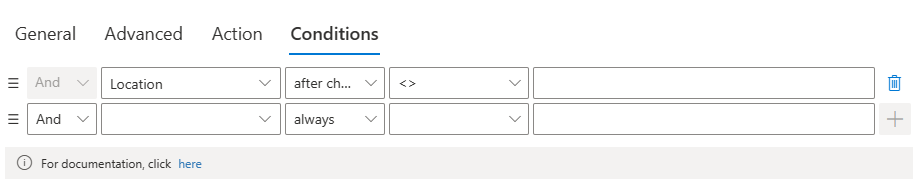
- Under Conditions add "after change" condition that checks the Location column and makes sure it's not empty. The "after change" setting ensures that the action is only triggered when the value is actually changed. In our case, it only runs when the location changes from being empty to a value.
- Now the interesting part. Under Action settings specify what the action should actually do.
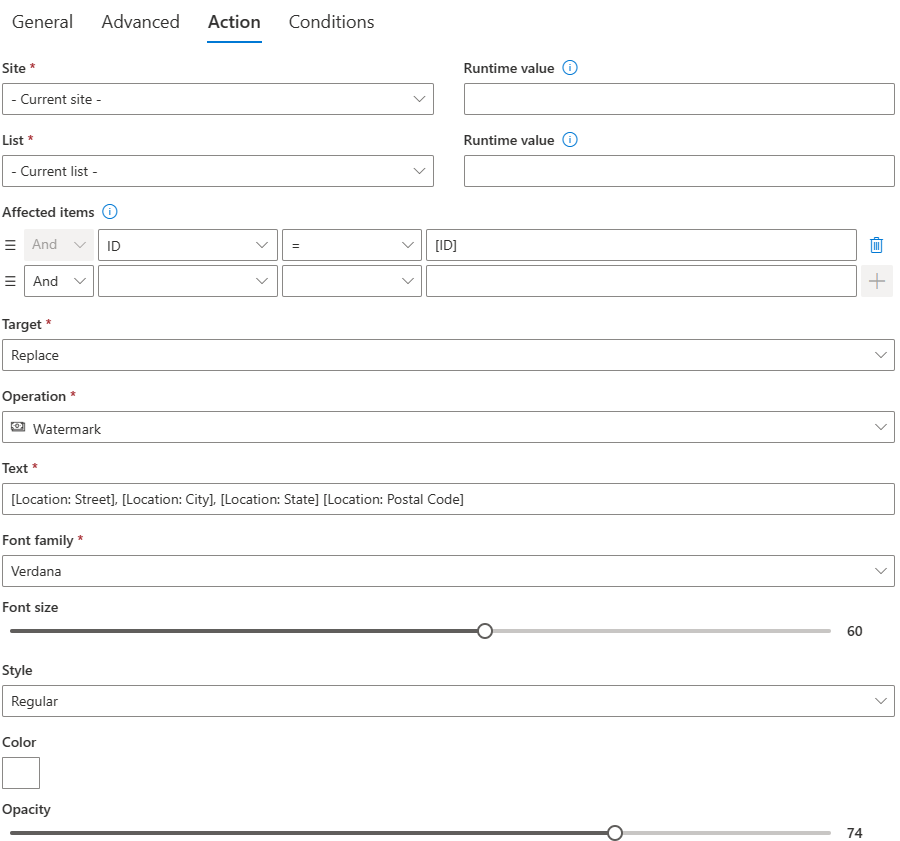
- First of all, under Affected items it says ID=[ID], that makes it run on the current item (the item that triggered the action). This selects the image that triggered the action.
- I set Target to Replace; the new image will replace the old one. As I mentioned earlier, you have several different options here.
- Under Text I assembled the full address out of the various sub-properties of the Location column. It is an easy task using our integrated Value Builder.
- Then I specified font and location properties. I also chose to leave the image in its original format (not shown).
- Save the action and it is ready to run on next form submission.
- Upload an image, open its properties and set location. In about a minute the image will be automatically updated to include the address.
Conclusion
The Actions component of Ultimate Forms makes many common tasks easy to accomplish, even for non-technical people. With the image manipulation action, you can take advantage of sophisticated, yet easy to use common image editing operations.