Introduction
Implementing business process in SharePoint with Ultimate Forms is fast and easy. And the best thing is, you don't need to be a seasoned developer. It combines all the components you need:
- Sophisticated, yet easy to use form
- Intuitive automation
- Reporting and visual display of data
Business process automation is simple and accessible to every user of our platform.
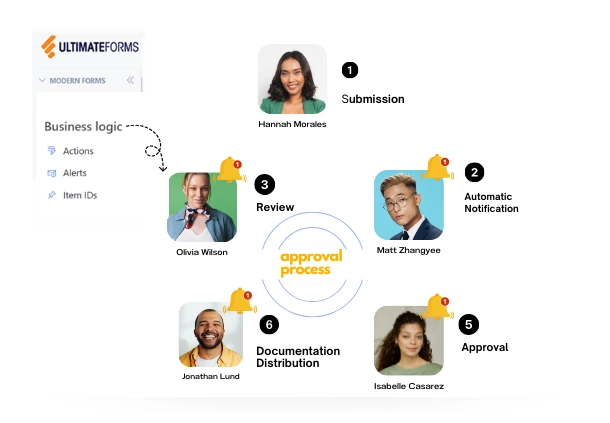
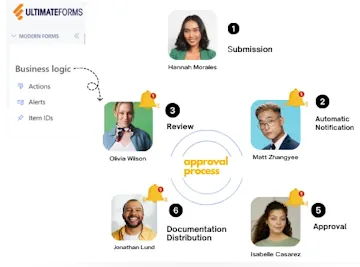
I will demonstrate the ease with which you can build a pretty complex multi-stage business process using plain old SharePoint. The process I chose is a software version approval. Approval workflows are probably one of the most common business processes in SharePoint. Our customers daily build a lot of different approval processes, based on SharePoint lists and libraries.
Ultimate Forms works the same both in SharePoint Online and on premises. The user interface and the implementation steps are exactly the same in both environments. We put in a lot of effort to ensure that. It makes implementation and automation of business processes a skill that you transfer no matter what environment you work in.
The process is rather simple and contains 3 stages. A developer submits a new version, the QA authorize it and the IT department approves its installation. Of course, this could be any other process as well, depending on your business needs.
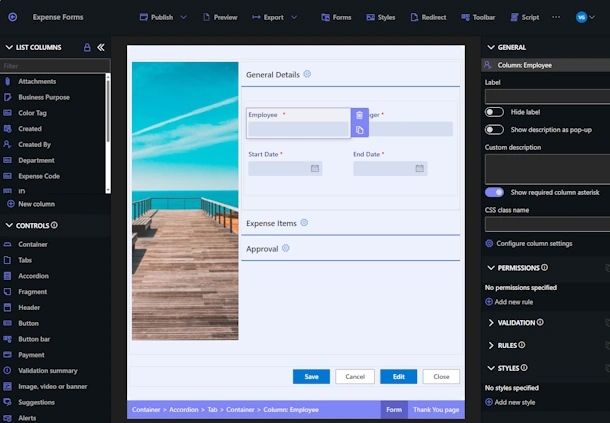
The Form
Ultimate Forms: Forms component far extends the regular SharePoint list form. It includes tabbed interface, permissions on tabs and/or individual columns, advanced validation and much more.
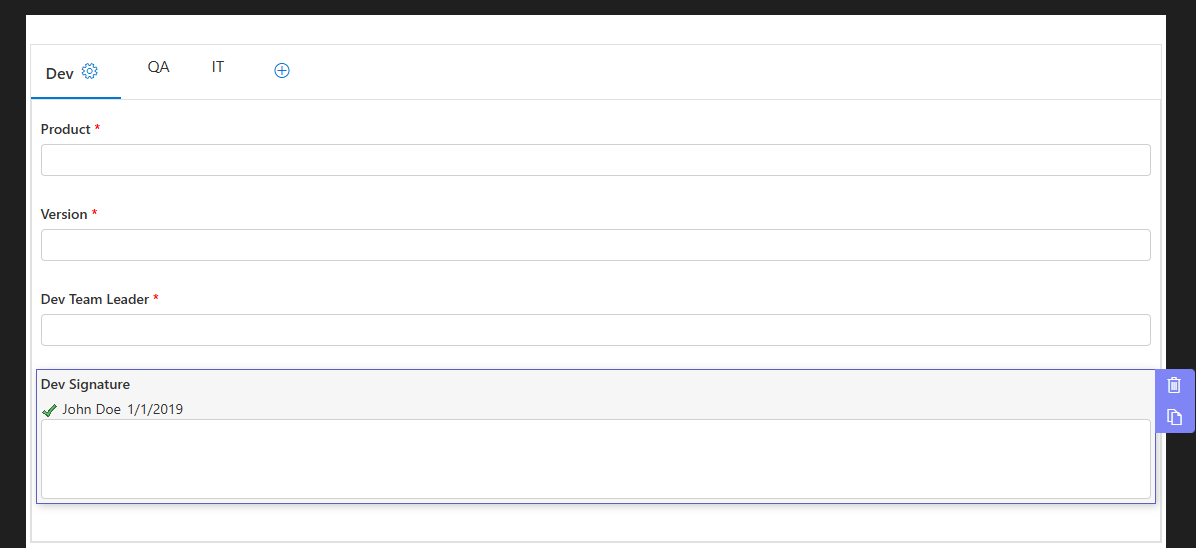
We can also use our Electronic Signature column. It allows you to electronically sign some or all column values. This way it's plain to see whether someone has subsequently changed the signed values. Your process will become more formal if you decide to integrate collect signatures workflow as part of it.
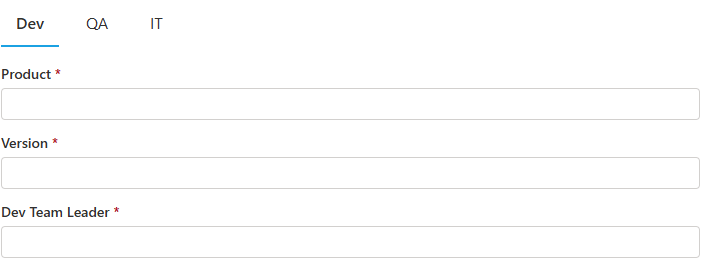
The process we are building involves 3 tabs: Dev, QA and IT. The basic outline of the process flow is:
- When entering a new process application, only the Dev tab is visible.
- Now it's QA's turn. They open the item for editing and the Dev tab becomes locked in read-only state. The QA tab is now editable.
- Once the QA person has made a decision, the QA tab becomes read-only and the IT tab is editable.
- Once the IT representative makes a decision, all tabs become locked in the read-only state. No further changes to the list item are possible.
We start with creating a regular custom list. I strongly recommend using our Form Generator (new). That will allow you to create the list in the fasted possible way.
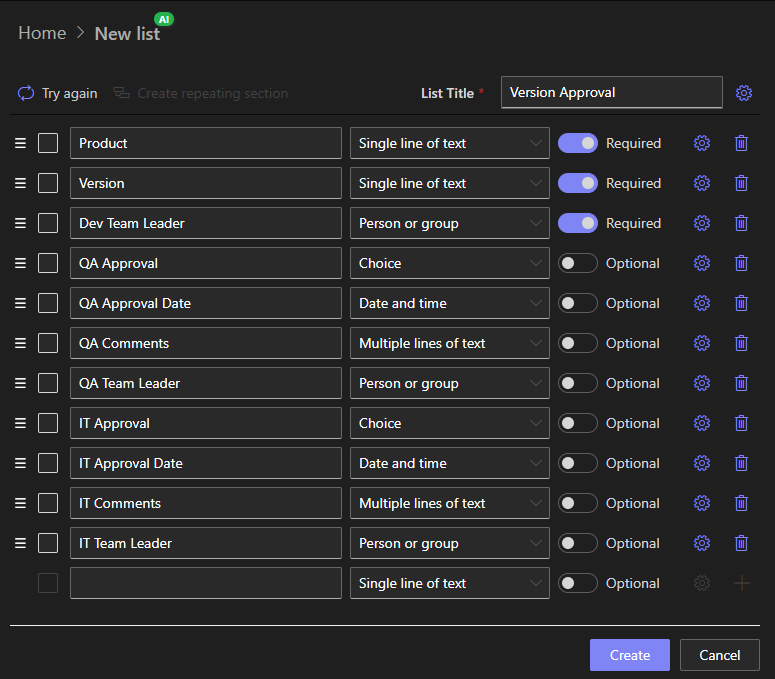
The following columns need to be added to the list:
- Product (text, choice or lookup field) - name of the software we want to approve
- Version (text) - version number
- Dev Team Leader (user) - name of the development team lead
- Dev signature (Signature column, optional). This column signs the above columns to ensure nobody has changed their values.
- QA Approval (choice: n/a, Approved, Rejected, default: n/a) - indicates QA department approval status
- QA Approval Date (date) - the date/time when the QA decision was made
- QA Comments (multiline text) - general QA comments
- QA Team Leader (user) - name of the QA team lead
- QA signature (Signature column, optional). This column signs the above columns to ensure nobody has changed their values.
- IT Approval (choice: n/a, Approved, Rejected, default: n/a) - indicates IT department approval status
- IT Approval Date (date) - the date/time when the IT decision was made
- IT Comments (multiline text) - general IT comments
- IT Team Leader (user) - name of the IT team lead
- IT Signature (Signature column, optional). This column signs the above columns to ensure nobody has changed their values.
NOTE: Signature columns will be added in the second step, inside Form Designer.
Once you have created the list, you can move to creating the tabs and permission. Click on Design to enter Form Designer for the new list.
- Optionally click on New column and add the signature columns.
- Drag and drop Tabs control on the canvas.
- Create 3 tabs by renaming existing and adding new tabs. The tabs are Dev, QA and IT (the tab names do not matter of course)
- Click to select the Dev tab and drag the following columns onto it: Product, Version, Dev Team Leader and Dev Signature (if you choose to use it)
- Click to select the QA tab and assign the following columns to it:QA Approval, QA Approval Date, QA Comments, QA Team Leader and QA Signature (again, if you choose to use it)
- Click to select the IT tab and assign the following columns to it:IT Approval, IT Approval Date, IT Comments, IT Team Leader and IT Signature (again, if you choose to use it)
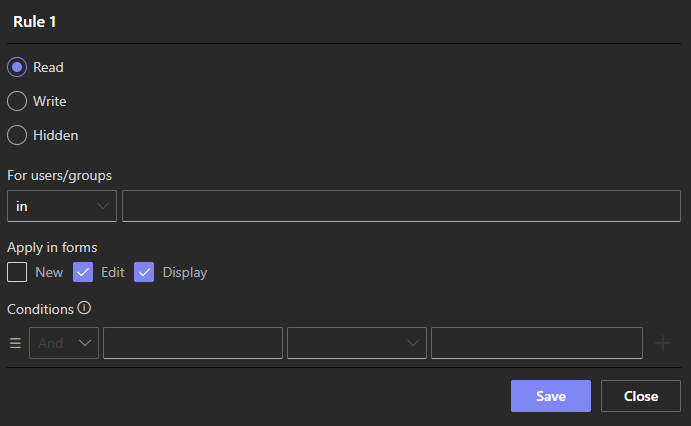
- Now we handle the permissions:
- Select the Dev tab, select Write under Permissions and check only the New form, add the rule
- Select Read permission and the check Edit and Display forms, add the rule
- Select the QA tab, select Deny under Permissions and check only the New form, add the rule
- Select Write permission, check the Edit and Display forms and add under conditions that QA Approval equals to n/a
- Select Read permission, check the Edit and Display forms and add under conditions that QA Approval does not equal to n/a
- Select the IT tab, select Deny under Permissions and check only the New form, add the rule
- Select Write permission, check the Edit and Display forms and add under conditions that QA Approval equals to Approved and IT Approval equals to n/a
- Select Read permission, check the Edit and Display forms and add under conditions that IT Approval does not equal to n/a
Don't forget to click on Publish when done.
And now you have successfully completed your task! In just under 10 minutes you've managed to create quite a complex dynamic form. Using any other tool would probably take you a lot longer. And you will need to possess specialized knowledge and experience.
You can obviously expand the form further. Some of my suggestions could be:
- Include permissions based on user identity
- Create a workflow using Ultimate Forms: Actions to send email to the parties
- Use dynamic rules to set dates.
Add your comment
Flexible Forms
Convenient responsive modern forms, featuring tabs, section and column permissions, dynamic rules, repeating sections, electronic signatures and input validation, while keeping all your data safely inside SharePoint.
Smart dynamic SharePoint forms provide an exceptional user experience, improve data quality and simplify business processes, saving you valuable resources.
Intuitive Automation
Replace complex SharePoint and Power Automate workflows with simple, but versatile Actions to create and update data inside SharePoint and in a variety of integrated applications, such as Exchange, MS SQL, Teams and many more.
By reducing the learning curve, you empower more people in your organization to create and manage business solutions, successfully removing bottlenecks.
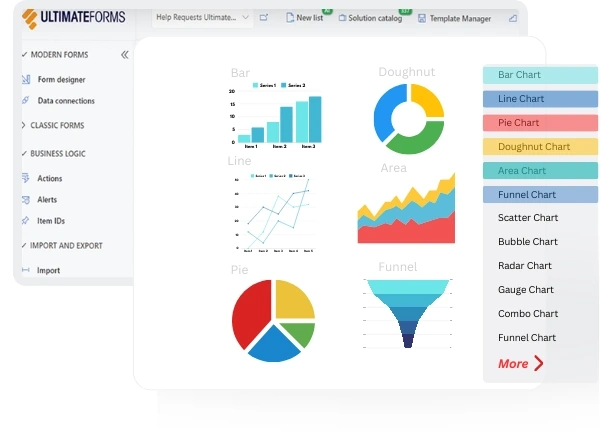
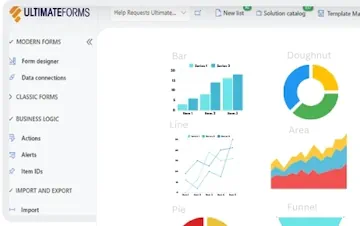
Clear Reporting
Present data as actionable insights with detailed shareable reports, dashboards, KPIs, calendars and charts.
Everyone is able to visualize information in an accessible fashion, improving responsiveness and accountability.
100’s of Templates