Introduction
Efficient incident management is essential for any organization, ensuring issues are quickly reported, tracked, and resolved. By leveraging Infowise Ultimate Forms with SharePoint, you can create a streamlined workflow for incident management, enhancing communication and speeding up response times—all without the need for coding.
This guide walks you through creating an incident management form in SharePoint, setting up automated notifications, and using Infowise Ultimate Forms’ Actions and Alerts to report, assign, and track incidents seamlessly.
Step 1: Setting Up the Incident Reporting Form in SharePoint
Creating the Incident Management List and Form
The first step is to set up an Incident Management List in SharePoint and use Infowise SharePoint forms to structure data collection for incident reports.
- Create a New List in SharePoint:
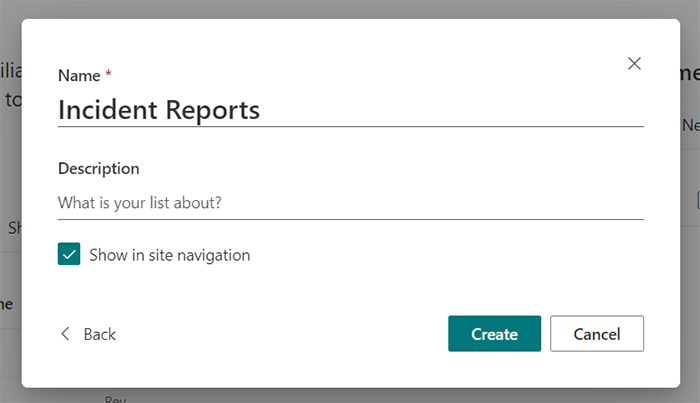
- Go to your SharePoint site and navigate to Site Contents. Click New > List and name it Incident Reports.

- Design the Onboarding Form:
- Once the list is created, click on Design in the top bar (ensure Infowise Ultimate Forms is installed in your environment).
- Open the Solution Catalog to search for prebuilt onboarding forms. Choose a template that matches your requirements and install it to your site.

3- Customize the Form:
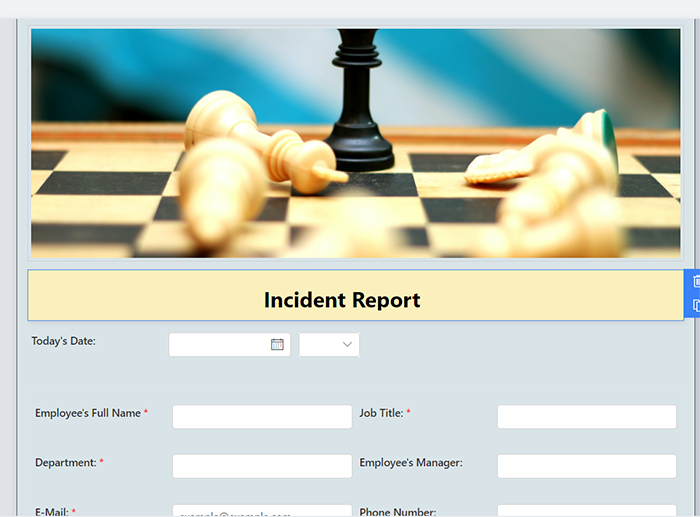
- Add or modify fields like Incident Title, Description, Date and Time, Priority Level, Assigned To, and Status.
Step 2: Automating Incident Notifications Using Infowise Alerts
Automated notifications are crucial for ensuring timely incident resolution. With Infowise Alerts, you can set up notifications to alert the right people immediately when an incident is reported.
Setting Up Notifications for Incident Reports
1- Access Alerts in Design:
-
- In your Incident Reports list, click on Design to access Infowise Ultimate Forms, then go to Alerts under Business Logic.
2- Create a New Alert for New Incident Reports:
-
- Click New Alert and configure it to trigger when an item is added to the list.
- Set the recipients to include relevant team members or managers responsible for incident management.
3- Customize the Alert Email:
-
- Use dynamic fields in the email template to include important details like Incident Title, Description, Priority Level, and a direct link to the incident report.
- Configure alert frequency to send notifications immediately upon incident submission.
4- Set Reminder Alerts for Pending Incidents:
-
- Create an additional alert for reminders if the incident status remains "Open" after a specified timeframe (e.g., 24 hours for high-priority incidents).
Step 3: Automating Task Assignments Using Infowise Actions
To ensure timely responses, you can set up Infowise Actions to automate task assignments and updates based on the priority of each incident. Corrective actions are assigned based on the results of root cause analysis, ensuring that issues are properly addressed and future incidents are minimized.
Automating Task Creation Based on Incident Priority
1- Access Actions:
-
- Go to your Incident Reports list, click on Design in the top bar, and then select Actions from the Business Logic menu.
2- Set Conditions for Priority-Based Actions:
-
- Create different actions to assign tasks based on the incident’s priority level.
- High Priority: Assign tasks to a specific team member or department with a short response deadline.
- Low or Medium Priority: Assign tasks with a longer response timeframe or route them to a general queue for review.
- Create different actions to assign tasks based on the incident’s priority level.

3- Configure Task Assignment Details:
-
- Customize the action to fill in details like Title (using the Incident Title), Description (pulling from the form submission), and Assigned To (based on the priority level).
- You can also set an Incident Due Date field that calculates a deadline based on the priority level, such as setting it to 24 hours for high-priority incidents.
4- Automate Status Updates:
-
- Configure actions to automatically update the Status field when tasks are assigned, changing it to "In Progress" once an action triggers a task assignment.
Step 4: Setting Up Follow-Up Reminders and Escalations
Ensuring that incidents are addressed promptly can be managed by creating follow-up reminders and escalation notifications based on status and due dates. These measures help prevent future incidents by ensuring that lessons learned are integrated into better detection, response capabilities, and organizational training.
Setting Up Reminders and Escalations Without Delayed Actions
1- Create a Follow-Up Due Date:
-
- In your Incident Reports list, add a field called Follow-Up Due Date to calculate a future date based on the incident’s submission date (e.g., 24 hours from creation for high-priority incidents).

2- Automate Reminders Using Alerts:
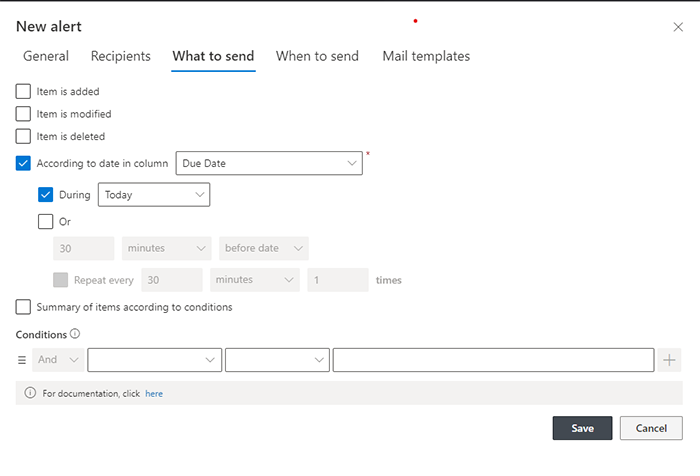
- Set up an Infowise Alert configured to monitor the Follow-Up Due Date and Status field.
- Configure the alert to send a reminder notification to the assigned team member if the Status remains “Open” or “In Progress” by the due date.
3- Escalate Unresolved Incidents:
-
- For unresolved high-priority incidents, create an additional Infowise Alert to escalate the issue by notifying a senior team member or department head if the incident is still unresolved by the Escalation Due Date (e.g., 48 hours after the incident is created).
- Customize the escalation email to highlight the incident details, current status, and a link to the SharePoint item for quick access.
Resources
Before we wrap up, let’s look at a few key resources Infowise provides to help you get the most out of Ultimate Forms. These tools are designed to support every level of user, making it easy to customize and automate workflows in SharePoint.
Templates
Infowise provides free templates to help you quickly launch solutions for common workflows like employee onboarding and approvals. These templates integrate smoothly with SharePoint, so you can start building effective processes right away. Explore available templates here: Infowise Templates.
Tutorials
Infowise’s tutorials cover everything from setup to advanced customization, making it easy for users at all levels to leverage Ultimate Forms fully. View the full tutorial library here: Infowise Tutorials.
Webinars
Join Infowise’s webinars to learn directly from experts about real-world use cases, including automation for HR and custom workflows. Watch live or on-demand here: Infowise Webinars.
Training
Infowise offers training resources to equip your team with best practices and essential skills. Choose from guided courses and self-paced options to fit your schedule. Learn more here: Infowise Training. These resources provide valuable support to ensure you can easily set up, customize, and optimize your SharePoint solutions.
Conclusion
By using Infowise Ultimate Forms with SharePoint, you can automate incident management workflows—from form submission to task assignments, follow-ups, and escalations. This solution enables your team to respond to incidents quickly and consistently, improving overall efficiency without the need for complex coding.
With automated notifications, task creation, and escalation workflows, Infowise Ultimate Forms provides a comprehensive toolset for effective incident management.

