
Introduction
All data we work with in the real world is relational, most commonly in a single-to-multiple relationship. For instance, each department employs multiple people, each product category contains multiple products, and so on.
We want our SharePoint lists to represent this real world data in the truest and most convenient form. Unfortunately, SharePoint handles relationships in quite a rudimentary fashion. It lacks a comprehensive way of managing parent child list relationships.
That's why years ago we developed our Associated Items column type in Ultimate Forms. It allows creating seamless SharePoint list relationships. You can utilize these both in forms and in list views. Creating repeating items and repeatable SharePoint forms within a parent item became easy for everyone!
Since then we have introduced a vast number of improvements and features. We listened to our customers and improved the component to better suit the wide variety of their needs. Be it sorting, paging, summaries, grid entry mode, the to mention just a few.
And as with every feature of Ultimate Forms, the support extends to all other components. You can view and manager related SharePoint items in Print, email Alerts, Actions, List Search results and everywhere else.
Configuration Challenges
The only issue that many new users would be stumbling upon was the initial configuration. We establish the relationship in two possible ways:
- Using our special content types ("Infowise Associated Item", "Infowise Associated Document", "Infowise Associated Task")
- Using a regular lookup column in the child list pointing to the parent
I won't be discussing pros and cons of each approach here, we have existing training documents that delve into this in great detail. I will just say that both approaches require quite a few manual steps to get things going. Inexperienced users might find it a bit challenging at first.
Simplified Configuration Method
That's why we came up with a simplified configuration method. It helps to execute the setup process with a minimal number of manual steps. When you create a new Associated Items column, we will create a new child list (or document library). We will then replace the content type or add a lookup for you.
Title and Description
- Access the Associated Item column settings page in the main page of Ultimate Forms. You can also add columns directly in Form Designer, whatever is more convenient.
- Click on Add new column.

- Enter the column title of your choice.
- Column description is optional, as well as the Required setting.
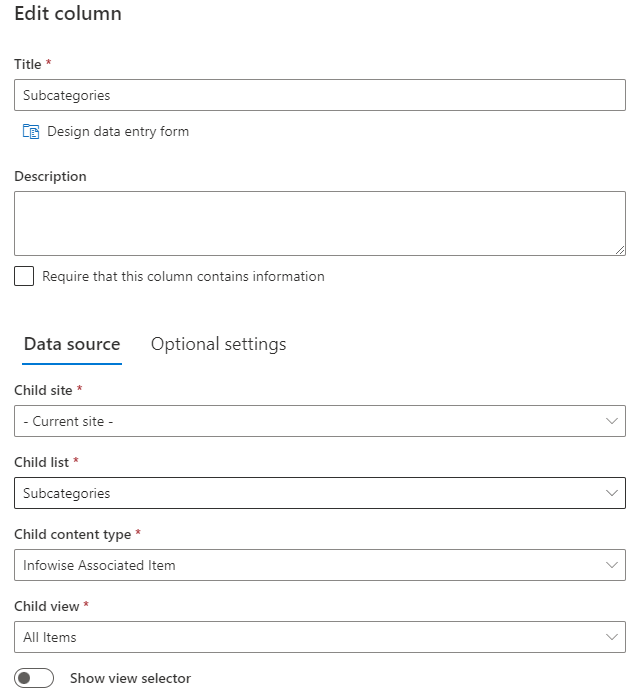
Data Source
- Under Data source, you can switch to New to create a new list.
- Choose from list type, we support Custom list, Document library or Tasks list.
- Provide a meaningful title for your list. In most cases, you want it to be the same as the column title, but you can enter anything that makes sense for you. If you already have an existing list with the same title, you will see a prompt to enter a different one.
- Optionally choose to use a lookup and provide a title for it.
We provide specific recommendations on what approach to use for the relationship. But in general, use a lookup when you want to export you data to Excel or other 3rd party applications.
Do not use it when you want to add child items in the New form of the parent. For instance, when creating an invoice, it is advisable to allow adding line items before you save the invoice. In this scenario you will use our content type and not a lookup.
Optional Settings
- Under Optional settings tab, you can configure a number of settings related to styling and functionality
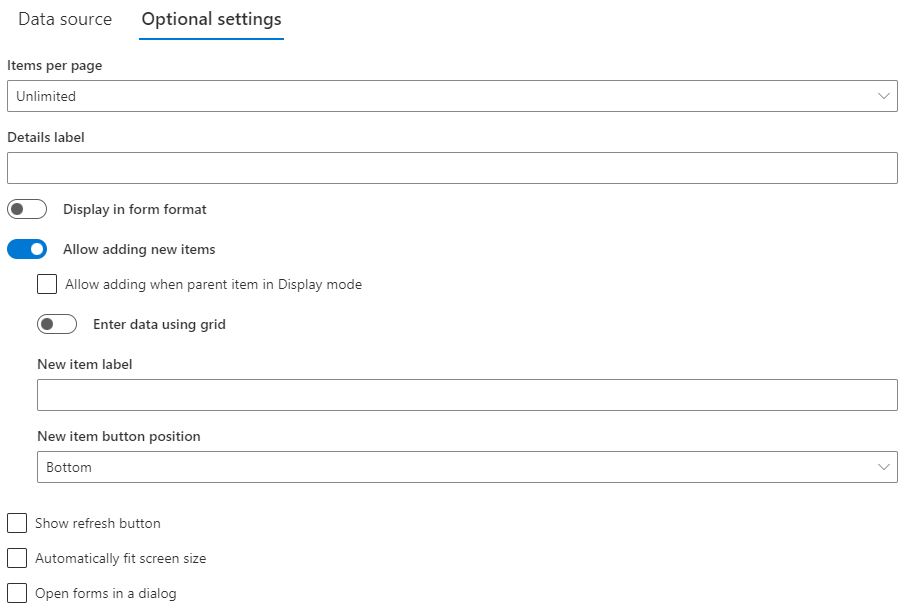
Generally, you don't have to change anything here, but I'd like to mention a couple of significant ones:
- Display in form format - by default we display child list items in a table view. With this option, we will repeat them in their own form layout, stacked within the parent form. It creates a repeatable child form within the parent.
- Allow adding new items - allow users adding new child items from the parent.
- Enter data using grid - you will add new items in the grid itself, instead of using a pop-up form. Makes sense when your child list only contains a handful of simple columns.
- Open forms in a dialog - opens child items in a pop-up window instead of navigating to them.
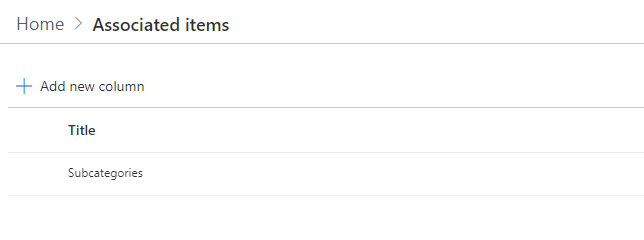
Once you save the column settings, it will generate the new list and then create the column to link it to the parent.
Form Designer
Now you need to add the column to the form. I'm showing it in Form Designer for modern forms, which is the recommended approach for all new forms. But you can use classic forms as well, we still provide full support for them.
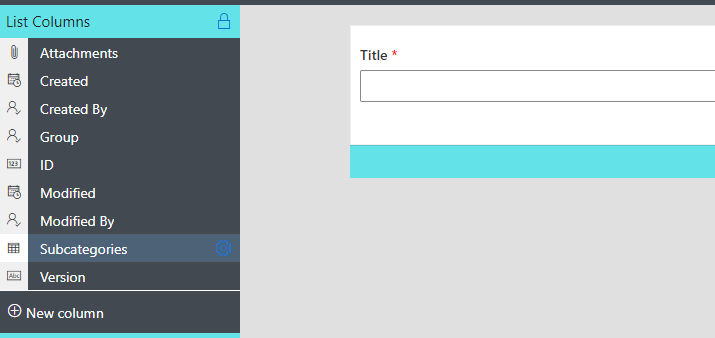
Once you open Form Designer, your new column will appear in the List Columns gallery on the left. You can now drag it onto the form design canvas. You can now just click on Publish, next steps are for information purposes only.
Click on the column to see the configuration settings on the right.
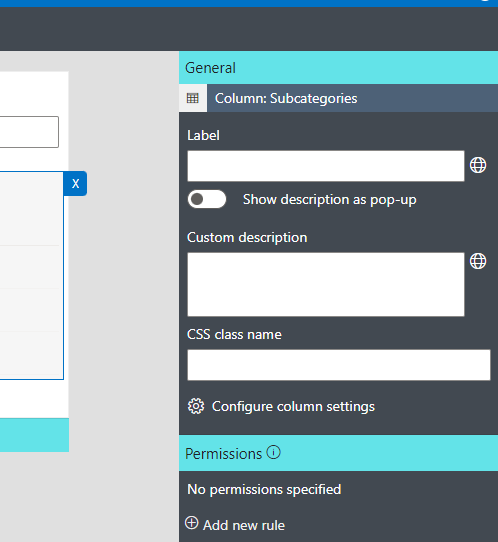
You can change settings of any existing column directly from here.
You will see the same configuration page we used earlier. The New option however is not visible as we are configuring an existing column here.
See the option Design data entry form. It allows you to create a special form for the child list. You will use this form when entering new child items from within the parent form only.
In some scenarios you want to use a simpler shorter form when entering data into the child list from the parent. This is how you design such a form.
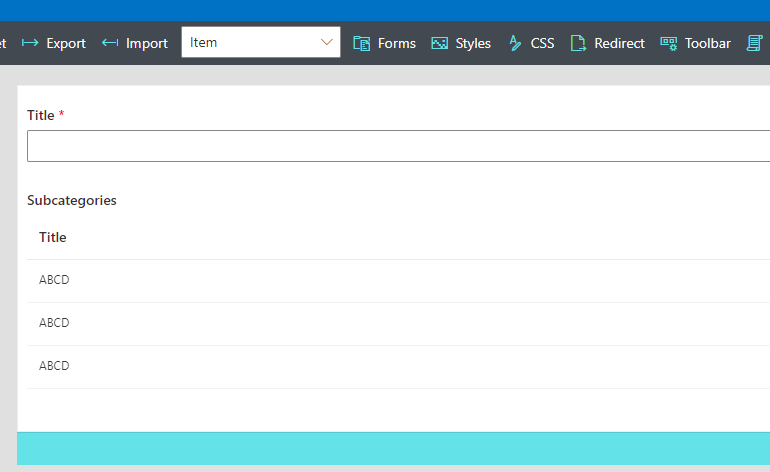
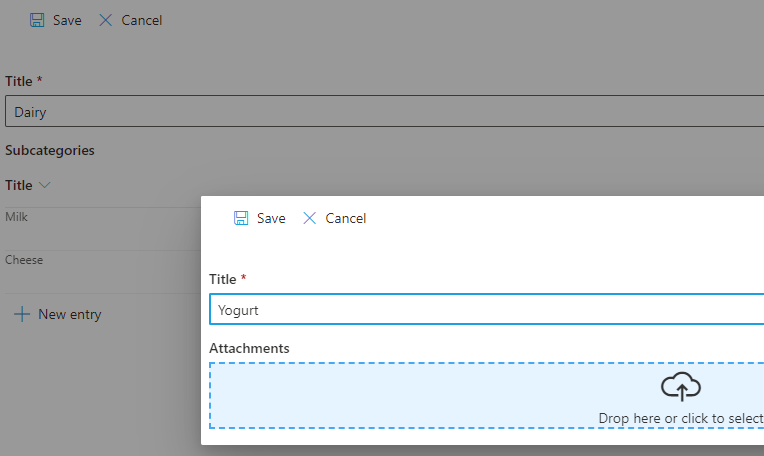
Once you publish in Form Designer, you form is ready for use. Here you can see the parent form item "Dairy" with the new Subcategories column and a number of child subcategories. We are in the middle of adding a new subcategory using a pop-up form.
Conclusion
Associated Items column makes relational SharePoint design a reality. Both SharePoint lists and document libraries can serve as either the parent or the child in the relationship. With automated child list generation it's easier then ever to create a new relationship.
I'm sure it's going to save you a lot of your precious time and allow you to focus on other tasks instead. Enjoy!