
Introduction
Ultimate Forms is all about streamlining and speeding up business processes. It does so by removing unnecessary, time-consuming steps, whereby improving productivity. One of our latest addition is Action Buttons inside email alerts. Using these, your email recipients can start actions and run business processes right from the email messages. These messages are sent by our Alerts module. Without these buttons the users would have to go through a multistep process:
- Open a web browser
- Navigate to the SharePoint list
- Manually locate the list item
- Open in Edit form and update the list item
As you can see, quite a few steps here. And each steps carries the possiblities of human errors. That's one of the things we are trying to prevent by implementing easy one click solutions.
One of the most obvious uses for action buttons is, of course, approvals. In this case you would place Approve and Reject buttons found directly in the email. This is what I'm demoing below. But any action or action group can be triggered.
You can select from a wide variety of actions we provide in the Actions module. These action can perform operation within and outside SharePoint. For example, managing permissions, creating sites, calling 3rd party applications and many others. And as always, we put great effort to deliver this immense power to you in the simplest and most convenient fashion.
In my demo today, I will be implementing a process where a user creates an item in a list. This then triggers an email being sent to the manager (same person for demo purposes). Inside the email there are two buttons, Approve and Reject. When the user click either one, it will immediately set the Approval column to either Approved or Rejected.
Let's build together
The following steps require no previous knowledge. All you need is to have Ultimate Forms installed. You can do it through the Try Now Free button anywhere within this site. Once installed, you will find the Design button on any list or document library within your sites. This is your entry point for Ultimate Forms.
Create a form
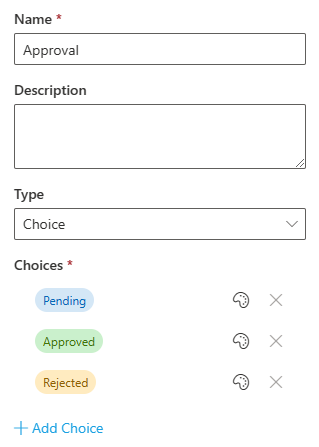
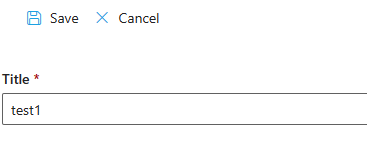
- Start with a simple Custom list, then add a Choice column to it with options: Pending (default), Approved and Rejected.
- Click on Design to open Ultimate Forms.
- Next click on Form Designer to generate a new modern form for the list. Make sure to exclude Approval column (or make it hidden or read-only in New form). You can read more about permission rules here.
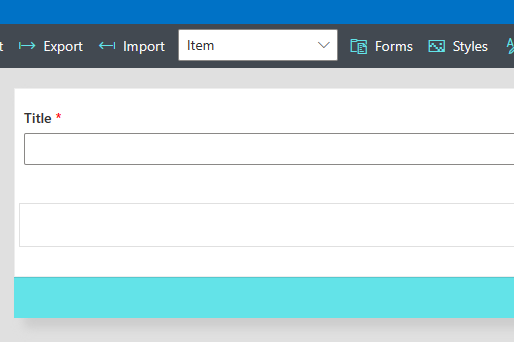
As you can see, I only have Title column, I'm keeping this demo as simple as possible. - Publish and let's proceed to the Actions module.
Actions
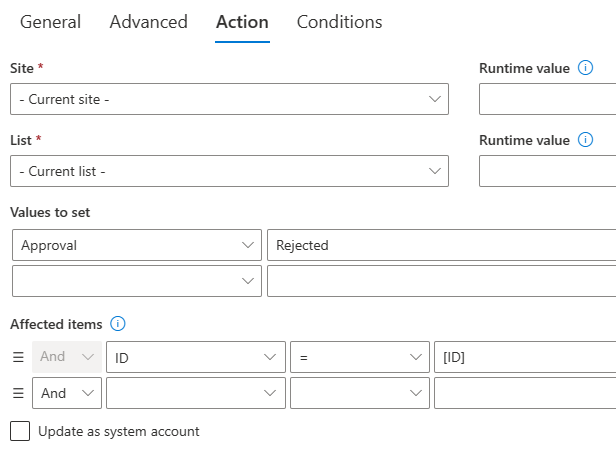
- Add a new Update List Item action and call it Approve.
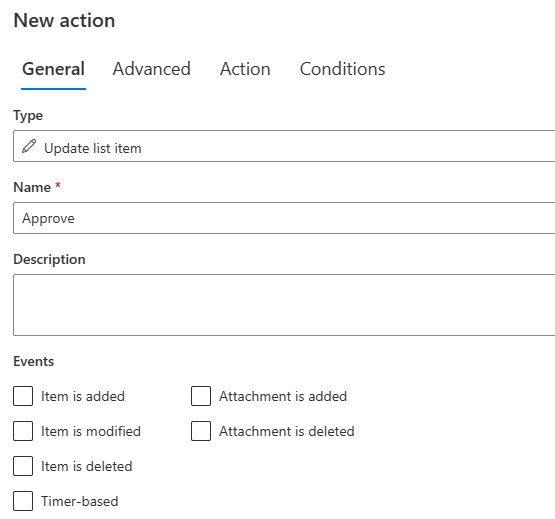
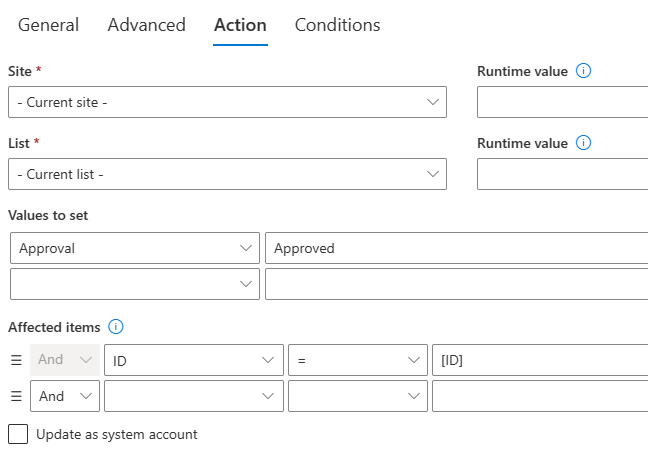
Make sure to uncheck all event types, we only want it to be triggered from the email. - Under Action settings, set Approval to Approved, nothing else need to be changed.
- Save the action and create another one for Reject, the only difference being the value being set for Approval.
Alerts
- Next we need to add a new alert.
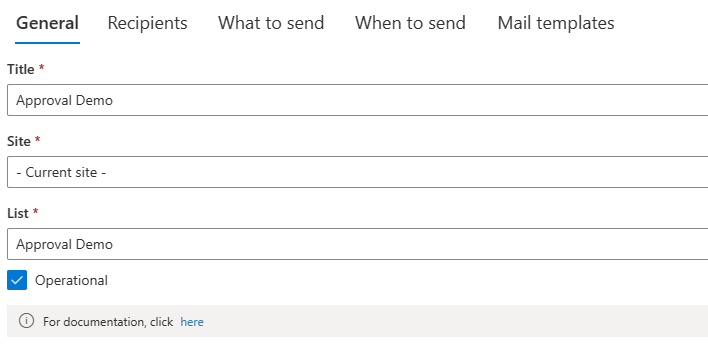
- Under Recipients I set To field to Created By column. I only did it so for testing purposes, just because I want whoever is testing the process to receive the email.

- Under When to send make sure only Item is added is selected. Next, switch to Mail Templates and click on Add column or button.
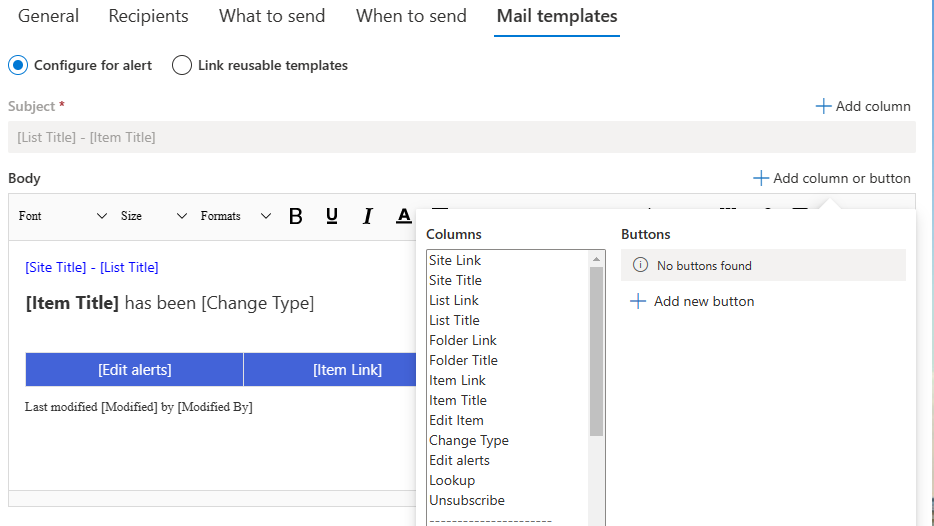
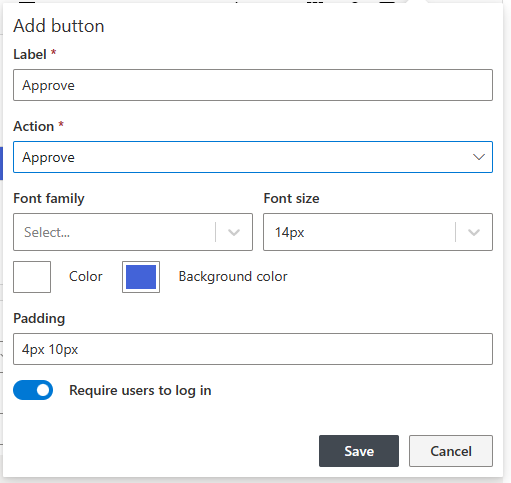
- We need to add two buttons here, one for Approve and one for Reject. Once they are ready, we can place them inside the email body. Click on Add new button to start.
- Enter the label (the text that appears on the button) and select the appropriate action from the two we just created. You can also control how the button looks like.
- And do the same for Reject

- Notice Require users to log in toggle. When it's on, it can only be pressed by an authenticated user, which is the default in most cases. But in some cases you want to send the alert to someone outside of your organization and want them to run the action. For example, a doctor's office might want to use it to let patients confirm their appointments. In such cases, the toggle must be off.
- Let's design the body of the alert the way we want it. Next place the buttons within by setting the mouse cursor where the button should go, then double-clicking the button name. By default, each button will occupy its own row. If you want to place multiple buttons in one row, add a table and put each button in a different table cell. Make sure to activate "Min size" option on the table to prevent it from taking up the whole width of the screen.
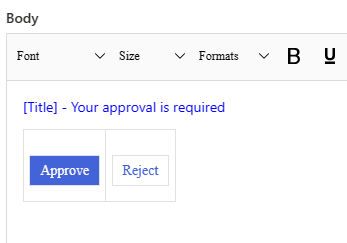
- Save your alert.
Testing the result
Now we are ready to test.
- Add a new item to our list.
- In a minute or so you will receive an email.
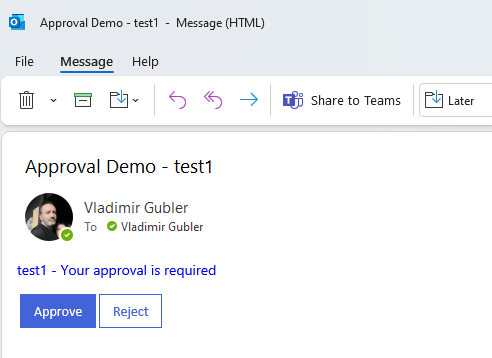
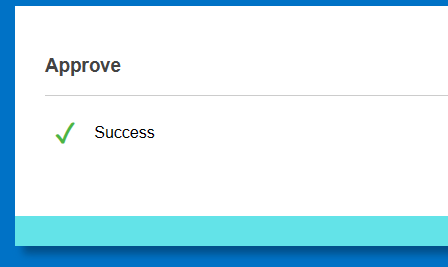
- Click on Approve. It will open a page in your browser, showing the execution progress.
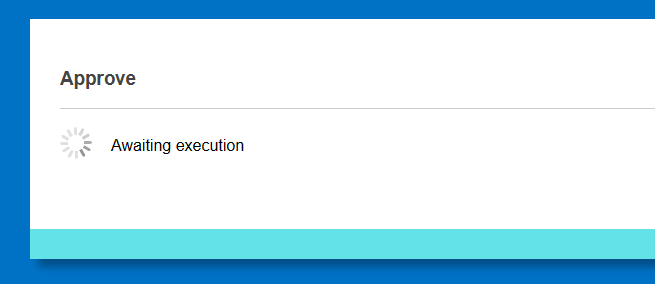
- Success!
As you can see, it literally take 5 minutes to implement this business process, but there is no limit to what you can accomplish!
Conclusion
Ultimate Forms makes it easy to implement action buttons in email alerts. With this button you can make it simple for your user to perform operations on SharePoint list items and document directly from their email client.