Dynamic Forms are an essential part of SharePoint solutions. Dynamic Forms change in appearance and functionality according to rules defined in the form. It does so in real time as the user fills out the form. This is the opposite of out-of-the-box static SharePoint forms which don't change in appearance or functionality.
Learning how to how to use rules in Ultimate Forms Form Designer is the key to dynamic forms development.
Dynamic Forms Features
First, let's start at a high level and talk about the ways in which a form can be dynamic:
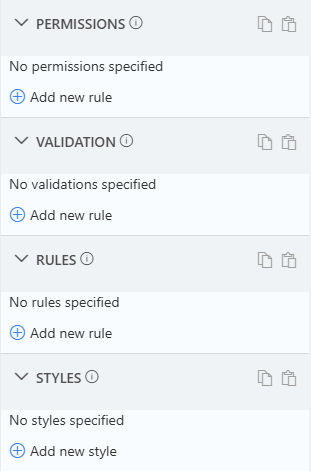
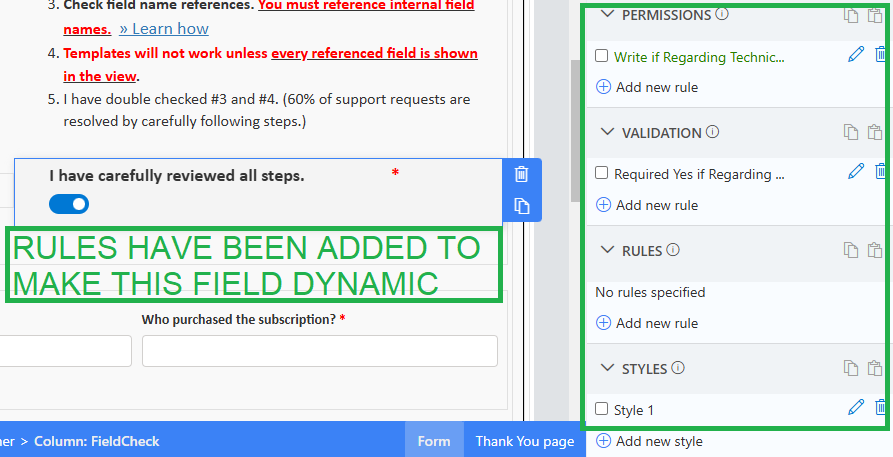
- Permissions Rules set whether an element is Write, Read or Hidden on the form. This is the most important concept in dynamic forms. Entire form sections can be hidden or displayed according to permissions rules.
- Validation Rules define requirements for form inputs which can be applied according to conditions. For example, a field may be required only based on a certain value for "Project Type". What matters here is that the validation rule is not always applied as is the case with static SharePoint forms.
- Dynamic Rules set values to columns in the forms. A simple example is defaulting a person field to the name of the current user for a new Help Desk request.
- Style Rules define the visual style of form elements. Normally these are used to control the fixed appearance of a form such as the border and background color. Using conditions, the styles on a form element can be dynamic. For example, you can make a field have a red border color when no value is in the field then green when there is a value. This helps users see that the field needs data.

Building this kind of functionality with other web form tools is difficult and usually involves custom code.
With Ultimate Forms Form Designer, no code is needed to create dynamic forms.
When developing forms, use a phased approach in which the static form is built first and then dynamic functionality is layered in.
Phase 1 - Building the static form
Step 1: Begin with fixed form elements
Make sure that all form sections have been set and that you have included all necessary fields. Consider whether you want to use tab sections and define your form containers. Set your containers for multiple columns if you want a grid layout for your form.
Step 2: Form Styling
Apply Style Rules which will be applied to the form that won't change. This includes background colors, borders and padding. This is described as the "look and feel" of the form. These are static styles that won't change regardless of form content.
Step 3: Static Rules for Validation, Values and Permissions
Usually these are easy to define. Check your form for any fields that need special validation. Value Rules can be useful to set a default value to certain fields such as a person field when the form is first created. Static Permissions Rules should be created in cases where any elements are displayed according to a SharePoint security group.

At the end of Phase 1, everything about the form appearance and functionality that is NOT based on dynamic conditions should be completely defined.
Phase 2 - Apply rules to make the form dynamic
Step 1: Dynamic Style Rules
Consider whether you want any part of the form to look different according to dynamic rules. Typically this involves changing colors according to values in a field. For example, if you have a status field, you could change the background color of the header for each possible status value.
Step 2: Dynamic Value and Validation Rules
If there are any value rules or validation rules that should be applied only for specific conditions, those rules can be added next.
Step 3: Dynamic Permissions
This is the step most commonly associated with dynamic forms. We can conditionally show form sections according to these rules. A detailed explanation of this step is described below.

At the end of Phase 2, all rules have been added to make the form change in appearance and functionality according to all possible conditions.
In-depth Look at Dynamic Permissions
Now let's talk more in depth about how to apply dynamic permissions in the form.
Ultimate Forms Form Designer uses a system of inheritance where a rule applied to a container effects all elements in that container. This is extremely beneficial because it saves us a lot of work. Imagine if we had to repeat the same permission rule over and over again for a series of 20 fields in a container! By applying a rule to a container with fields inside, we only need to define the rule once and all elements inside the container are affected.
Generally when applying a permissions rule to a form section or field, we are considering a field value such as Status or we are considering the user permissions.
Example 1: Status is "Complete"
Once the Status of a request is changed to "Complete", I don't want users to change the data in the form anymore. How do I stop them from doing that?
I can set permissions rules on the form containers. Add a Write Rule to the container with the condition Status not equal to Complete. Then add a Read Rule to the container when Status is equal to Complete. Now once the Status is "Complete", users won't be able to make further changes to the form.
Example 2: Follow Up Questions
It is often the case that according to the answer to a question, additional information is needed. For example, in a support form, you might have "Would you like us to call you". In this case, we want to show two follow up questions "When is a good time to call" and "What is the best number to reach you". Add a Write Rule for each follow up question which applies in the condition that the first answer is "Yes". Note that these question will not appear in the form unless this answer is changed to Yes. They will be hidden automatically. Additionally, you should add a Validation Rule which requires that each answer is not blank in the condition that the first answer is "Yes".
Always be sure to check you dynamic forms rules as you go. It can be a lot to track. It is best to make sure that the form behaves as you expect by testing each condition after it is applied.
There are many possibilities. The best way to learn is my experimentation and testing!
