
Introduction:
Loans play a vital role in personal finance, enabling individuals to make significant purchases, cover unexpected expenses, and manage their cash flow efficiently. However, calculating loan payments, interest rates, and repayment schedules can be challenging without the right tools. That’s where a Personal Loans Calculator comes in handy.
In this article, I will share how I built a Personal Loan Calculator using Ultimate Forms. This tool simplifies loan management by providing an intuitive form for users to input loan details, receive instant calculations, and track approval statuses—all within SharePoint.
Understanding Loans and Their Importance:
A loan is a sum of money borrowed from a financial institution with the promise to repay it over time with interest. Loans come in various forms, including personal loans, auto loans, home mortgages, and business loans. They help individuals and businesses access funds they might not have upfront, allowing for investment and growth.
For example, if an individual takes a $50,000 loan for one year at an annual interest rate of 12%, they may need to make monthly payments of $4,442, with the principal amount due at the end of the year. Loans provide financial flexibility, but they must be managed wisely to avoid excessive debt.
Why Do Banks Provide Loans?
Banks generate revenue primarily through lending. They earn interest on the money they lend, which helps them pay interest on deposits and maintain financial stability. The banking system operates on the money multiplier effect, where a portion of customer deposits is reserved while the rest is lent out. This cycle contributes to economic growth by increasing the amount of money in circulation.
For example, if a bank has $100 million in deposits, it may lend out $90 million while keeping $10 million in reserve. The interest earned on these loans allows the bank to compensate depositors and remain profitable.
However, banks must assess an applicant’s creditworthiness before approving a loan. If borrowers fail to repay, the bank risks financial losses. This is why strict eligibility checks and risk assessments are crucial.
Building a Personal Loan Calculator with Ultimate Forms:
To develop an efficient Personal Loan Calculator, I identified several key requirements:
- Data Collection: Gather applicant details, including personal and employment information.
- Document Upload: Allow users to attach supporting documents.
- Mobile Accessibility: Ensure the form works on smartphones and tablets.
- Automated Notifications: Send email alerts upon application submission.
- Approval Workflow: Enable bank employees to update loan request statuses.
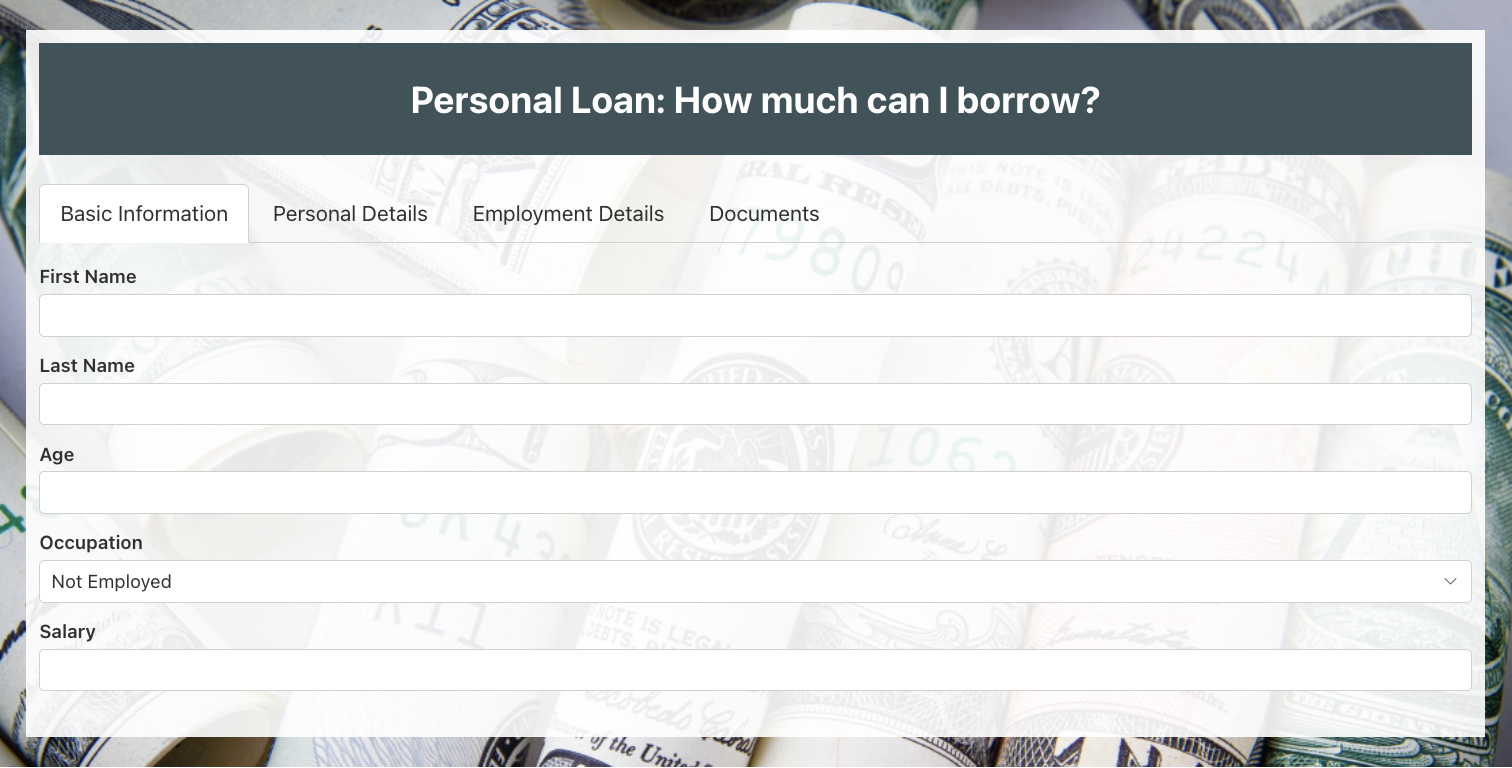
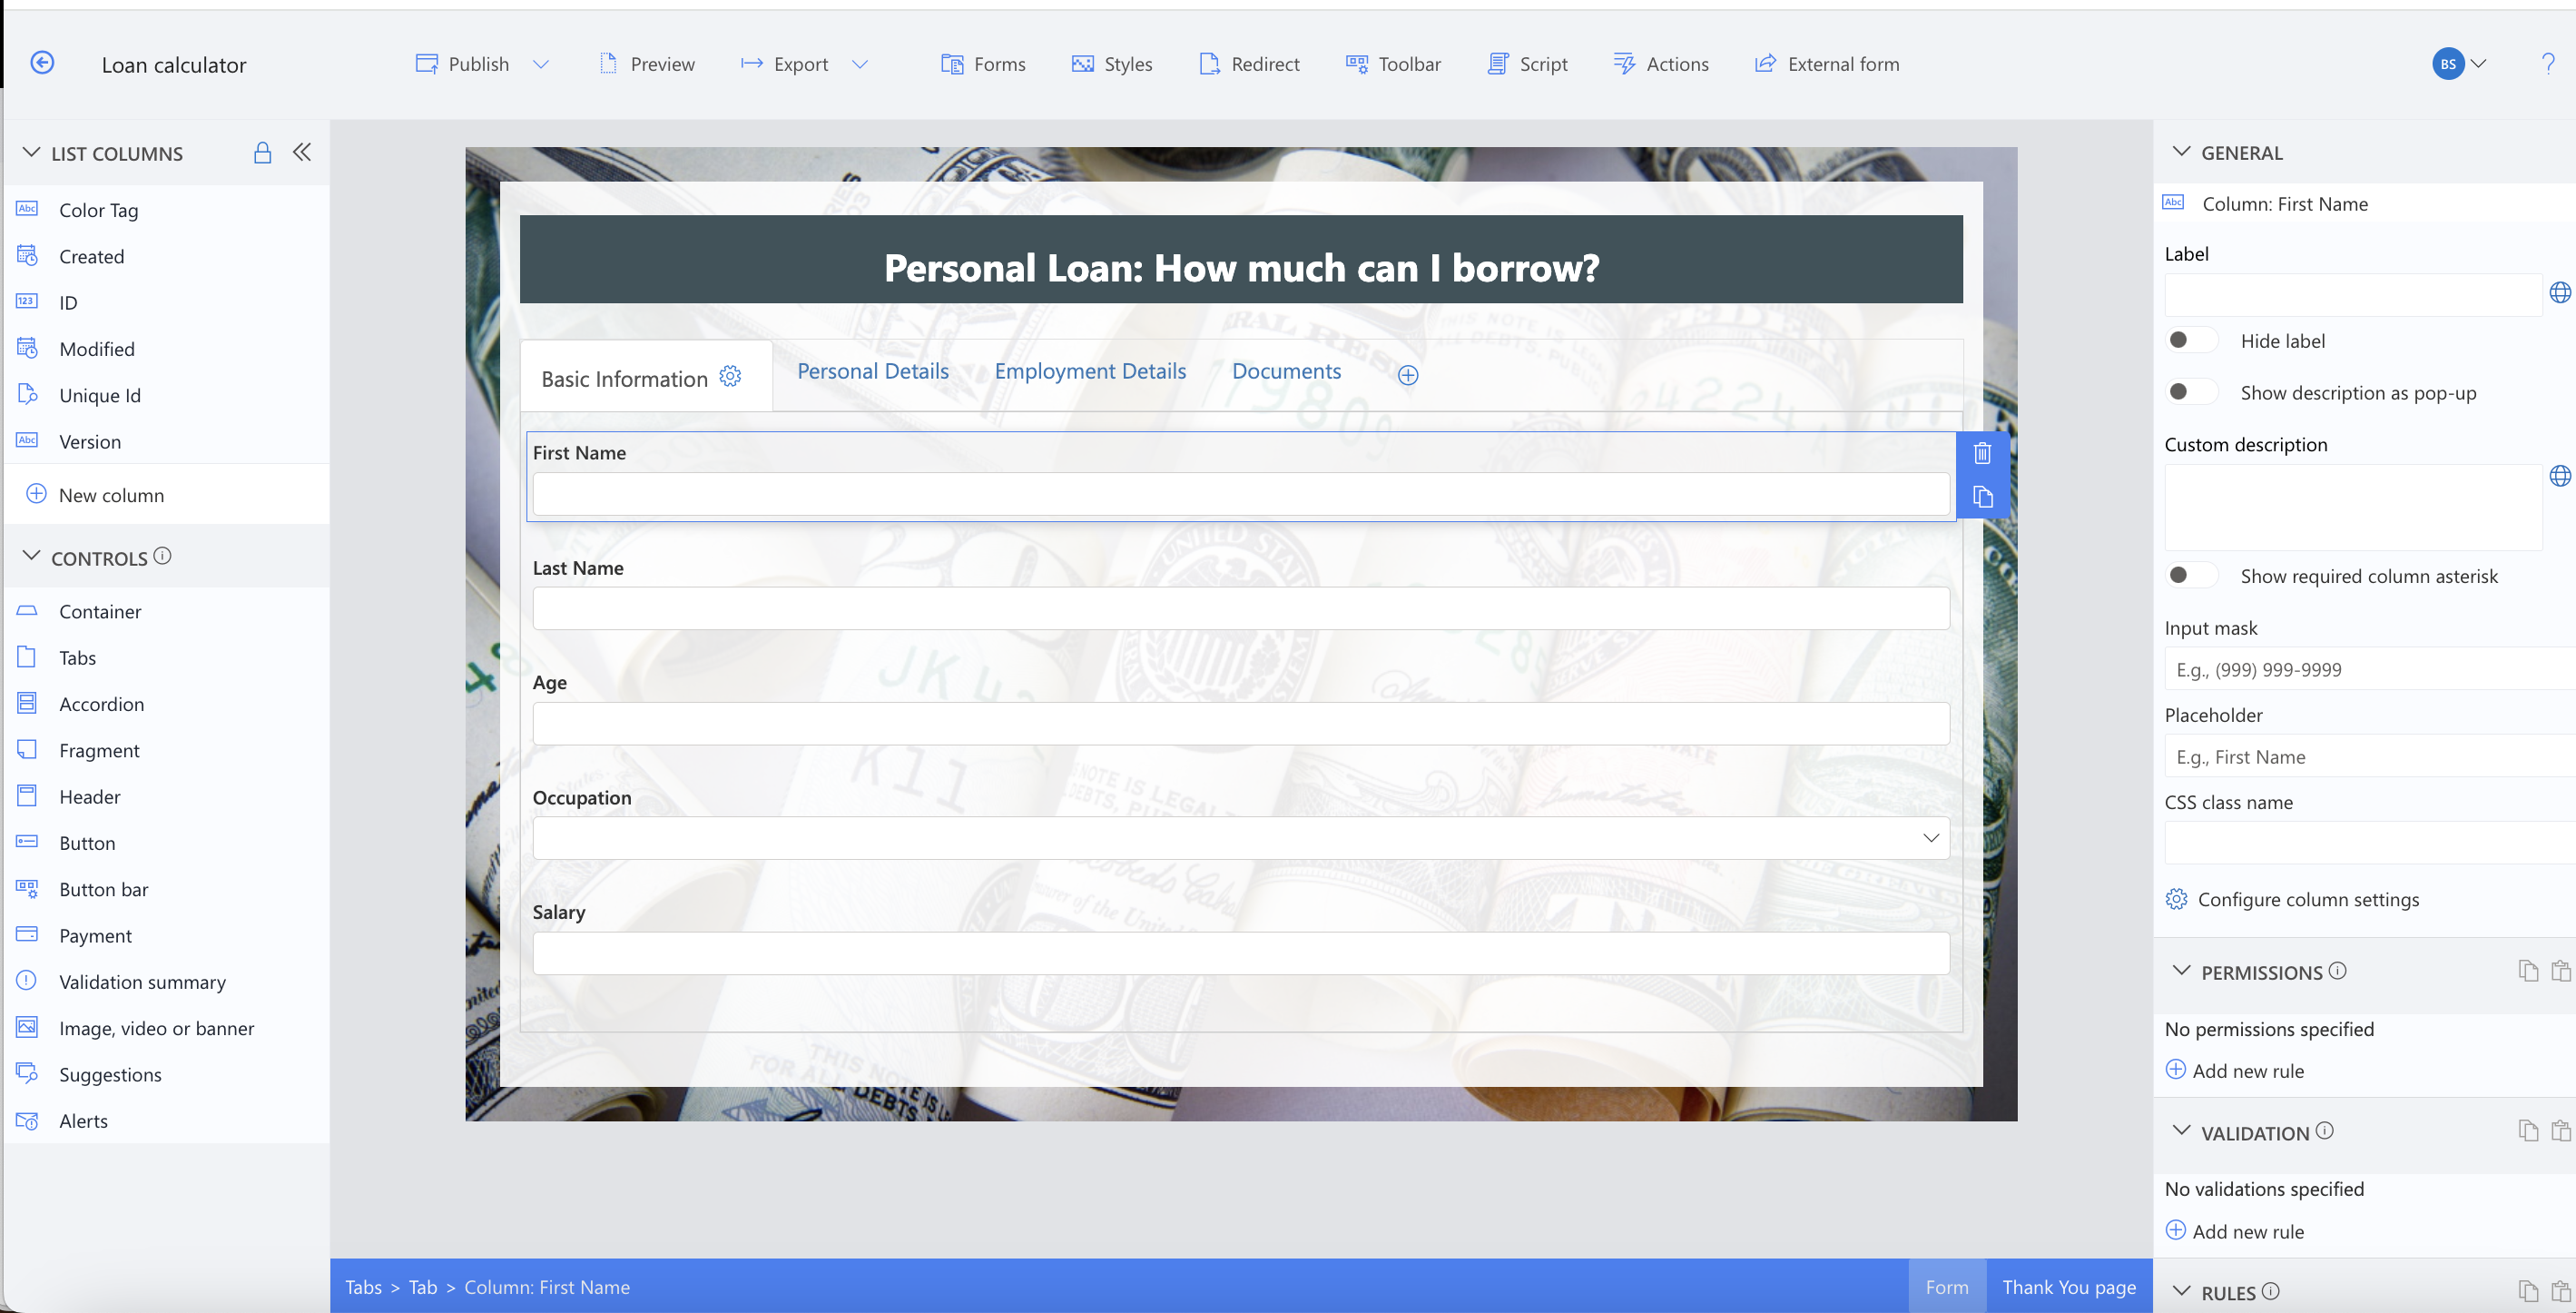
Step 1: Designing the Form
Using Ultimate Forms: Forms, I created a user-friendly form with a sleek design. The Form Designer tool allowed me to customize the page layout using built-in themes and custom CSS options. With a few clicks, I adjusted the colors, margins, and padding to align with the branding.
To manage multiple input fields efficiently, I implemented tabbed navigation. This approach enhances usability by breaking down the form into logical sections. For forms with an extensive number of fields, accordion views can also be used as an alternative.
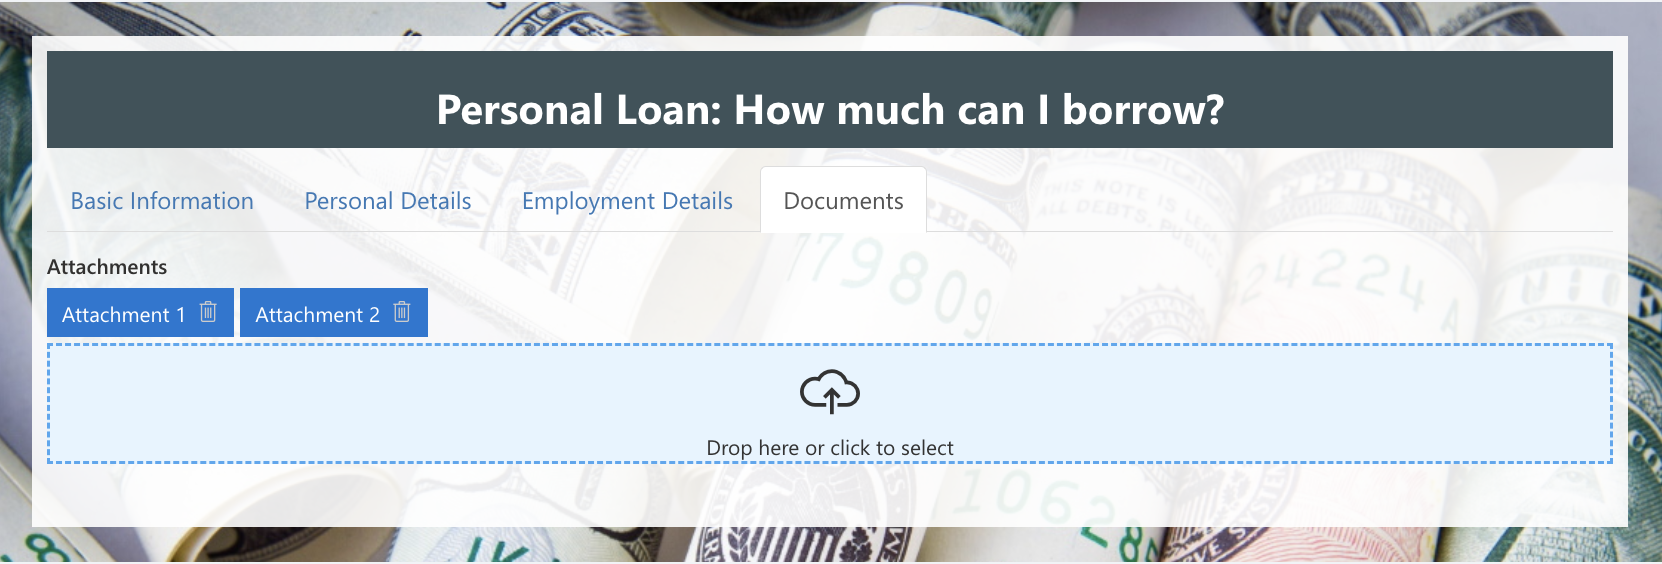
Step 2: Adding a Document Upload Feature
A dedicated document upload tab was added to the form. This feature allows users to drag and drop files, such as proof of income, identification documents, and other necessary paperwork. Ultimate Forms integrates seamlessly with SharePoint, ensuring efficient document management.
Step 3: Implementing Validations and Permissions
A robust form requires proper validations and permissions to ensure data accuracy and security. Infowise Ultimate Forms provides an intuitive interface for defining rules. I added:
- Field Validations: To ensure users enter correct information (e.g., numerical values for income and loan amounts).
- Role-Based Permissions: To restrict access to sensitive fields based on user roles.
- Form-Specific Rules: Different validation criteria for Create, Edit, and View modes.
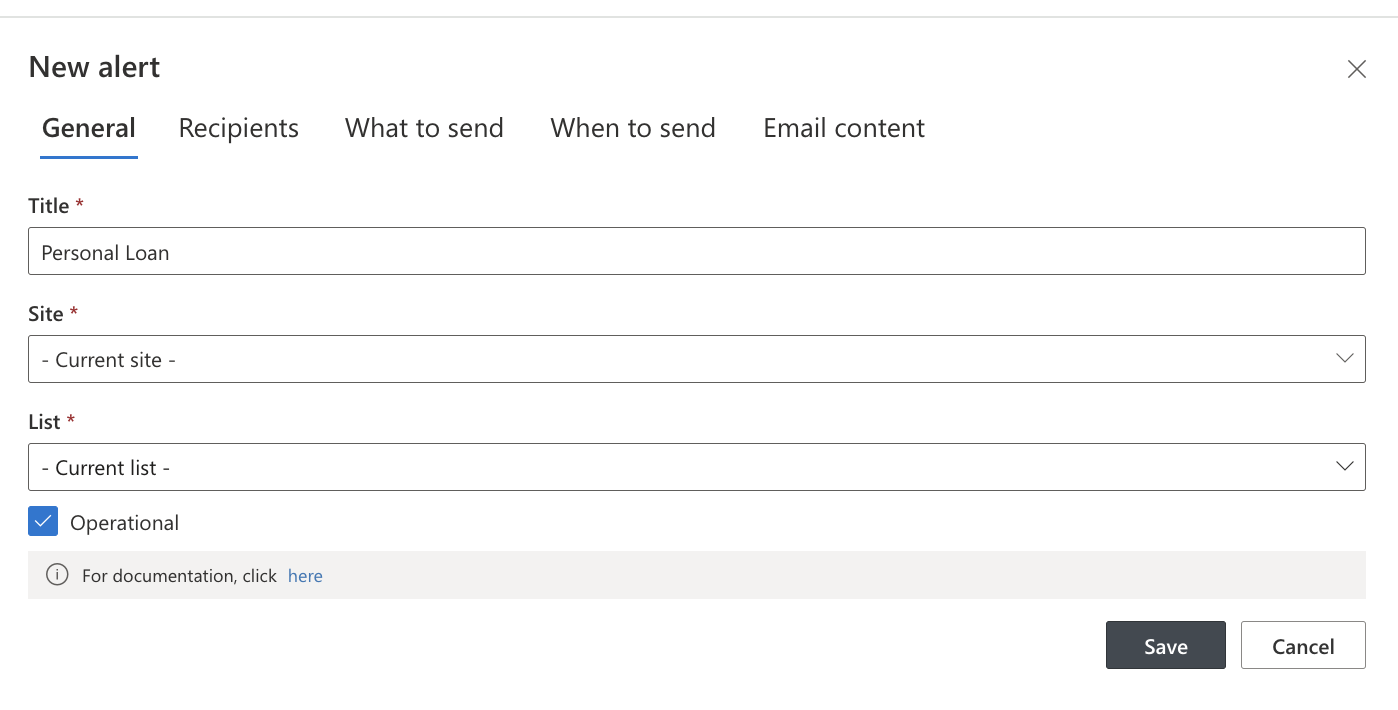
Step 4: Automating Email Notifications
Once the form was completed, I configured automated email alerts to notify applicants when their request was in progress. Without Ultimate Forms, setting up alerts would require additional tools like SharePoint Designer or Microsoft Power Automate. However, Infowise simplifies the process with an integrated alert system, featuring a dropdown-based UI for quick configuration.
The system allows me to:
- Define alert criteria (e.g., notify the applicant when a loan request is submitted or updated).
- Customize email templates with dynamic data from the list.
- Track and manage previously set alerts with ease.
Advantages of Using Infowise Ultimate Forms:
After completing the Personal Loan Calculator, I realized several advantages of using Ultimate Forms: Forms over traditional form-building tools:
- Ease of Use: No coding is required, making it accessible for non-developers.
- Seamless SharePoint Integration: Works flawlessly within the SharePoint environment.
- Customizable UI: Allows personalized form design with CSS and branding options.
- Powerful Workflows: Automates approvals, notifications, and validations.
- Document Management: Enables easy document uploads and organization.
- Mobile Optimization: Ensures a responsive and user-friendly experience on any device.
Conclusion:
Building a Personal Loan Calculator with Infowise Ultimate Forms proved to be a seamless and efficient process. By leveraging its powerful features, I was able to create an intuitive, functional, and mobile-friendly loan management system within SharePoint.
If you haven’t tried Infowise Ultimate Forms yet, I highly recommend exploring its capabilities for form creation and automation. Have you built any forms using this tool? Share your experience in the comments!