
Dear Readers,
Introduction:
Loan processing is a critical aspect of financial management, requiring efficiency, accuracy, and automation. Traditional methods often involve manual approvals and extensive paperwork, which can slow down the process. However, with modern tools like Infowise Ultimate Forms, loan application management can be streamlined with minimal effort.
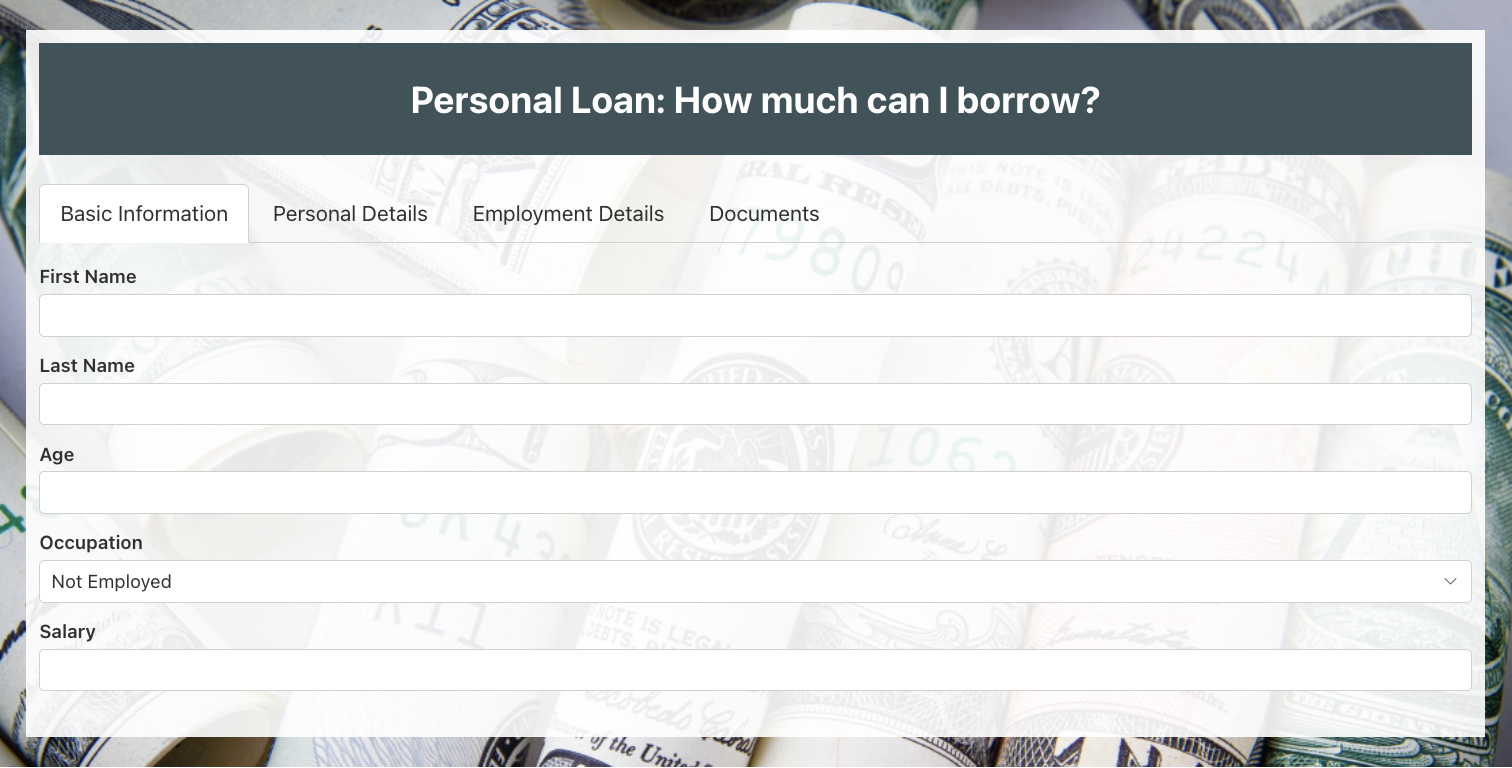
My loan calculator, which I worked on last week, has been a great success. Everyone appreciated how easily and quickly I could create a form with a large number of fields. All thanks to Infowise Ultimate Forms! Read more about it here.
Adding Business Logic and Automating the Process:
As promised, today I will document the next steps for my calculator.
Once I completed the form with multiple fields, the stakeholders wanted to incorporate business logic and automation. After a quick discussion, we decided to implement auto-approval for loans meeting specific criteria. If a loan application did not meet the criteria, it would need to be manually approved or rejected by an approver. Once the decision was made, the loan requestor would receive an email notification about the status of their application.
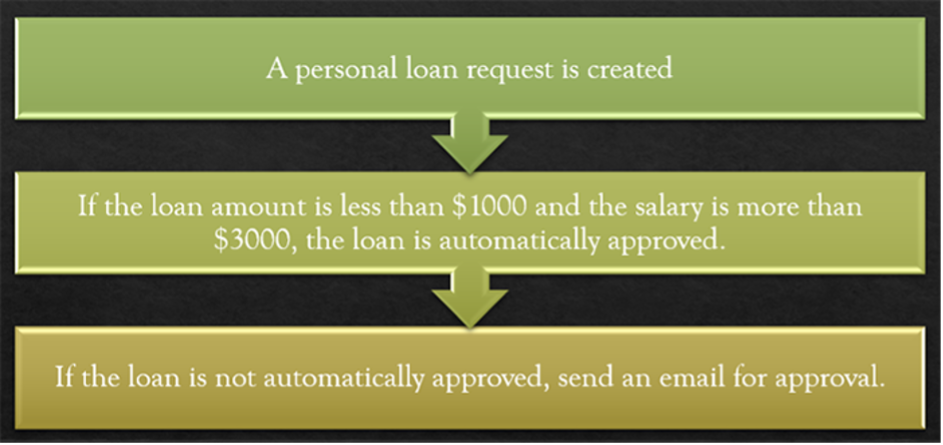
Auto-Approval for Personal Loan:
Auto-approval allows a request to be approved automatically if it meets certain conditions. In this case, we had two conditions:
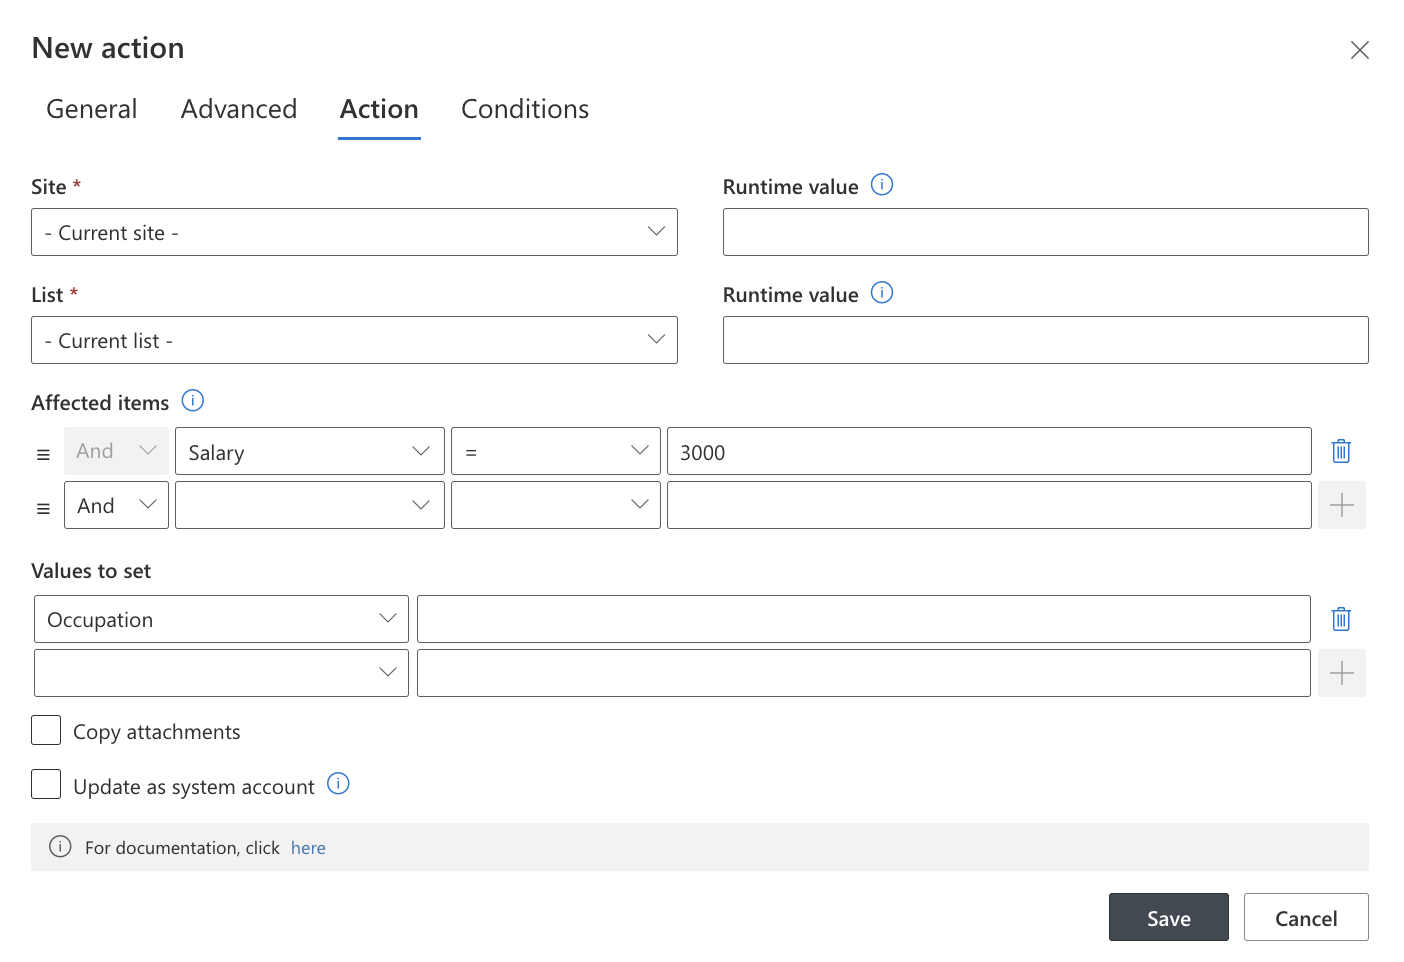
- The loan requested is less than $1,000
- The requestor’s salary is more than $3,000
Additionally, the same process needed to run if the application was modified.
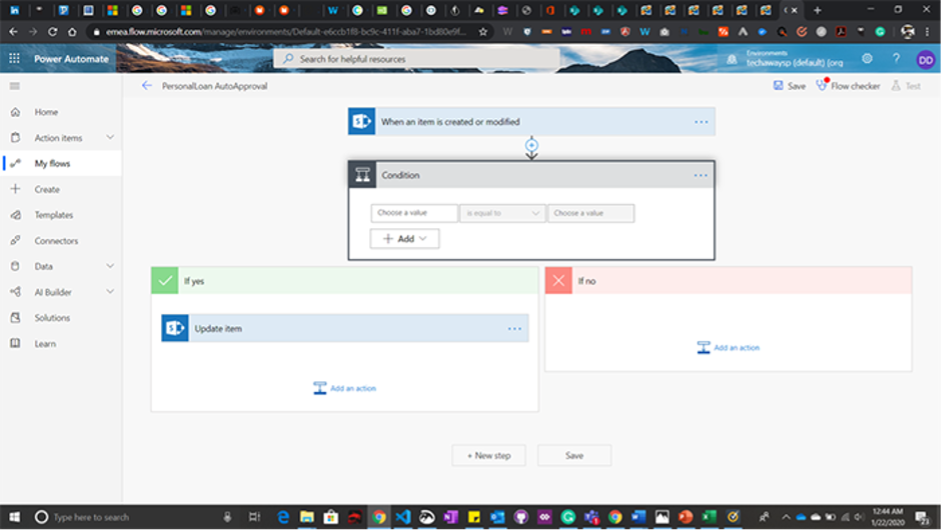
I decided to try Microsoft Power Automate (formerly known as Flow). I logged into the Power Automate Portal and created a Flow.
However, when I presented the completed Flow to my business team, they found it difficult to understand due to its complexity with connectors and logic. Any small change required going back to the developers.
So, we turned to Ultimate Forms: Forms for business logic. I was amazed at how intuitive and user-friendly it is. The interface is clean and easy to navigate, with checkboxes and tabs simplifying the process.
Business Advantages of Using Ultimate Forms: Forms:
1. Cost and Time Efficiency
Reducing manual work means reducing costs. By automating loan approvals, businesses save hours of processing time. Employees can focus on higher-value tasks rather than spending time on repetitive manual approvals.
Ultimate Forms: Forms eliminates the need for complex coding, enabling business users to create automation workflows without relying on IT teams. This significantly reduces development time and costs.
2. Increased Accuracy and Reduced Errors
Manual processes are prone to human errors, such as incorrect data entry or missed approvals. Ultimate Forms: Forms ensures accuracy by setting clear rules and validations. The system automatically checks for missing or incorrect information before processing the loan application.
By implementing automated validation, businesses can avoid costly mistakes and ensure compliance with company policies and regulations.
3. Faster Decision-Making
With automation, loan approvals happen in real-time. Instead of waiting for manual reviews, eligible loans are auto-approved instantly. This speeds up decision-making, leading to improved customer satisfaction and a more efficient loan processing system.
A well-structured approval system also ensures that decisions are made consistently, reducing bias and enhancing fairness in the approval process.
4. Better Compliance and Audit Readiness
Financial institutions and businesses need to comply with regulatory standards. Ultimate Forms: Forms provides built-in tracking and logging features that record every action taken during the loan approval process.
This makes it easier to generate audit reports and ensures transparency. If any discrepancies arise, the logs provide a clear record of who approved or rejected a loan and why.
5. Enhanced User Experience
A user-friendly interface makes all the difference. With Ultimate Forms: Forms, setting up automation requires no coding knowledge. Business users can easily configure workflows, define conditions, and customize actions without extensive training.
The platform also offers mobile-friendly solutions, allowing approvals to be managed from anywhere, improving flexibility and responsiveness.
Key Features That Made a Difference:
1. Tutorials and Documentation
The application provides a vast number of tutorials and documentation on the right-hand side of the screen. I even found a video tutorial that explained the process step by step, making my work much easier.

2. Extensive "Run on Events" Options
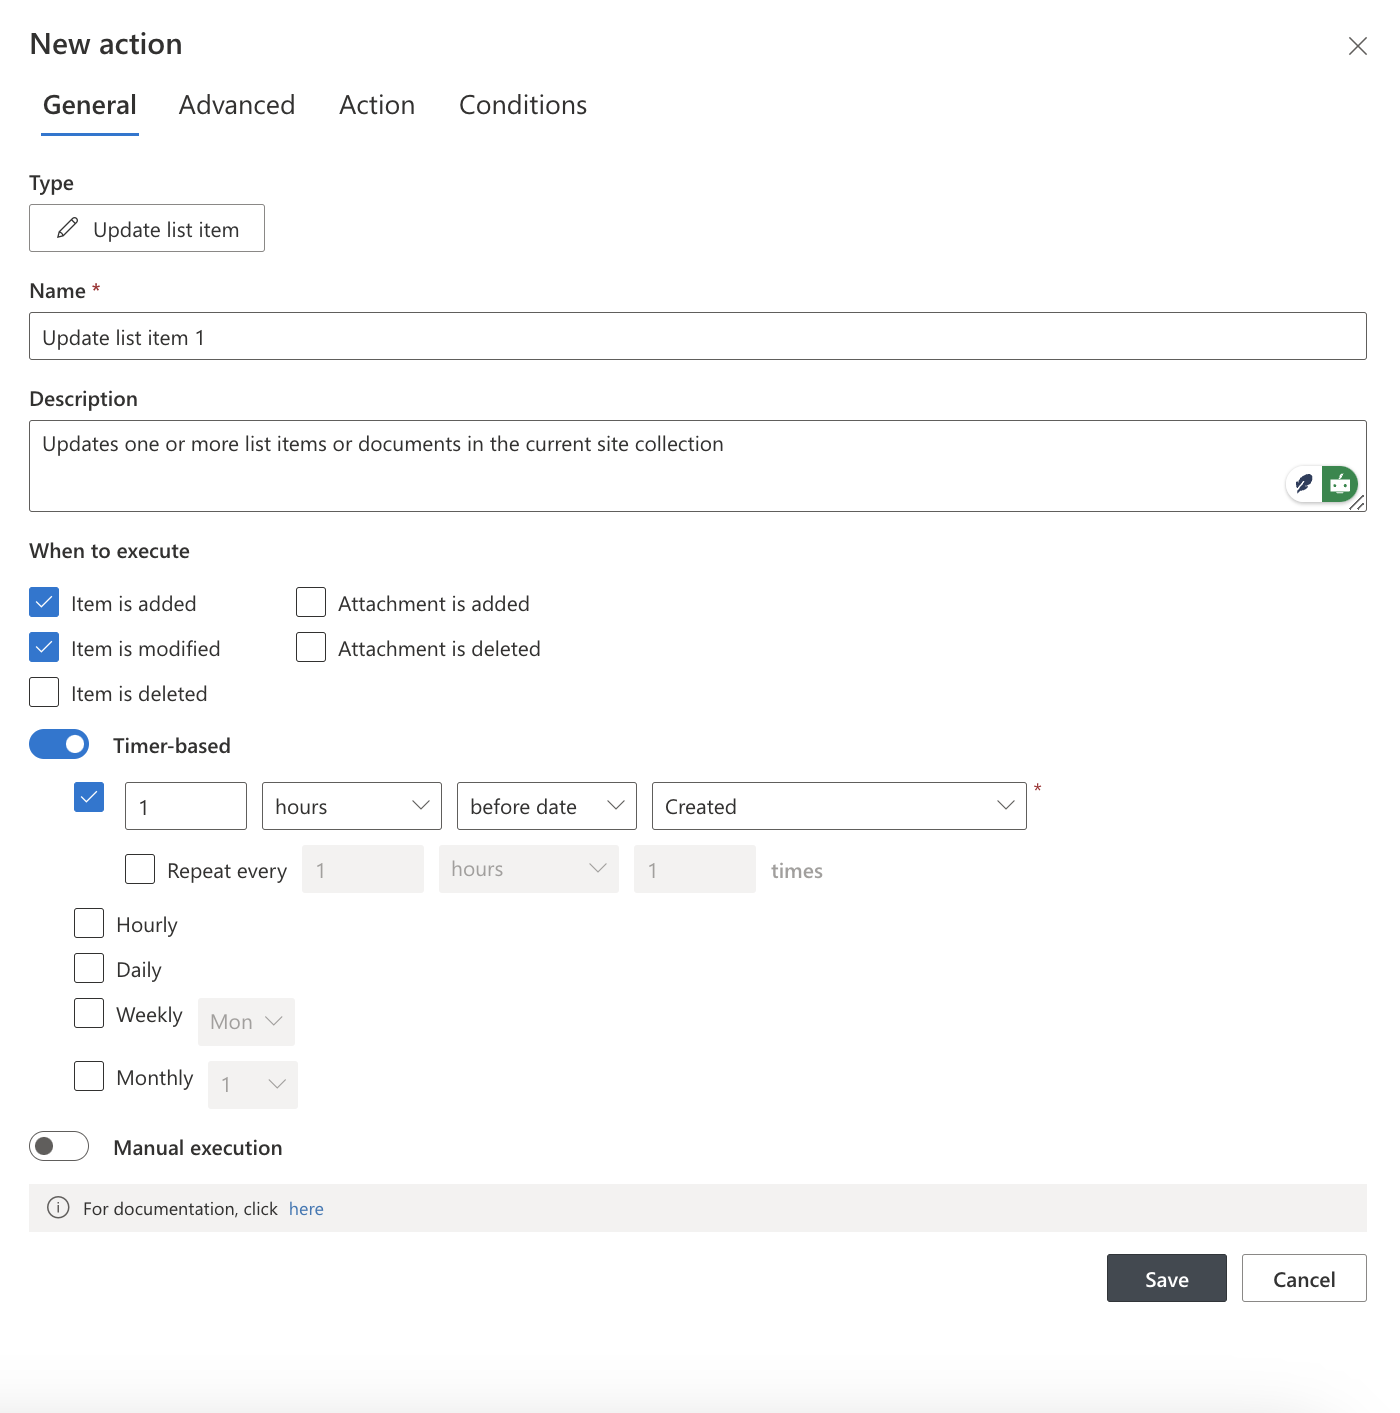
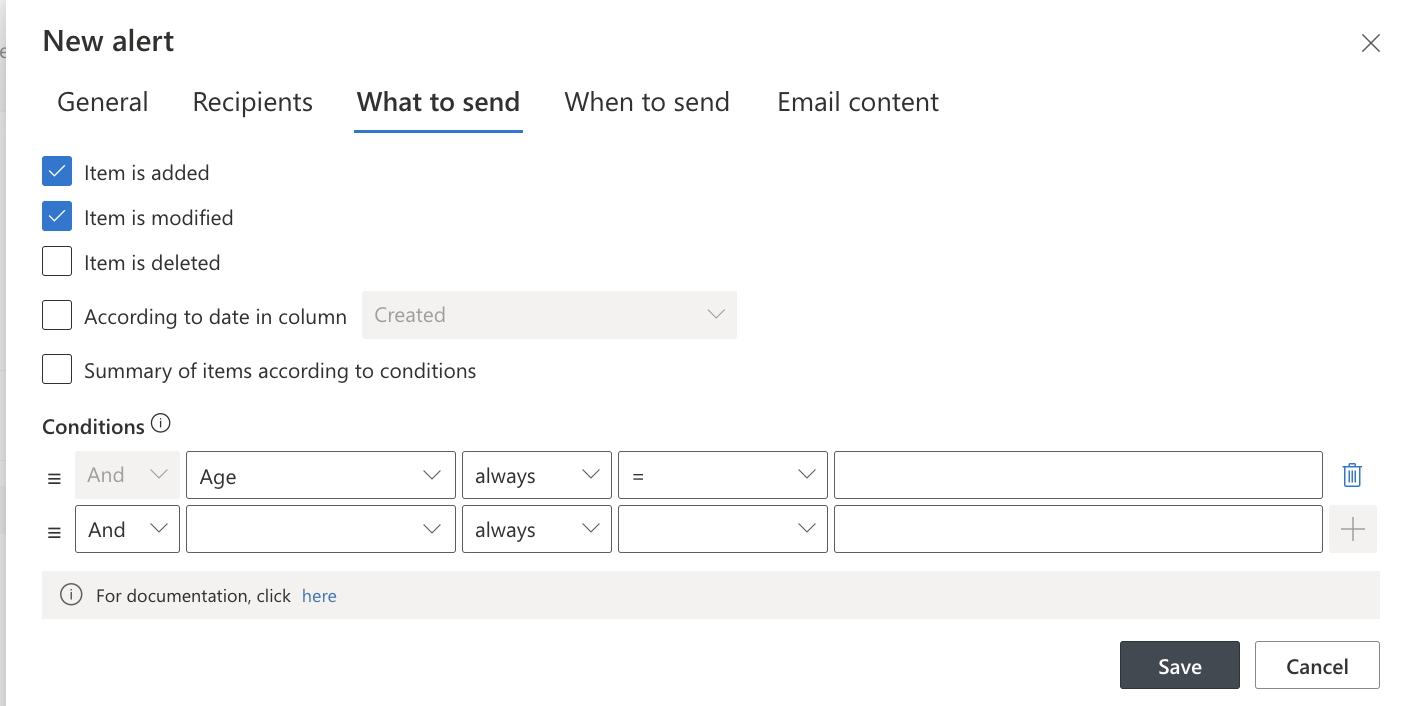
Ultimate Forms: Actions can be triggered based on specific events, such as item creation or updates. With Ultimate Forms: Forms, I could select multiple triggers, allowing me to execute the same action on different occasions (e.g., Item is added, Item is modified, Item is deleted), thereby reducing repetitive work.
One of the standout features was the ability to trigger actions when an attachment is created or deleted. This helps track important changes, such as reviewing new attachments or detecting accidental deletions.
Timer-based events were another valuable feature. They function similarly to a Timer Job, allowing scheduled actions such as daily report generation.
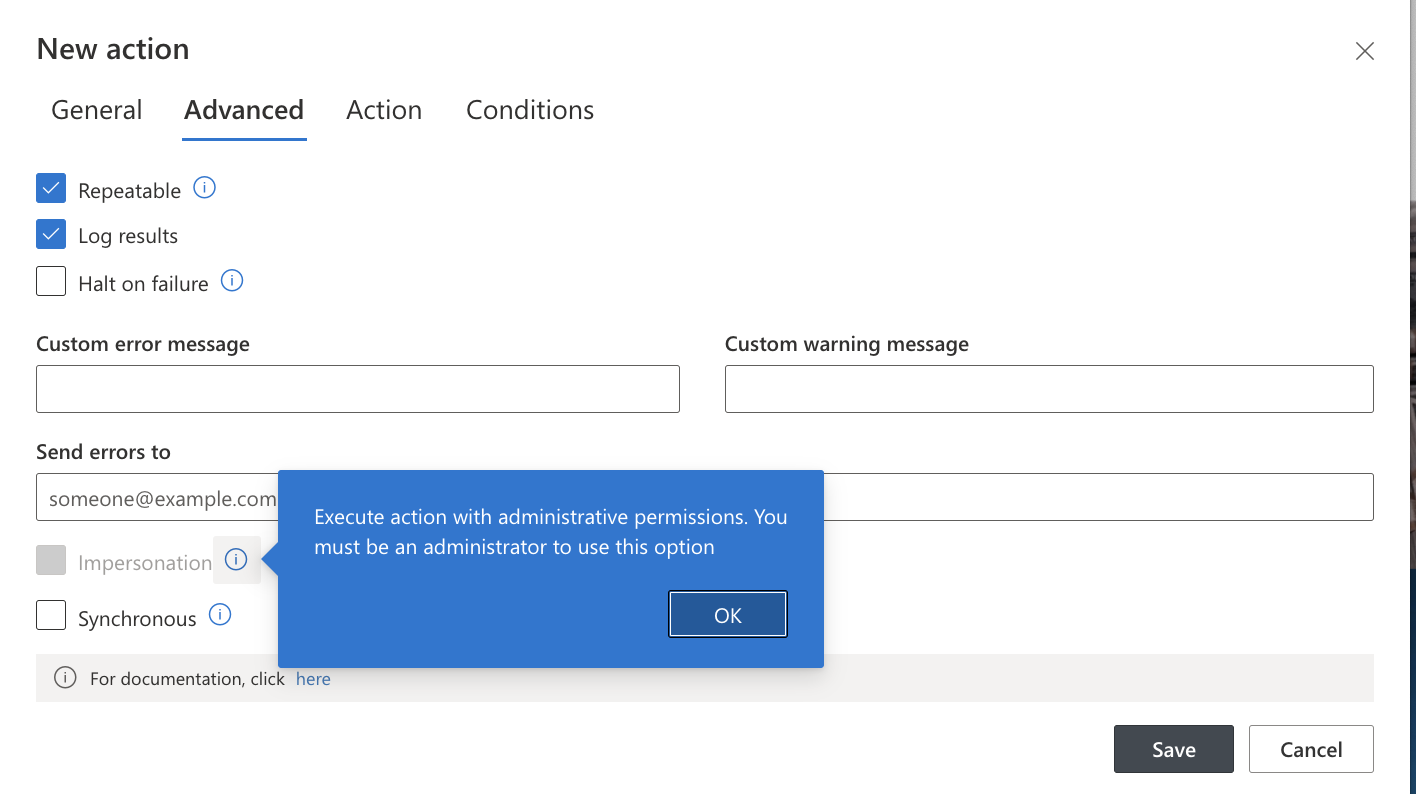
3. Advanced Settings
The “Advanced Settings” tab offers more customization options, each with detailed explanations. Clicking on the "question mark" icon provides further clarification.
Some key options include:
- Manual execution: Ideal for testing workflows.
- Repeatable execution: Ensures an action runs every time a new item is added.
- Logging results: Useful for debugging.
- Error handling: Stops the process and notifies the responsible person when an error occurs.
- Permission management: Allows execution of actions even for users with insufficient permissions.
4. Action Settings: Defining Actions with "AND" and "OR" Operators
Once I set the trigger events and configurations, I defined the conditions and outcomes. Ultimate Forms: Actions allows selecting sites and lists, then specifying one or more columns using the "Values to set" option. The values can be static text or pulled from different columns.
To define conditions, I used the dropdown menu to select columns and combined them using “AND” or “OR” operators.
A word of caution: Be mindful when setting up conditions. The Infowise Tutorial provides guidance on how the system interprets them.
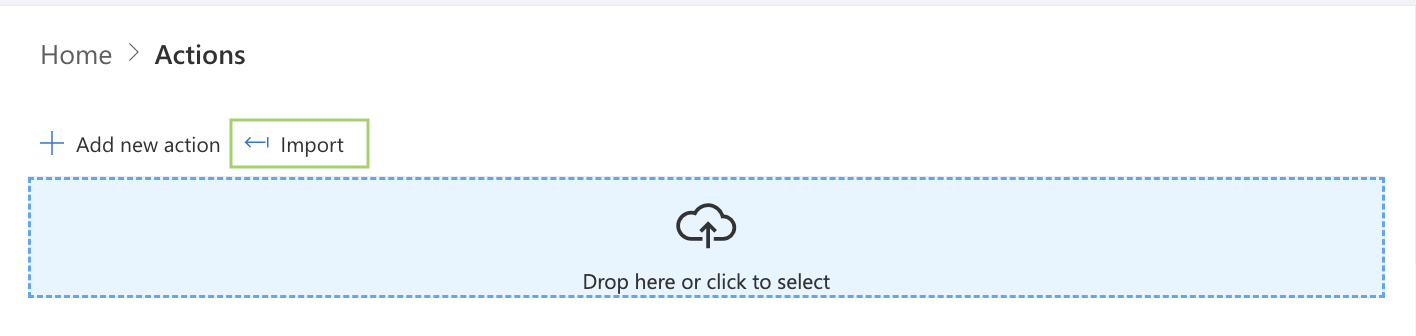
5. Importing Predefined Actions
Ultimate Forms: Actions also support importing pre-existing actions. If I had already created a similar action before, I could reuse it for my current workflow.
With all actions in place, auto-approval started working seamlessly. My business team could now modify conditions without relying on developers.
6. Email Approval for Personal Loans
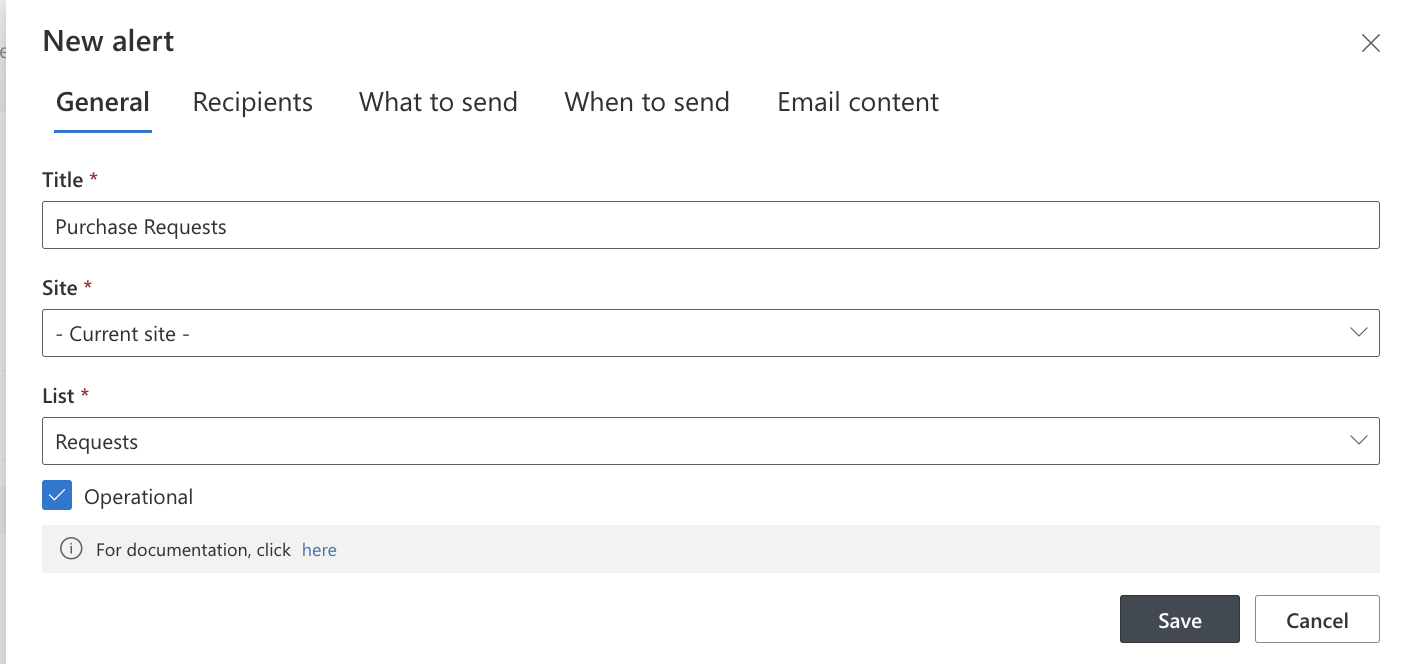
For loan applications that were not auto-approved, we needed an email notification system for approvers. I leveraged the Ultimate Forms: Alerts component, which I had previously used for sending emails. I simply added the conditions, and the emails were triggered accordingly.
Calculating Summary and Generating a Tracking report:
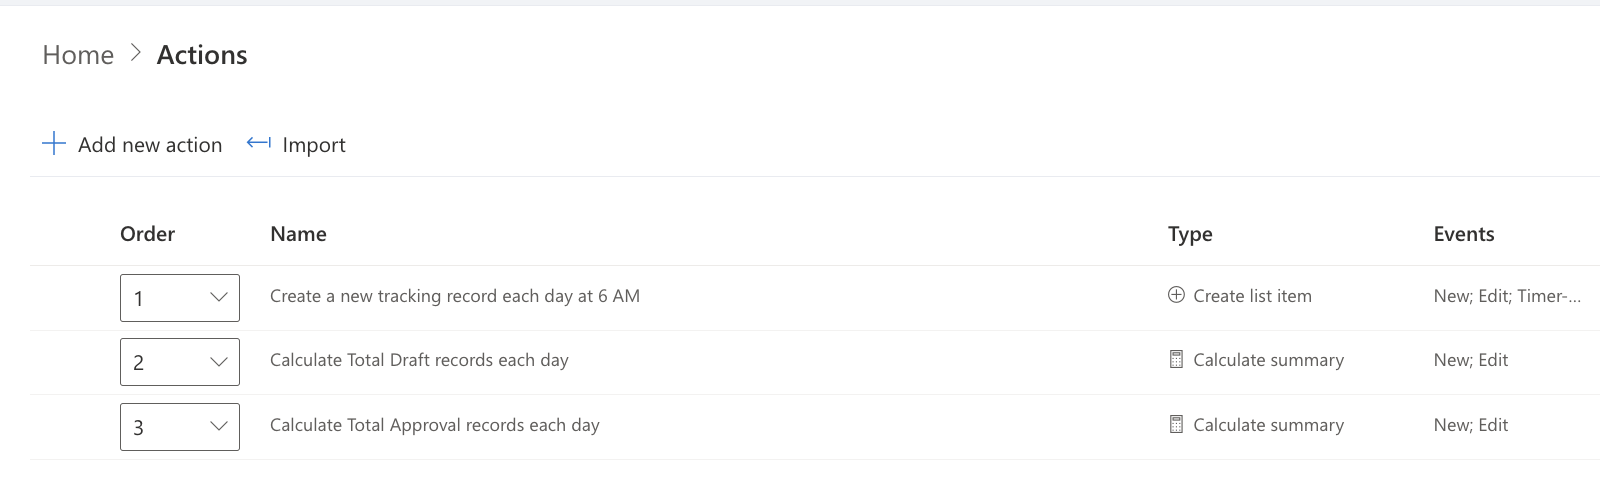
Once the approval system was in place, I wanted to generate an Approval Tracking Report. I used Infowise Ultimate Forms: Actions to create a list and set up three actions:
- A timer-based event that creates a new record daily at 6 AM, ensuring the next steps update the summary correctly.
- An action that updates the number of loan requests every time a new request is added.
- An action that tracks approved loans, enabling us to analyze trends over time.
These actions allowed us to generate a tracking report, helping us understand the volume of loan requests and approvals. We could also visualize trends using graphs and charts.
Conclusion:
Automating loan approval processes with Ultimate Forms: Forms has proven to be a game-changer. By eliminating manual approvals for qualifying loans and streamlining notifications for pending applications, businesses can save time and improve efficiency. With its user-friendly interface, extensive customization options, and automation capabilities, Ultimate Forms: Forms stands out as a powerful tool for business process automation.