UPDATE 6-Dec-2024: We are forced to make a change to require Full Control at installation. This is due to a security limitation in SharePoint that prevents the app with less than Full Control permissions from reading SharePoint group's members. As this feature is heavily used almost everywhere, it would be an disproportinate reduction of capabilities to pursue Manage permissions only. This blog article has been updated to remove references to Manage permission.
Ultimate Forms is a SharePoint add-in and as such requires access to your SharePoint Online tenant to do its magic. As it is capable to doing basically anything inside SharePoint as well as in other 3rd party applications, the access levels it requires are bound to be quite high. We take the security of your data as our highest priority. We put a lot of effort into creating the most comprehensive implementation possible at the current technological state of the art.
Generally, there are 3 types of permissions Ultimate Forms uses:
- Forms and web parts - delegated permissions of the current user obtained by the SharePoint Framework, meaning that the form can do what the user can do and there is no ability to gain access to anything beyond.
- Ultimate Forms interface - delegated permissions as well (albeit obtained via a special Entra ID enterprise application added to your tenant when Ultimate Forms is installed). Here as well the user is only allowed to do what they are granted access to in SharePoint itself. The same permission is also used in Print utilities and in manually-triggered Actions.
- Backend features - such as event or timer-driven Actions, all Alerts, Import, Item ID, Signature validation and Associated Items Summary calculations. As these happen behind the scenes without user interaction, we are using Application level permission, meaning permissions obtained by the application itself in its own name, without delegating permission of any actual user.
Up until now, Application permissions were tenant-level Full Control permissions, due to the fact Microsoft didn't offer a more granular approach. That has changed and now we are able to assign permissions to specific site collections. Which mean that when one department installs Ultimate Forms on their site collection[s], there is no way for the app to access other, unapproved site collections.
How Does It Work?
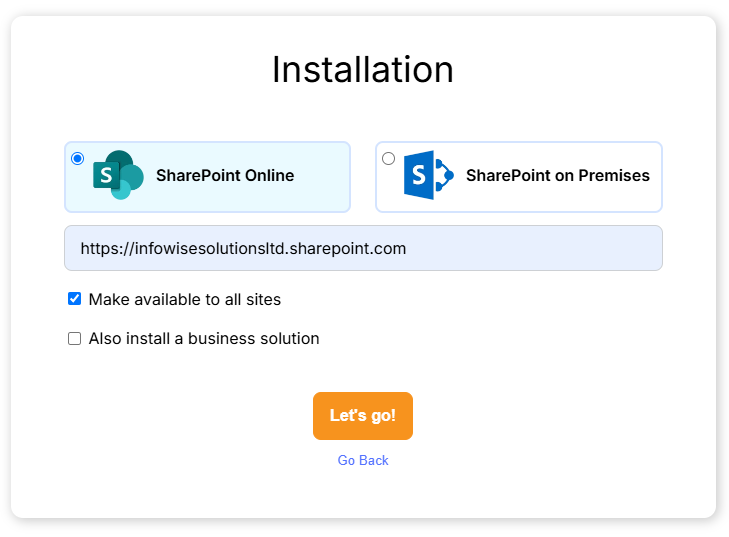
When you run our Installation Wizard, we will ask for the permissions and automatically grant permissions to the site collection based on the site URL you provided to the installer. Other site collections will remain inaccessible. If you want to extend permissions to additional site collections, you can do one of the following (in both cases you must have Full Control permissions on the site collections in question):
- Run the Wizard again, providing one of the site URLs of the additional site collection.
- If you initially installed the app as available to all sites, click on Design on one of the lists in the site collection and then approve the site collection access directly from the warning banner.

NOTE: There are actually two pop-up windows that appear when you grant access. Make sure your browser doesn't block the second one. There will be a notification regarding pop-ups being blocked in the right-hand side of the address bar in your browser. Please click it to allow pop-ups from the site and click on Grant again. The second window normally doesn't require user interaction and will quickly close on its own.
Existing Customers
The change went into effect on November 4th 2024. Customers who installed Ultimate Forms beforehand, will by default keep their existing tenant-wide Full Control permission and may ignore the change altogether. If you do want to implement it in your environment, do the following (preferrable outside of business hours due to a brief loss of authorization):
- Delete the Enterpise Application
- Go into Entra ID
- In the left side navigation go to Application -> Enterprise Applications
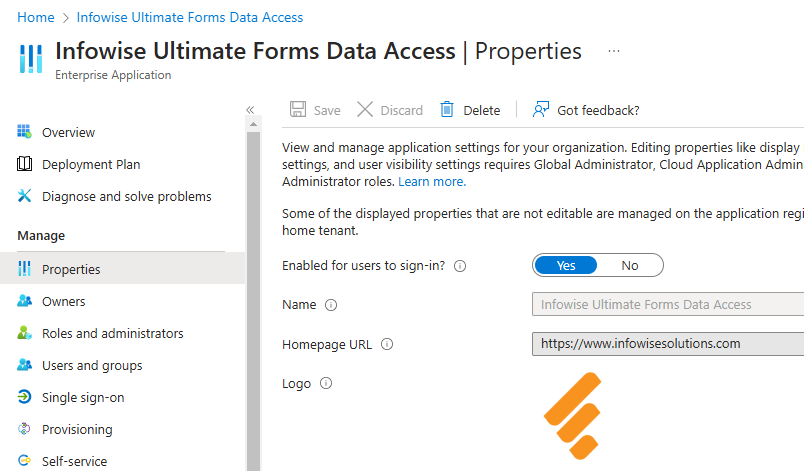
- Locate Infowise Ultimate Forms Data Access application
- Open it, switch to the Properties section, then delete it

- Run Installation Wizard
- Go to our website as a Global Administrator of your tenant
- Click on Try Now Free in the top right corner of the page
- Pick Installation and enter your site URL

- Grant access in the pop-up window[s]
- For any additional site collection, you can either run the Wizard again, or, provided that you made the app available to all sites, simply click on Design and approve directly from the app
As you can see, the change can be very important, especially for larger enterprise environments, but implemented in the way that helps minimize any disruptions for existing installation.
