For the past week, I played around with the Infowise Ultimate Forms and trust me it justifies its name. At every step, it gave me a vast number of options that helped me to create forms and processes faster, without writing even a single line of code. Once I shared how easy it is to use Infowise Ultimate Forms, my manager asked me to create a demo application.
Being a part of a SharePoint Consultanting company, one of the pain-points that my management wanted to solve is Expense Claim. Currently, every time a consultant is placed in a job in a different company, he needs to submit an expense claim form. The consultant chooses the type of expense and the cost incurred. He then gets the signature of the line manager and submits the form to the company HR.
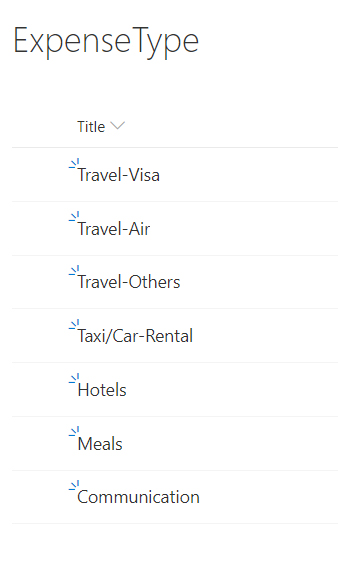
To convert the same to a paperless process, I started with the Expense claim form. First, I needed a list of the type of Expense Claim. I went ahead and created an Expense Type List. I keyed in the values and created my Expense Form.

I added the fields like Title, Expense Type and Total Amount. My next step was to add the Expense types as a dropdown. However, I wanted it to be populated from a different list.
Instead of trying the default SharePoint lookup column, I started exploring the Ultimate forms app. I found an option to create a connected lookup column. I clicked on the Connected Lookup option, under the columns folder and could easily create a dropdown with options from any List through an easy to use UI.
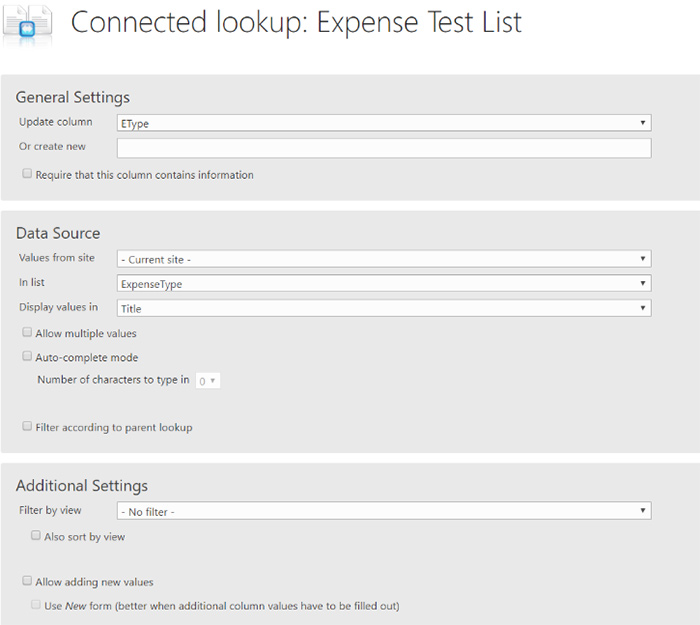
The best part is that
- I can choose any site; I have permission to fetch the data for lookup.
- I can choose multiple values and create a multi-value dropdown.
- I can have an autocomplete, just like when you type in google, and it gives you options. I can also define the number of characters that I need to type in for the options to get populated.
- I can define filter easily and sort the results based on the views I have for the list.
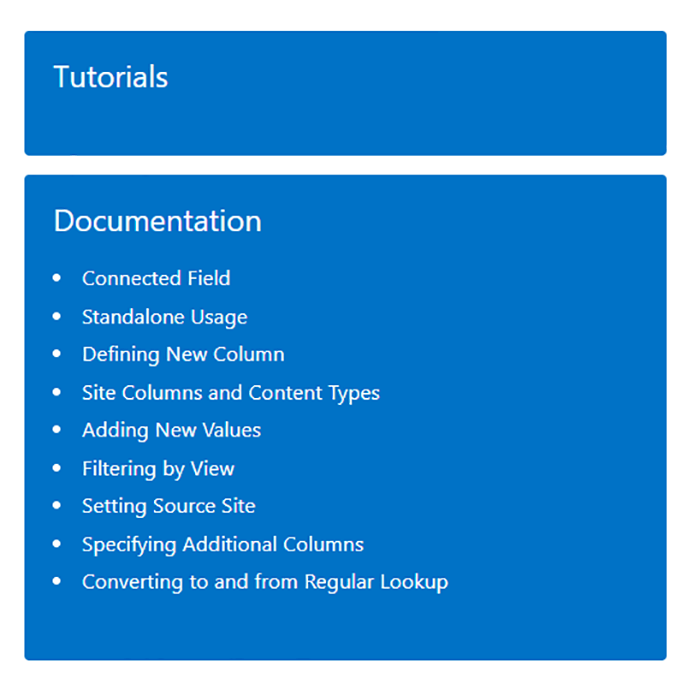
The Forms also came with very descriptive tutorials, explaining every feature. It clearly states how to use the lookups to the best of their ability. I created an autocomplete Expense type field, which fetches values from the Expense Type list in less than 5 min.
It was really wow, and I only used my browser to create a form functionality that otherwise would take me at least a few hours to develop. It's intuitive, and it doesn’t take much time to understand the process. Moreover, with a click of a button, I can view my results, making its development process genuinely agile.
Once done with look-up, I wanted to try a few things. Firstly, I needed a good UI. I want my forms to look good and have validations and permissions. Secondly, I wanted to add an approval process, send an email once an expense claim has been created.
Like always, instead of starting with the tutorial, I started with the application and started editing the form. I had created a tabbed form before (check it here), and I knew it's very easy. (All you need is to drag and drop.)
I was more concerned about the permissions. I didn’t want the user to edit the type of Expense once he has created an expense item. That meant I need column-level permission only on edit and not on a new form.
I selected the expense type and found exactly what I was looking for. Column level permissions can easily be defined as Ultimate Forms.
I can choose
- The type of permission (Read, Write or Hidden) I need for the column.
- The users or the group of users who can access the forms
- The type of Forms (Edit, New or Display), where the permission will be set
- And also additional conditions that I might need for the given column
To make it easier I can add
- Multiple Permissions
- Multiple Validations
- Multiple Rules
Once completed, I just published it.
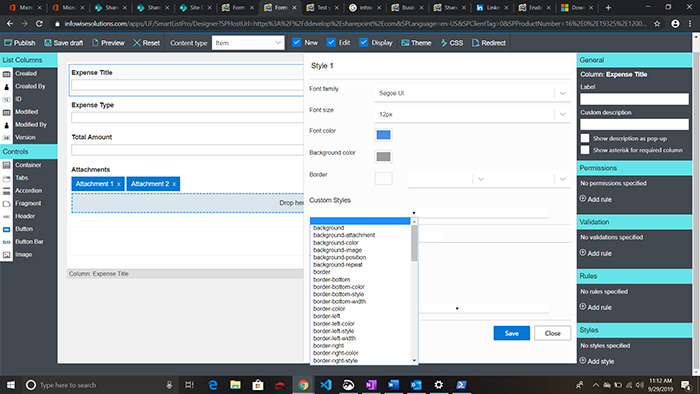
Moreover, it is also straightforward to change designs. I enjoyed trying out the various combinations of colours and fonts for my forms. It also allowed me to add custom CSS to make my forms look attractive.

Finally, once I was done with my design, I wanted to complete the entire process by adding an email notification to the line manager. I started by not using my SharePoint designer to create a custom workflow. Instead, I clicked on the alerts under Business Logic.
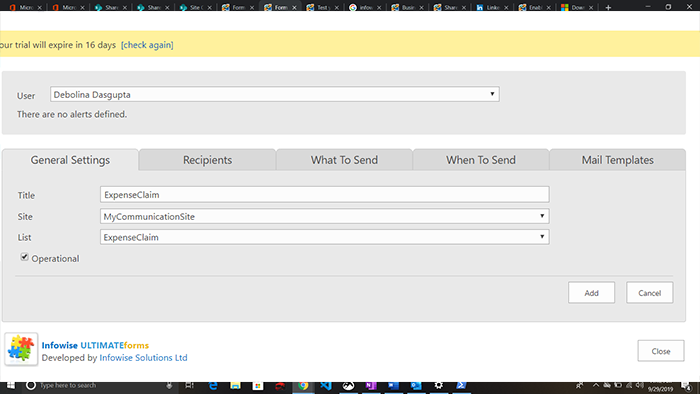
The alerts page defined the options that I needed to create an email notification. It also came with not only easy to use interface but also a tutorial and documentation. With a few clicks of a button, I could create an email notification. It also allowed me to define a template for my email. I could easily create a dynamic email by adding columns values from “columns in the list.”
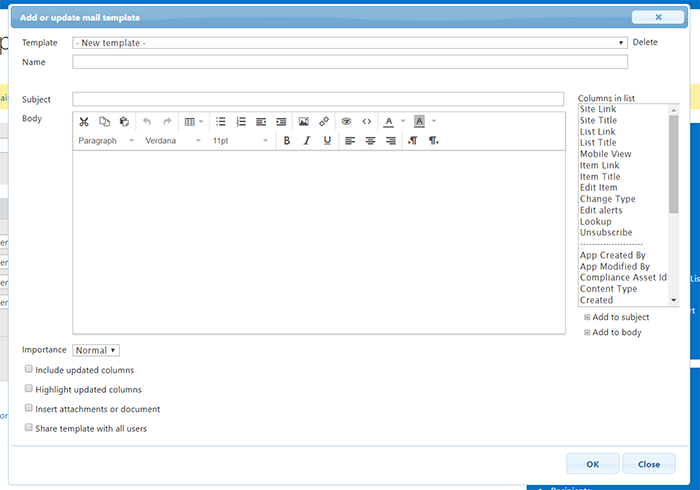
It’s incredible how many different options are available for every process. It eliminates not only the need to use custom code but also any other 3rd party applications. I could transform the entire business process into an easy and intuitive online form with the click of a few buttons, making the whole process for Expense Claims simple.
I also learnt that I could easily create graphs and charts using the Ultimate forms app. Follow me as I explore the process of creating graphs and charts.
Infowise
infowise is a leading provider of forms and processes solutions for the Microsoft SharePoint platform. As authors of productivity and agility software, we're pleased, yet not surprised that global financial businesses, Healthcare, Technology, Education and Transportation services have adopted our tools in their daily productivity cycles. Our flagship package Infowise Ultimate Forms is an integrated suite of SharePoint components that enables users to create advanced, dynamic forms, sophisticated business processes and striking visualization.
Ultimate Forms supports all Microsoft SharePoint platforms, including Microsoft 365 and all on-premises SharePoint versions.

