Print templates are managed from Print screen accessible from the Design page. You must have permissions to edit list settings.
Print Templates
This section lists the existing templates created by the current user.

You can use this view to edit and delete the existing templates.
General Settings
In this section you set the main parameters of new and existing templates.
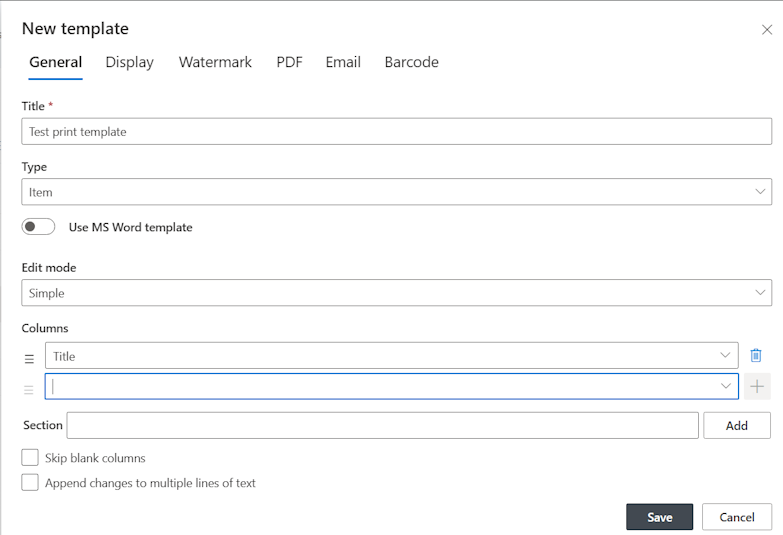
- Title – set the template title as it will appear in Print Preview screen. Choose a descriptive name.
- Type – choose whether to create a template for list items, list view, calendar view or PDF Merge.
- Use MS Word template - define the structure and the preview of the template, by a template Word document. This option will appear for List and Item template types. Once a template is uploaded, only word related settings will remain visible.
- View – when creating a list view template, choose a view to base the sorting and filtering settings on.
- Edit Mode – when creating an item template, you can choose to use the simple editor, where you simply select the columns you want to print or use the Advanced Mode and directly edit the template. Read more regarding Advanced Mode in the Advanced Mode Editing section of this guide.
- Use columns defined in view – when create a list view template you can define the viewable columns manually or use the columns defined in the selected view.
- Columns – choose the columns and column order for the print-out. In item templates you can also choose to add sections, page breaks and blank rows.
- Section – in item templates you can choose to add section headers to group specific columns together.
- Totals - define Totals to be included in your List template. Totals will be shown at the bottom of the printout or at the bottom of each group of items.
- Skip blank columns – for Item template in Simple mode allows you to dynamically exclude column not containing any data.
- Append Changes to Existing Text (Multiple lines of text) – print changes for multiple lines of text column with Append Changes mode enabled.
NOTE: Valid installation of Infowise Event Calendar Plus is required to be able to use the Calendar View
NOTE: In the Office 365 app version, when you print a list, the number of items printed will be limited by the page size of the selected view. To include more items, increase the page size of the view. The hard limit to the number of items is 100, regardless of the view settings.
In Calendar template, you need to map the following columns
- Title – title column of the event
- Location – (optional) location column of the event
- Start Date – start date of the event
- End Date – end date of the event
- View – type of calendar view to use. You can choose Day, Week, Month, Quarter, Half-year, Year or Gantt view.
When using a List or Item template type, with a word template:
- Preview will appear as defined in the template document.
- Column selection will become limited only to the column defined in the word document.
- Watermark, Header, Footer and Style definitions will be hidden, as they are not used in Word template mode.
PDF Merge template type – this template will always use a PDF output which will only include the Files or Item attachments, merged into one PDF file. The print preview will show regular fields. This template removes all irrelevant settings from template definition, leaving only the ones useable in this scenario.
Display
Set additional parameters for the view the print-out is displayed.
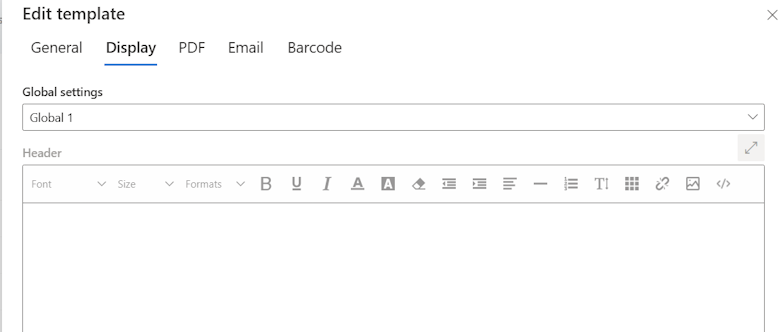
- Global Setting - Optional. Select the Global setting profile that your SharePoint or Global Admin created for the organization. If this is set no other setting for display or watermark is needed. To learn more on Global Settings see Setting the Tenant-Wide Print Settings (infowisesolutions.com)
When not using global settings leave that set to none as below.
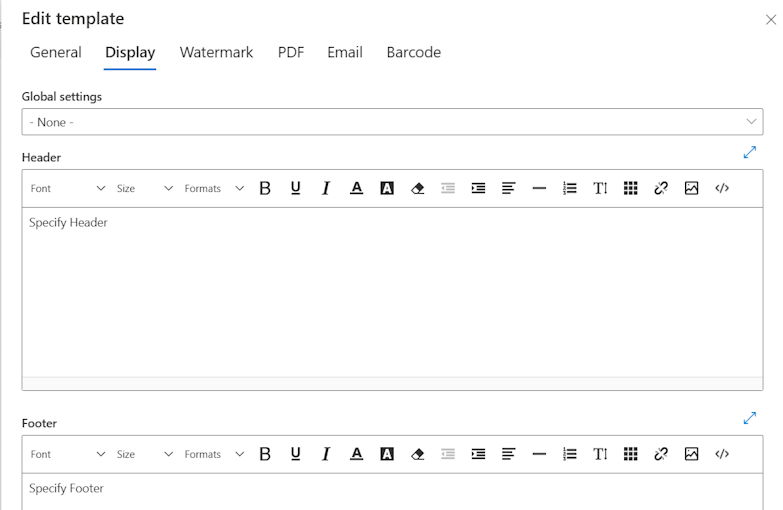
- Header – enter any header to add to the print-out. You can use any combination of text and formatting.
- Footer – enter any footer to add to the print-out. You can use any combination of text and formatting.
- CSS - optionally include standard CSS definition to format your printout.
- Theme – choose either regular or high-contrast color theme. The regular theme includes shades of gray, whereas high-contrast theme only includes black and white.
- Share template with all users – allow other users to view and use the template. If left uncheck, only the creator of the template can use it.
- Users/Groups – optionally specify users and/or groups to share the template with. The checkbox for sharing the template must be checked as well. When left blank and shared, the template is selectable by all users.
- Default template under conditions – optional, when the entered conditions are true and multiple templates exist, the template is pre-selected as the default template. When more than one template has conditions, the one with more conditions gets selected. Note that the pre-selection is only available when printing a single item.
Note: you can include the following tokens in your headers and footers to be filled in automatically during print preview generation:
- [[Me]] – name of the user performing printing
- [[Today]] – current date
- [[Now]] – current time
- [[WebTitle]] – title of the web site
- [[WebLink]] – link to the web site (title is used as a display value)
- [[ListTitle]] – title of the list
- [[ListLink]] - link to the list (title is used as a display value)
- [[ItemTitle]] – title of the item (can only be used in item templates)
- [[ItemLink]] – link to the item (title is used as a display value, can only be used in item templates)
- [[DocLink]] - link to the document itself (can only be used in item templates)
The following tokens can be used for PDF export only:
- {total_pages} - total page numbers
- {page_number} - current page number
PDF Settings
These settings apply when exporting the page to PDF.
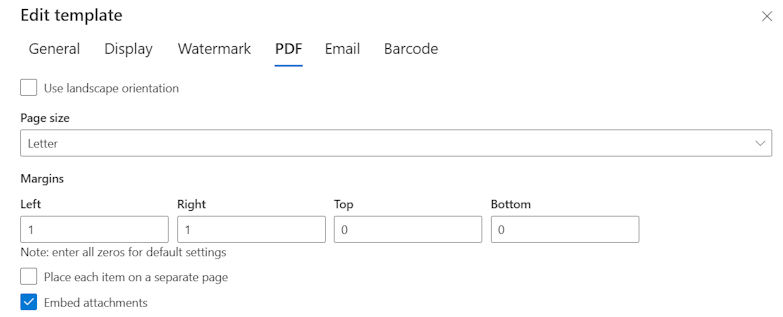
- Use landscape orientation – prints the template in Landscape orientation. Please note that most browser do not allow setting the print layout yet.
- Page Size: choose one of the available page sizes, such as A4 or Letter.
- Margins – set margins in inches or millimeters (depending on your locale). Leaving all values at zero will add default margins.
- Place each item on a separate page – when multiple items are printed, places each one on a separate page inside the PDF document.
- Embed PDF attachments - pdf document or attachments will be appended in to the end of the pdf created from item properties.
Word Settings
Upload the Word template to use for printing your items to Word.
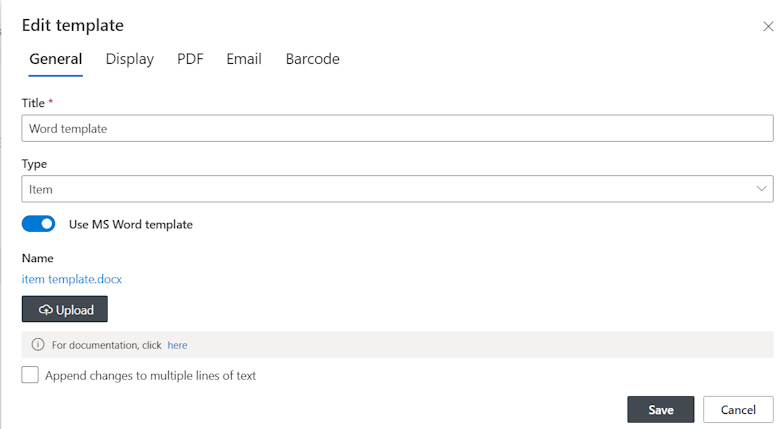
- You would defined the Word template in Word and setup field placeholders in your word template where you want he fields to appear (for example: [[Title]] etc)
- As long as Type is set to Item or List, the Word template selection options will appear. Use MS Word template file to define the printout.
- Click on Upload and choose your Word template file, then save the profile
- Return to list/library, click on Print, then click on. The preview will show an html generated according the word template.
- Exporting to Word or PDF, will use the same template.
For more detailed explanation see the subsection on Setting up a Word Template (infowisesolutions.com) or the blog entry Filling Word template with SharePoint data (infowisesolutions.com)
E-mail Settings
Configure the defaults for e-mailing print-outs.
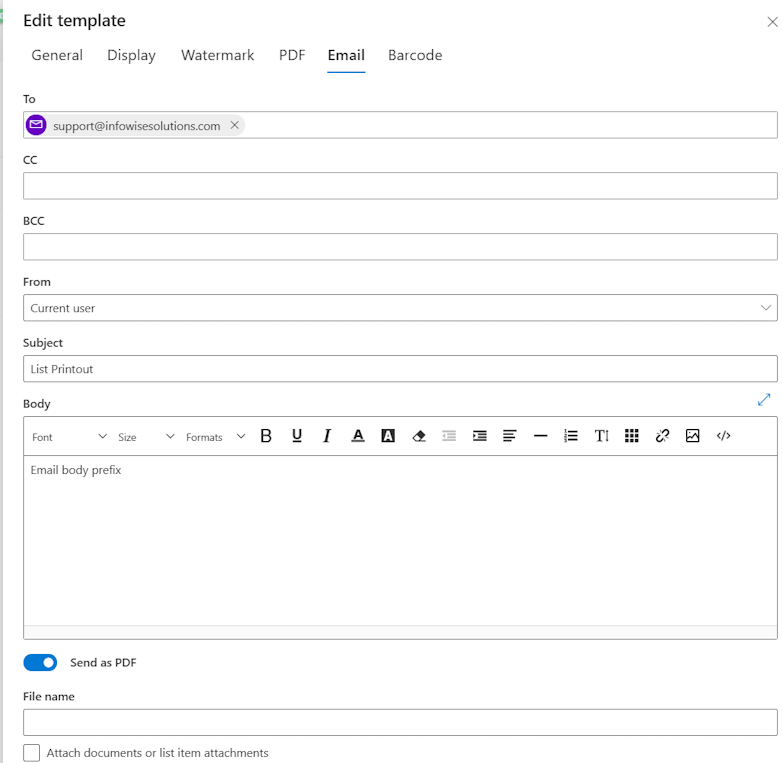
- To – select zero or more To recipients. Me – the person currently using the template.
- CC – select zero of more CC recipients.
- From – the sender account appearing on the email. You can choose to use the Service Account (application pool account), Me (the current user printing) or type a custom email address (available only for admins). Depending on your Exchange configuration, you might be forced to use the service account only. Note that the display name of the sender is shown as [Site name] – [List name] and not the application pool account’s actual display name.
- Subject – default subject line of the e-mail message
- Body – default body of the e-mail message
- Send as PDF – default setting for sending the print-out as a PDF attachment. When not sending as a PDF attachment, the print-out is placed directly in the body of the e-mail, under the content provided in Body.
- File name – default file name for the PDF attachment
Troubleshoot e-mail settings: some SMTP configuration require the sender to own a valid mailbox with the address provided in the From field. In this case you would need to create a mailbox for the application pool account, specify it in the Outgoing email address of the web application and only use Service Account as the From setting of the templates. Check with your e-mail service administrator.
Barcodes and QR Codes
You can print one of the columns in your list as a machine-readable barcode or a QR code. 
- Make sure to include the column you want to print as barcode/QR code in the list of columns selected for printing. If the column is not included, it will not be printed despite being configured as barcode.
- Expand Barcode & QR Code section
- Select the code type: Barcode or QR
- Select the column to be converted. Note that some column types (such as yes/no) cannot be converted and are not shown in the selector.
- For barcodes:
- Select the encoding. Note that most encodings support numbers only and as such cannot be selected when the chosen column’s type is not Number/Currency or Calculated with output format set to Number
- Specify width/height of the barcode (in pixels)
- Specify whether or not to include a label and specify its location. The label is the actual value of the column as encoded by the barcode
- For QR codes – specify the size of the image.
Associated Items Columns
When your lists contains Associated Items columns, the child items will appear in the print-out in a form of a table.
By default, the default view specified in the column will be used, thus controlling the presented columns and filtering/sorting of the items.
If you would like to use a different view for printing purposes only, create a view with the same name as your print template, and this view will be used instead.
When the parent list template uses a Word document template to generate the preview, the preview of the Associated items will be generated on a word list template, if one exists in the Associated list.