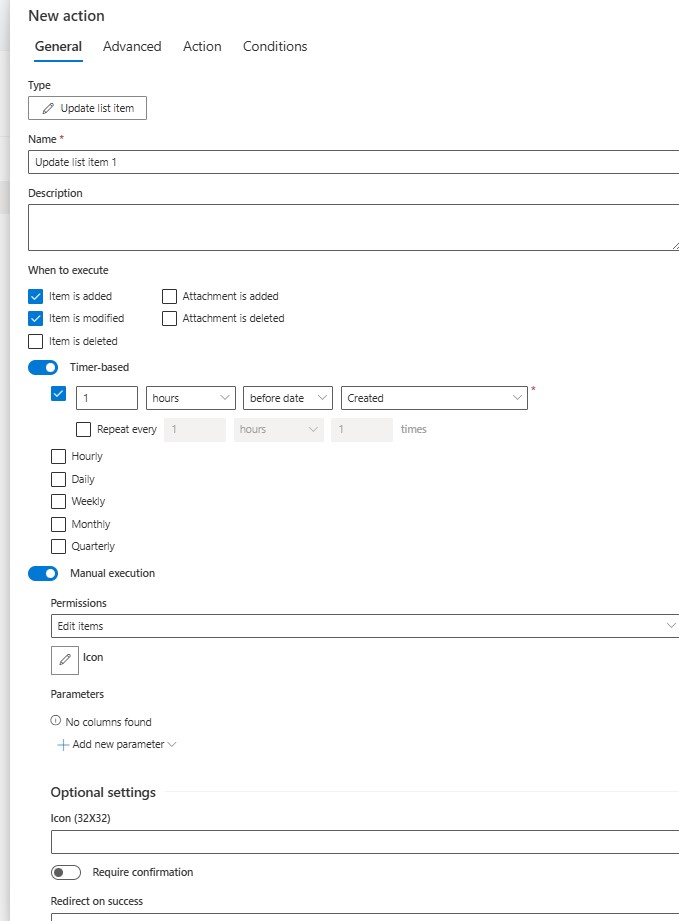
You must define the general settings for any action you create.
- Action Type – here you select the type of action you want to create. Action types can't changed once the action is saved.
- Name – give a meaningful name to your action. Your users will recognize the action by that name. Note that you can change the action name at any time without losing any information.
- Description – give additional information about the action to your users.
- Run on Events – choose when the action is to be executed. You must select at least one event type, such as New, Edit or Delete.
Timer-based
When creating a timer-based action, you need to specify when the action is supposed to run. There are four options for the action timing:
- According to a Date/time column (or a calculated column with the output format set to Date/time) - select a date column and specify how long before or after the date you want the action to run. The minimum time period is 1 hour. You can also set the action to repeat up to 100 times with preset intervals.
- Daily – runs every day at the selected hour
- Weekly – runs on a specific day of week at the selected hour
- Monthly – runs on a specific day of month at the selected hour
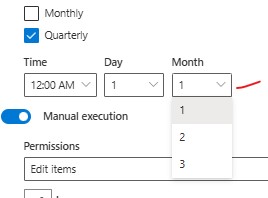
- Quarterly - runs on the specific hour and day of the month selected within each calendar quarter


NOTE: when creating a daily/weekly/monthly/quarterly action, you need to provide at least one static condition. A static condition is one that does not reference any column on the right hand site and thus can be evaluated without first loading any items. Also, due to the nature of the timerbased actions not running from a user account only a site admin can create these types of actions of the curent site.
Manual execution
The action is executed via Run Actions buttons in any list view or in the Display form. On premises, a button can optionally be added to the context menu and to the ribbon.
- Permissions - minimal permissions of the user to be able to trigger the action.
- Icon - select one of the available icon to present on the trigger button.
- Parameters - ask the user to provide values via a pop-up form. This value can then be used in the action, similar to regular column values. With Actions used in a Group Action where there is a loop setting of Range there will be an additional parameter where the user can use the looping variable in the action tab as a value to apply to the records as the group action loops.
Optional settings
- Icon 32X32 - link to user-provide icon image file
- Require confirmation - whether or not ask the user to confirm action execution
- Custom message - custom confirmation message
- Redirect on success - you can specify a URL address to which the page will be directed only upon successful execution of the action