The landing page for Ultimate Forms is your starting point to access the various capabilities of the product. You access it through the List or Document Library ribbon by clicking on the Design button

- List Selector - the app allows you to select the list or document library which you want to customize. When you access the app through Site Contents, the first list in alphabetical order is selected by default. When accessing through the Design button, the current list is chosen automatically.
- Modern Forms - New app interface to design advanced modern forms.
- Classic Forms - allows you to design the classic form layout (such as tabs, groups or themes).
- Tabs and tab permissions - allows you to control the layout and functionality of tabs on your form as well as general layout and design.
- Advanced column permissions - allows you to assign permissions to specific columns in the list.
- View permissions - allows you to assign permissions to views in your list.
- Column validation - allows you to create custom validation rules for your columns.
- Default values and dynamic rules - allows you to assign default values and dynamic rules.
- Business Logic - allows you configure automatically executed operations running behind the scenes, responding to changes in your data.
- Actions - allows you to configure actions to manipulate data inside and outside of SharePoint in response to list item updates, timer values or manual execution.
- Alerts - allows you to configure advanced alerts, extending the built-in alert capabilities.
- Item IDs - allows you to assign item IDs according to your own templates.
- Import and Export - allows you to configure incoming and outgoing data for your list.
- Import - allows you to automatically import external data, such as emails or databases, to create or update items in your list.
- Print and export - allows you to print the list item in your own template, convert to various formats and send to internal and external recipients.
- Web Parts - in Office 365 version only, configure settings for web parts. In the on-premises version, you directly configure the web part properties of the corresponding web parts.
- Charts - configure charts and graphs that can be displayed within app parts on your site's pages.
- Event calendars - Configure the date columns in your list or library to provide a calendar view of your data. Can be displayed in the following formats (calendar by day, week, month or gantt).
- List search - searches items in list and document libraries.
- Columns - allows you to configure various special column types. In the on-premises version, you can only create the columns through this interface and need to edit the existing column through list settings. In the app version, you create, update and, in some cases, delete custom column through this interface.
- Associated items - allows you to create and update column that enable relationships between items in different lists, similar to the repeating sections in InfoPath.
- Associated items summary - allows you to calculated summaries of Associated Items columns automatically.
- Connected lookup - allows you to create and update cascading lookup column relationship, with parent column filtering the available values in the child column.
- Color choice - allows you to create and update choice columns with color-coding or icon associated with each value.
- Indicator - allows you to create and update KPIs, progress bars and countdowns.
- Voting - allows you to create or update columns that allow your users to vote for or against the item and collect feedback.
Note: On the top of the Landing Page for Infowise Ultimate Forms there is a short top menu for
- Solutions - gallery of free preconfigured business solutions
- Template Manager - SharePoint Online only - create and apply templates of your business solutions
- Stages - present various components in use in the list as corresponding to various stages of business processes, based on conditions
- Inventory - see which components of Ultimate Forms are in use across the site
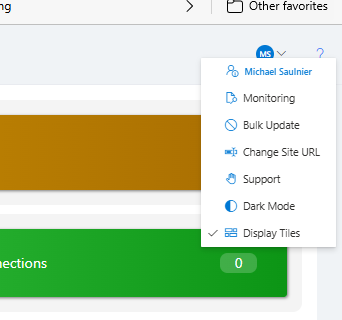
Additionally, there is a menu under the User ID to the top right on the Blue bar showing the other menu options.

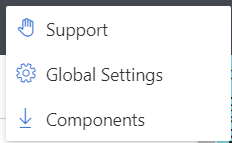
Some of these option will only appear for Infowise Ultimate Forms administrators (Billing) and Sharepoint Tenant adminstrators (Global Settings)
On-premises the menu will look like the following:

Get helpful videos
Also read these:
Last modified: 7/16/2025 4:56 PM
Loading...
Add your comment
Comments are not meant for support. If you experiencing an issue, please open a support request.
Reply to: from