Hi Readers, in this blog, I am going to share another example from healthcare industries, where we did magic using SharePoint and Infowise Ultimate forms. As I have spent a good amount of my experience in healthcare industries, I have commonly seen requests from businesses for automating their appointment booking process. I decided to explore all possible ways of building it and have explored other alternatives like Infopath, Nintex and building SharePoint custom solution. But as it always happens, cost, rapid development, required skills and maintainability were the primary factors for making decisions.
I ruled out Infopath because it is deprecated from Microsoft, and there is no new version available for long. I thought of building a custom solution for it, but skills and code maintenance were the issue and also I wanted to build it rapidly. So, a custom solution is also ruled out. There are third party solutions available catering the similar needs, but the licensing cost was too high comparing to Infowise Ultimate forms.
As I have already worked with Infowise Ultimate forms on my last projects, I was aware of flexibility, cost-effective and supportive technical support offered by Infowise Ultimate forms. I have already written about Infowise Ultimate forms in my previous blogs; you can visit my past blogs along with others in Infowise blogs under the resource section, this direct link will take you there.
Patient Appointment App
As we decided to use Infowise Ultimate forms to build an appointment app, we explored its features such as Classic form designer, Column Validations, Alerts and notifications, search and calendar view web parts. Getting information about these featured were easy because of the detailed steps provided in knowledge articles by Infowise.
This patient appointment app is built on SharePoint using Infowise Ultimate forms. A patient would call the clinic or hospital and request a doctor's appointment, or a lab test, an operator on behalf of the patient, enter the request in the system and inform the patient of the available slots. After getting confirmation from the requestor or patient, the operator will block the slot. As a result, confirmation emails will be sent to the patient as well as requested doctor along with hospital administration with details about the appointment with unique meeting ID generated with the help of Infowise.
This app could be useful for clinics, hospitals and individual practitioners for booking appointments for their patients and definitely could be adopted by other similar business models like Dentists, saloons, Advocates and many more.
Steps to build a Patient appointment App
We need the following SharePoint Components for creating this app.
- SharePoint custom list
- SharePoint Columns\ fields
- SharePoint List views
- SharePoint permissions
S No |
Column\ Field name |
Type of column |
Remarks |
1 |
Reserved for |
Single line of text |
Capturing patient’s name |
2 |
Reserved by |
People type |
Who captured this request |
3 |
Reservation for |
Choice type |
To capture booking choice from available medical practitioners |
4 |
Reservation Slot Start Time |
Date time |
To capture Start time of reservation. |
5 |
Reservation End Time |
Date time |
To capture End time of reservation. |
6 |
Purpose of visit |
Multi line text |
To capture purpose of visit. |
7 |
Remarks |
Multi line text |
To enter any remark about booking |
For creating this app, we have to first create a SharePoint custom list with the following SharePoint columns\ fields.

This app should have the following features.
Double booking check features – To avoid double booking on the same slot.
Email alert notifications- To inform the doctors and patients about booking confirmation.
Calendar view of reservations - To quickly see the availability of slots.
Search functionality – to search the records for easy retrieval of booking information.
To build the form along with the above features, let's open the design view of Infowise and easily add these features without code.

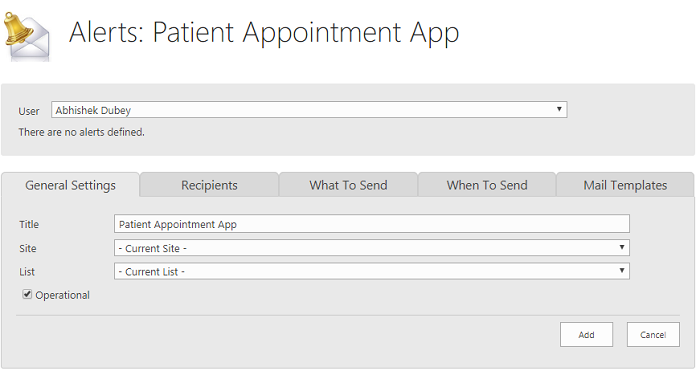
For adding emails and alerts notification feature, go to alerts under Business logic and configure it for sending emails to doctors and patients on confirmation of billing.

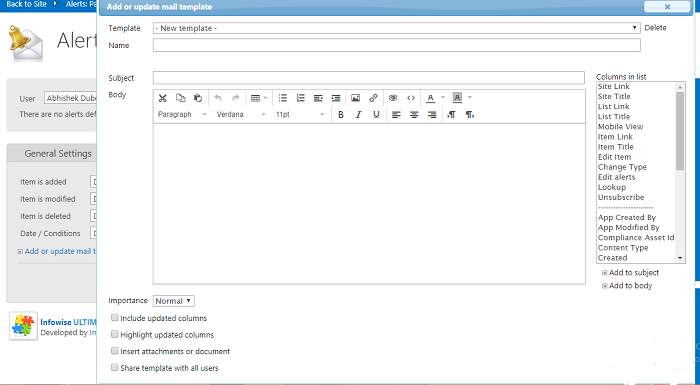
Configure the settings according to requirements, set the recipients, email body when this email alert should be triggered, and mail template can also be configured.
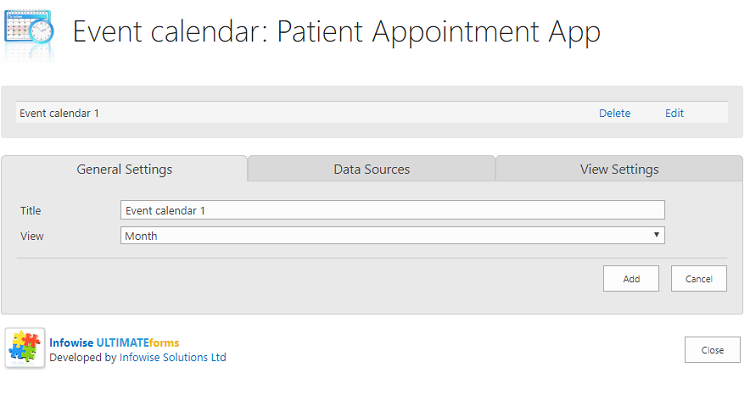
Calendar view, there should be a calendar view of the reservation system to get the complete view of the system. In Infowise there is a feature of configuring a calendar web part, which is very easy to implement, adding colour-coding to differentiate between doctor's availability.

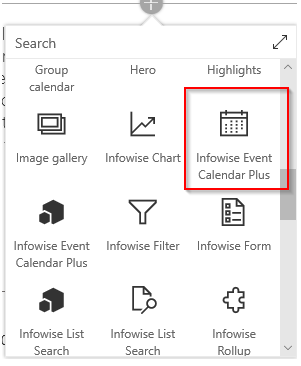
This calendar web part could be added to any SharePoint page by editing the page and add the web part on it.

To add the search feature in the patient appointment app, we used the list search web part. Search is an important functionality of any application and using Infowise, it was very easy to built search.
For avoiding double booking for the same slot, we can easily show the available slots by calendar view web part; booking agent can easily see the updated value of the slot and avoid double booking, we used actions to create a trigger which will check the available slot and update the status as confirmed or conflict.
Finally, our patient appointment app is ready
Finally, our patient appointment app is built, and the amazing thing is that it was built without writing a single line of code. We could have used some other third party products for the same, but after doing a cost analysis and feature comparison among them, we decided to use Infowise Ultimate form, and after using it, we did not regret our decision. Configuration and installation were easy; training and other reference materials are easy to find on their website, and last but not least, their support is fabulous.
So, readers, I hope you enjoyed this blog, I am going to extend this patient's appointment app to advance level in my next blog, where we will have opportunity to explore advanced features of Infowise.
Please keep sharing your feedback through the comment section given below the blog.
Thanks for reading…
