
Update: The HR Recruitment Process Site Template is Available for Download!
Introduction:
Ultimate Forms is a suite of SharePoint components that provides all the capabilities needed to build state-of-the-art electronic forms quickly and efficiently using only a browser.
In this post, we'll show how to build a simple HR recruitment system using Ultimate Forms. We’ll see how easily an HR solution can be created within SharePoint with minimal effort.
Recruitment Process Goals:
- Insert candidate details, resumes, recommendations, and other relevant documentation into the system.
- Categorize candidates based on relevant criteria.
- Assign approval tasks to managers and provide tools for decision-making.move on with the candidate.
- Send confirmation emails at every stage to the appropriate individuals.
At the end of the process, we should have a comprehensive view of each candidate's progress.
Now, let’s see how it works.
Defining the Process Roles:
In this example, the recruitment process involves three roles:
- Recruitment Agent – responsible for submitting candidates.
- HR Manager – reviews applications and makes approval decisions.
- Division Manager – gives the final approval for selected candidates.
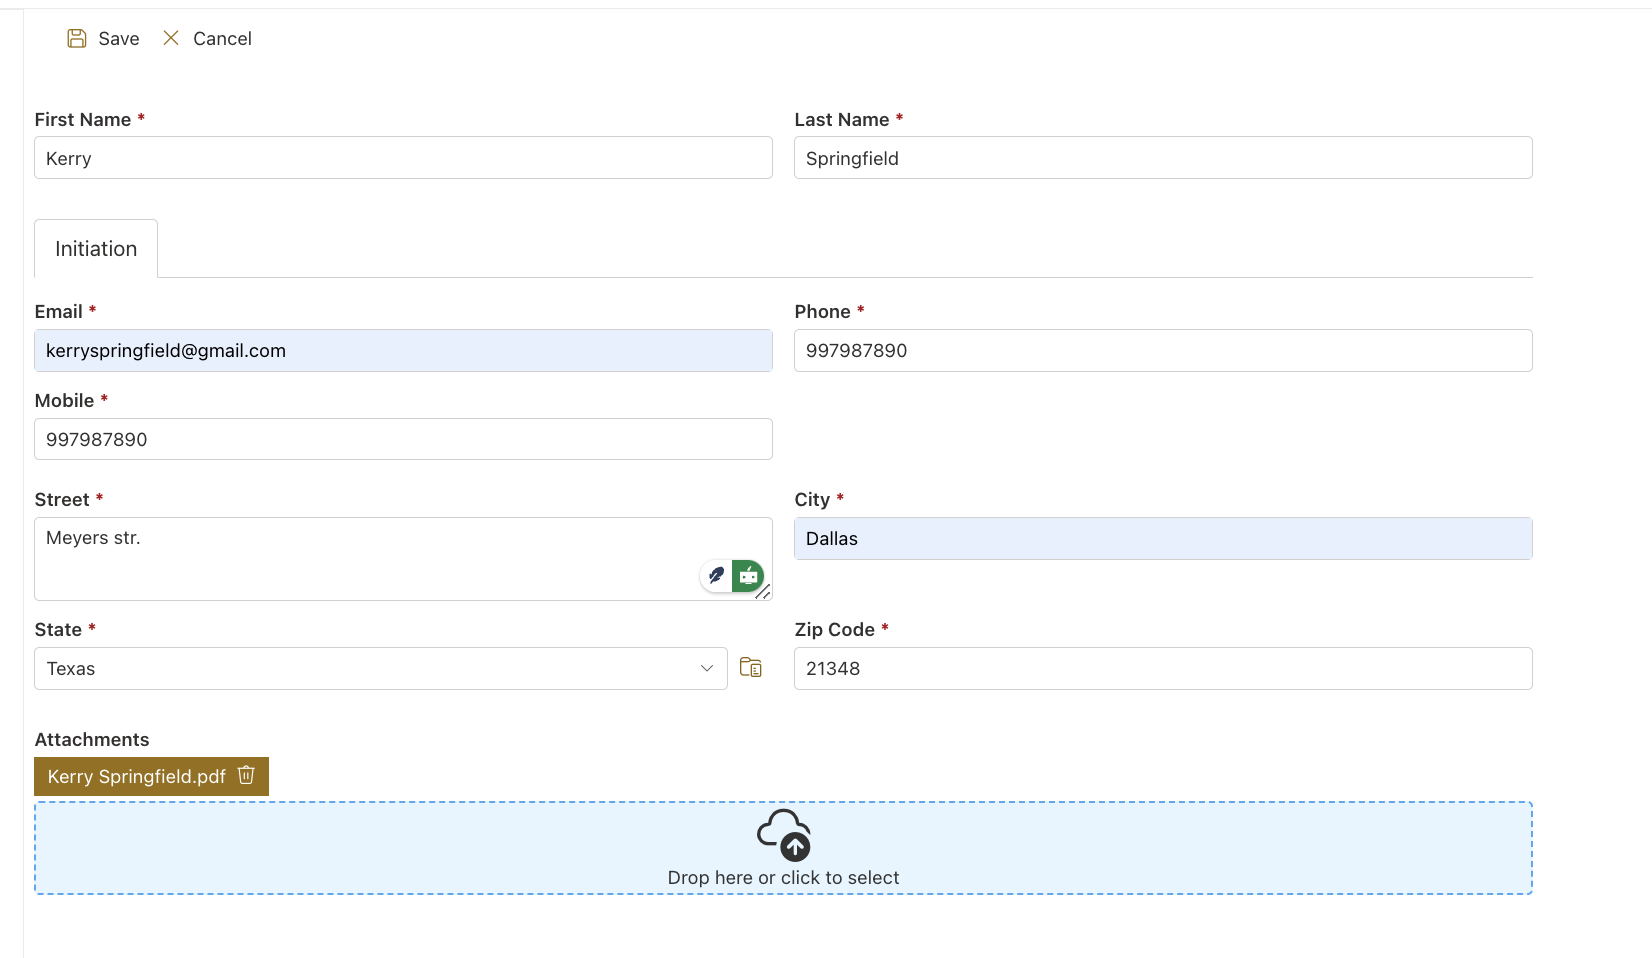
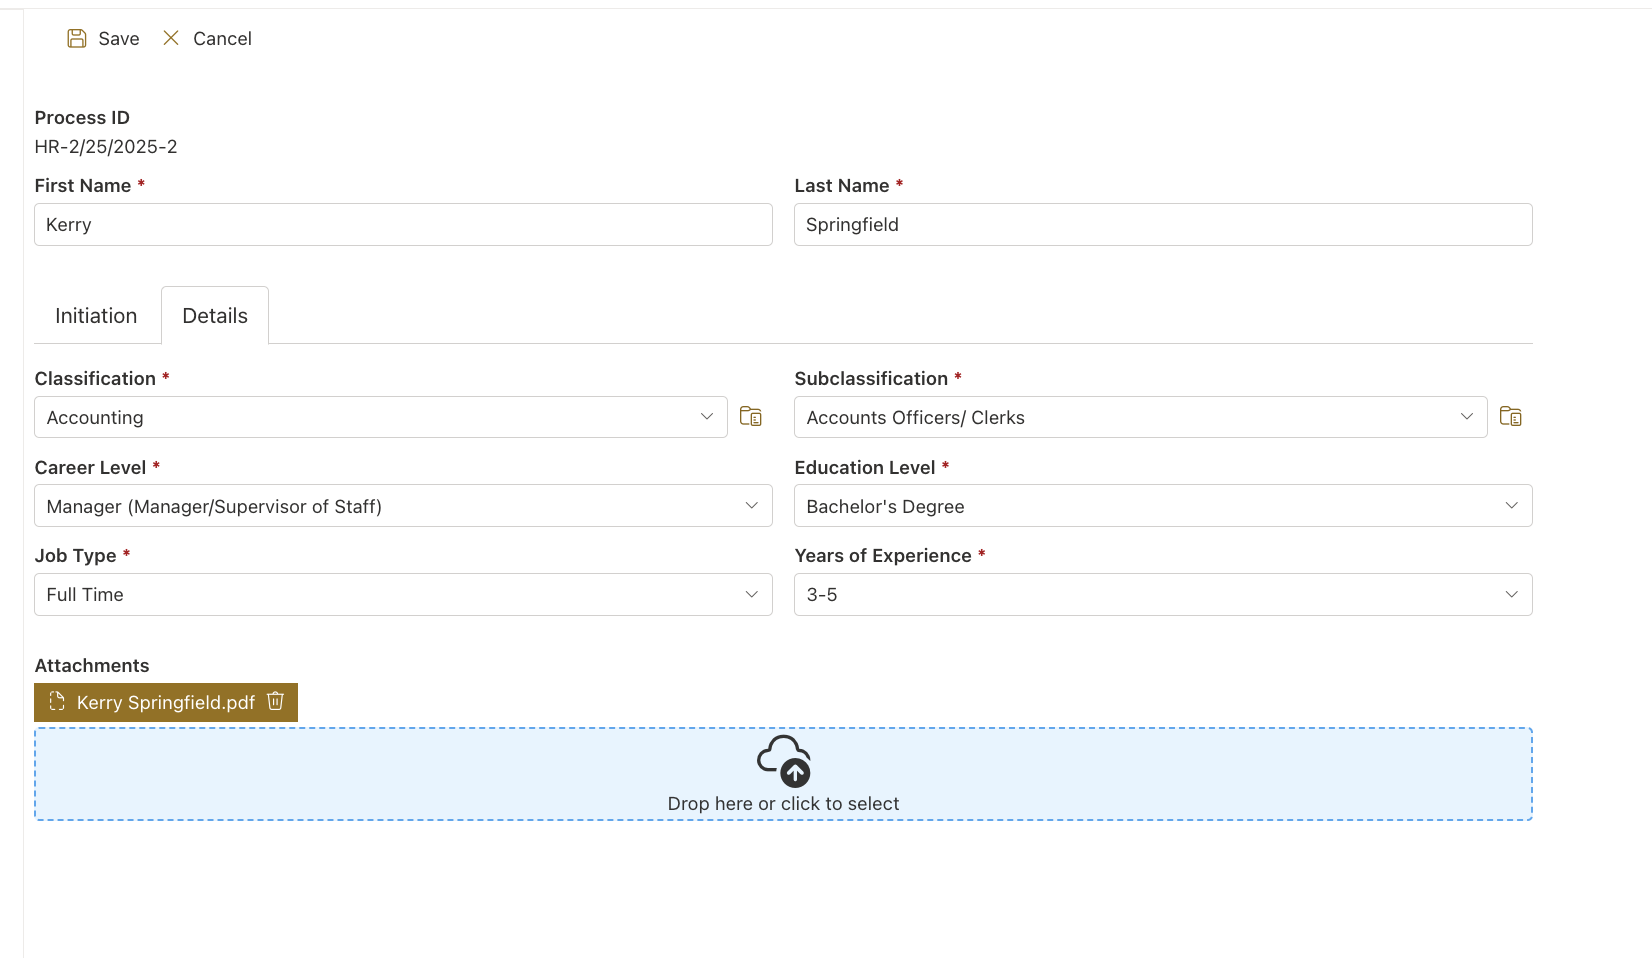
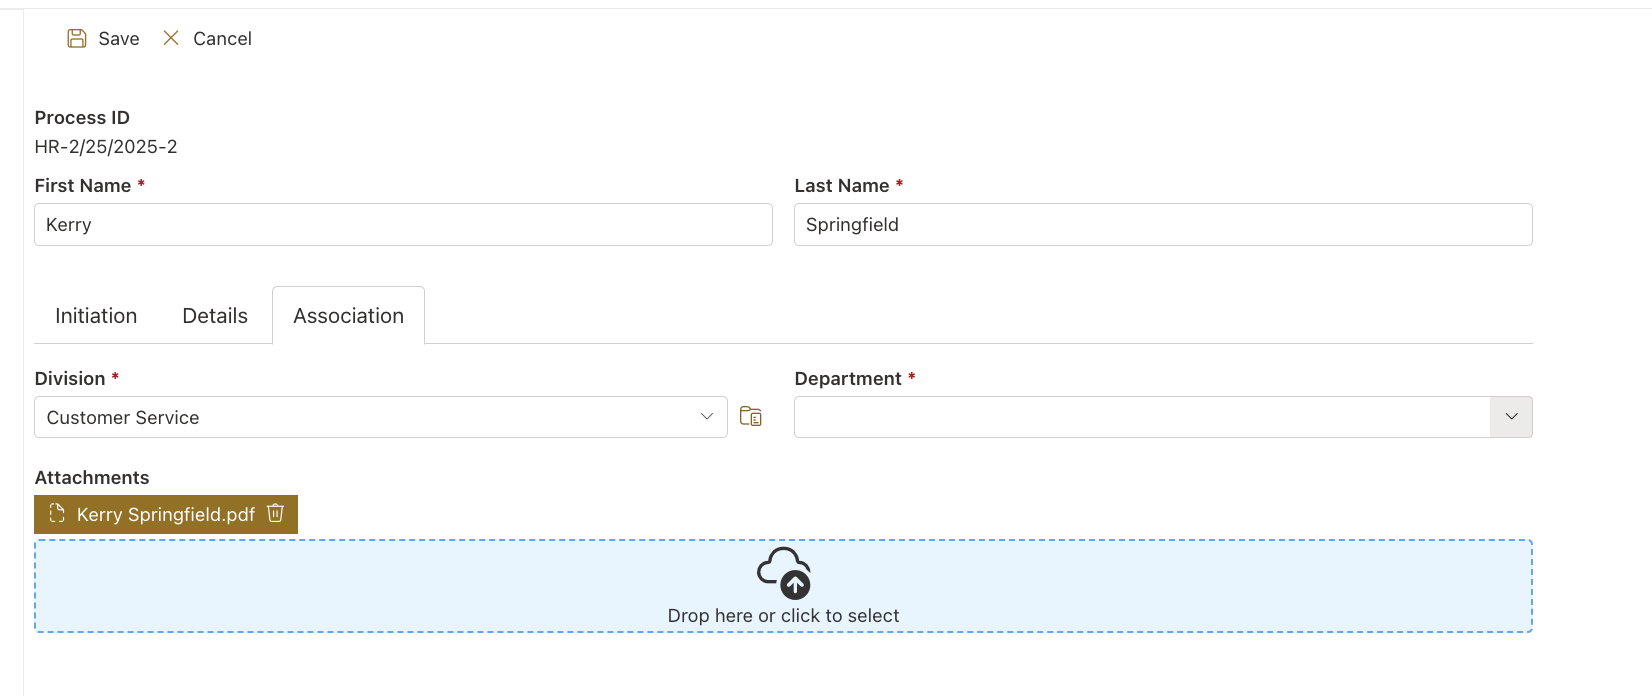
The process starts when the recruitment agent creates new item, uploads a CV file, and starts to fill out the form. The recruitment agent form is actually split into four steps, in a wizard-like style (powered by Ultimate Forms: Forms). Using the wizard style simplifies the metadata entry and enables the recruitment agent to fill out several fields at a time instead of many fields on the same page which can be a pain. The fields are grouped into logical subjects (each subject represented by a tab in the wizard) e.g.- initiation, details, candidate details, association and etc.
Here are some screenshots of the recruitment agent forms:
After the recruitment agent finishes to fill in her fields, the next stage is the HR Manager approval. To proceed to the next stage, the system sends a confirmation email to The HR Manager (powered by Ultimate Forms: Alerts), which indicates that she has a new candidate to review.
HR Manager Confirmation Email Example:

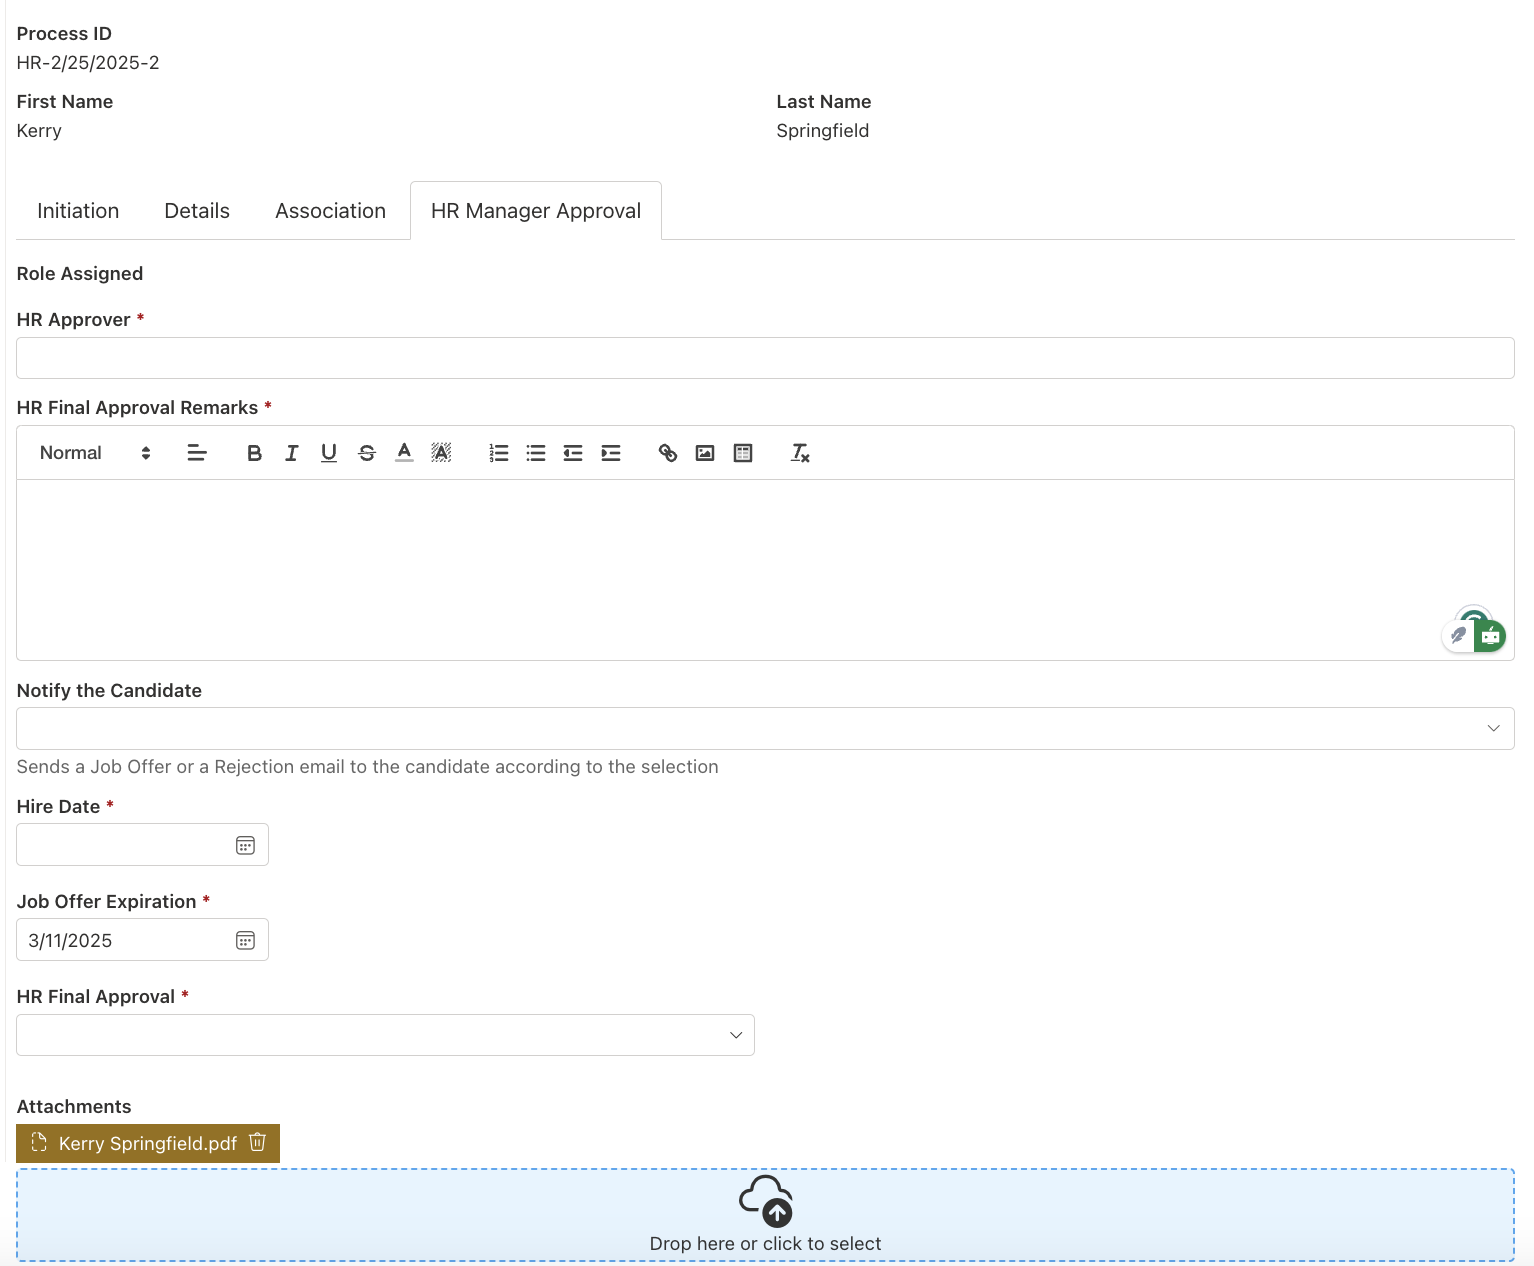
The HR manager edits the item and can review all the candidate details by switching the form tabs and can decide whether to move forward with the candidate or reject him. Afterwards the HR manager needs to approve or reject and finally add some remarks about her decision.
*remark - In some cases, the HR manager or HR director is the final step at the process. It can be changed with slight adjustments.
HR Manager form:
The last stage the division manager approval. After the HR manager approves the candidate, according to the candidate associations (filled in by the recruitment agent), the appropriate division manager gets a confirmation email which indicates that he has a new candidate to review.
Behind the Scenes: How It Works
This solution is built using a custom SharePoint list containing all necessary columns for each stage of the process. With the help of Ultimate Forms: Forms, we organized the list fields into nine tabs:
- Initiation
- Details
- Association
- HR Recruiter Approval
- Technical Interview
- HR Interview
- Division Approval
- HR Manager Approval
- Rejection Actions
Here is a screenshot of the Tabs and tab permissions form – Smart List Pro Settings:

Tab Permissions:
For the recruitment agent tabs - Initiation, Details and Association we left the Permissions section empty, that means that every user can add candidates, which was good enough for this example. It's possible to restrict the tabs only to the recruitment agents by adding a permission rule to the recruitment agents Active Directory group or SharePoint group. That would restrict the tabs only for the recruitment agents.
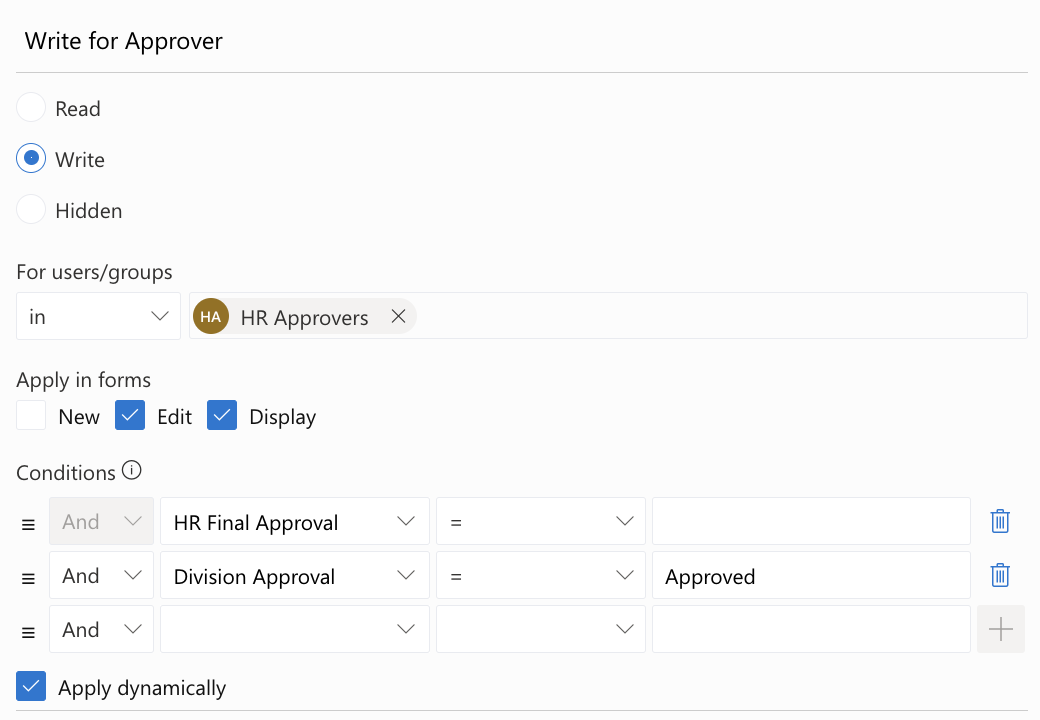
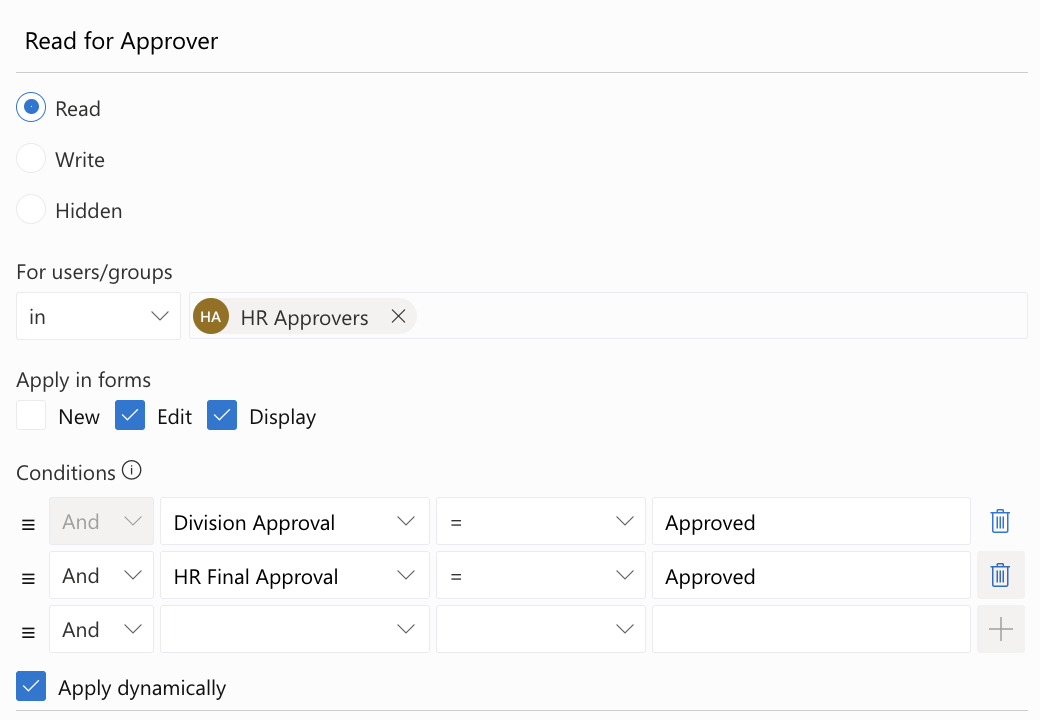
For the HR manager and the division manager tabs we added permission rules.
- HR Managers can edit and approve candidates.
- Division Managers have read permissions for HR approvals and write access for their approval stage.
Example of Tabs and Tab Permissions Configuration:
Here is a screenshot of the "Tabs and Tab Permissions" focused on the "HR Manager Approval" tab.
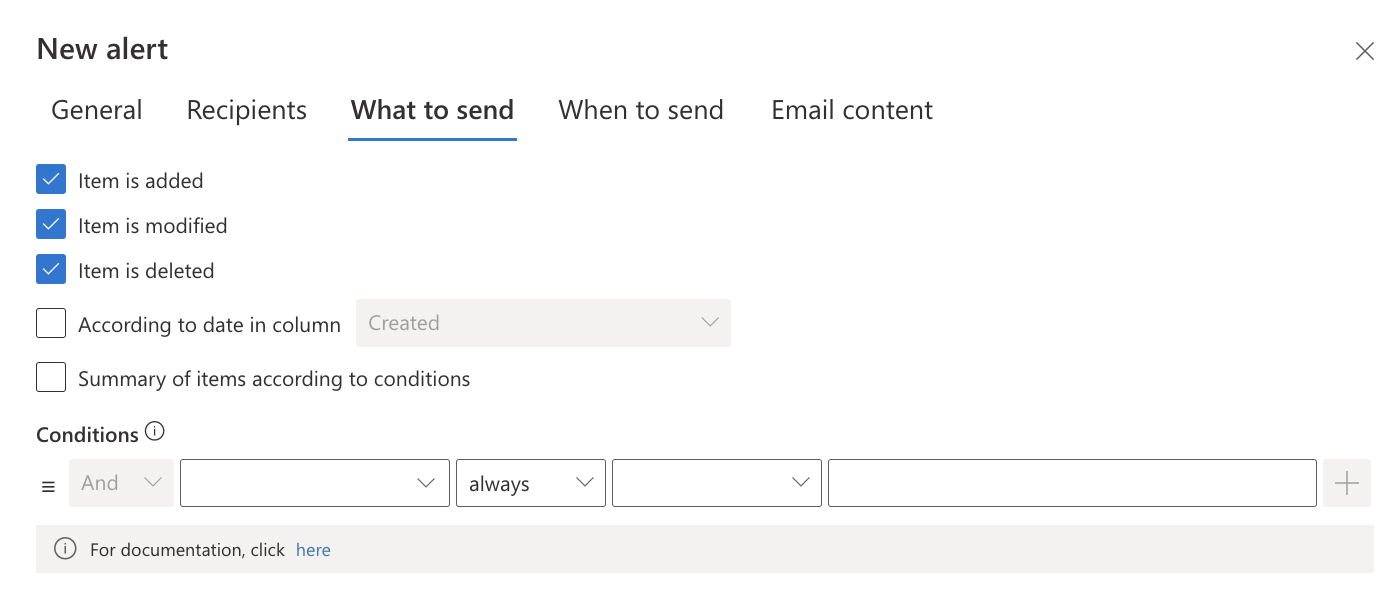
Automating Notifications and Alerts:
To ensure smooth communication, we used Ultimate Forms: Alerts to automate email notifications:
- HR Manager Notification: Triggered when a Recruitment Agent submits a candidate.
- Division Manager Notification: Triggered when an HR Manager approves a candidate.
By using Ultimate Forms: Alerts, we designed a mail template that includes relevant fields and attachments, ensuring that each notification contains all necessary details.
Here’s how a sample email template looks within the system:
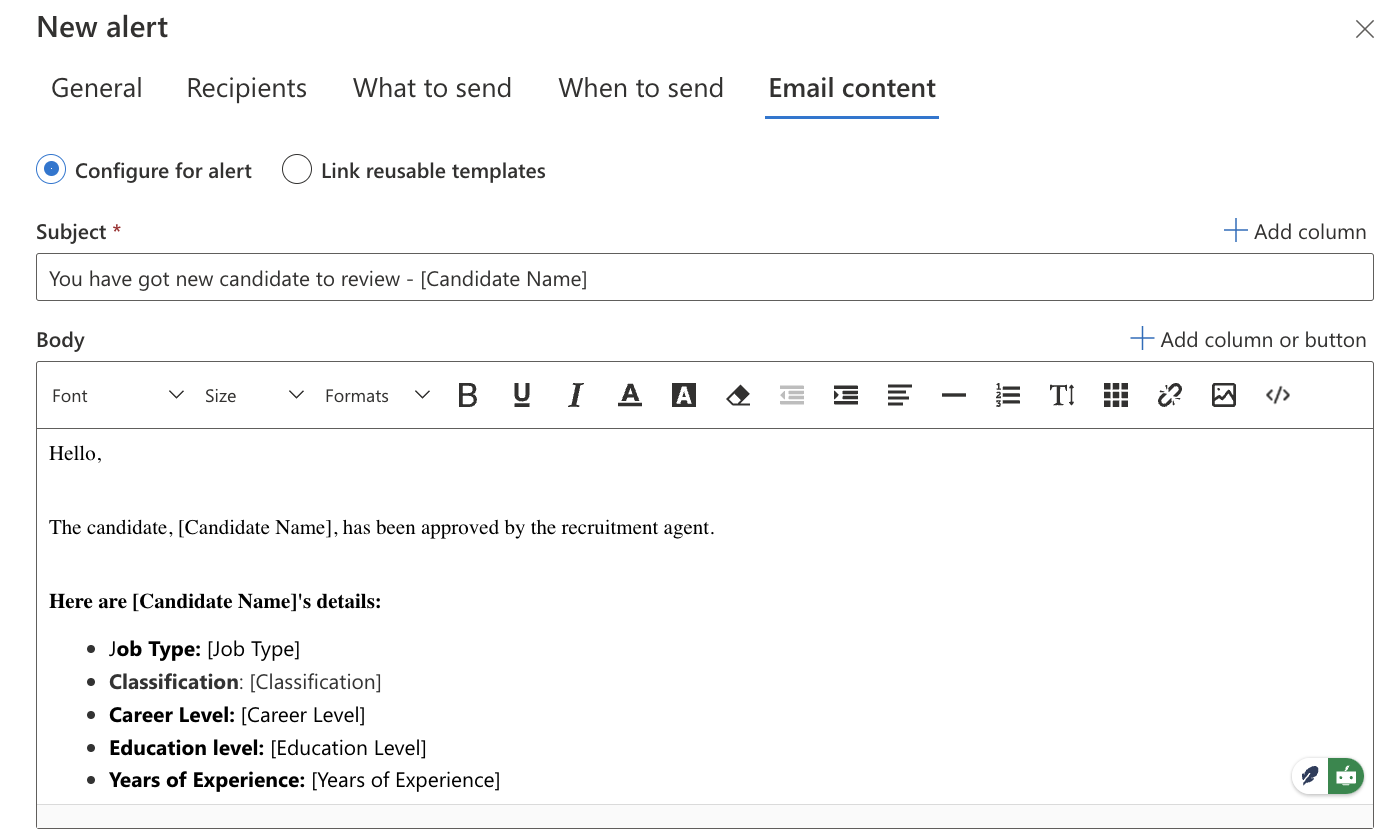
Here we can see that the template contains some rich text and placeholders for list fields. Is very simple to create templates and manage them. Mail templates also enables to share templates between users and to add an attachment to the alert!
Conclusion:
As demonstrated, Ultimate Forms makes it incredibly easy to create electronic forms and automate business processes directly within SharePoint. This HR recruitment example is just one of many possible applications of Ultimate Forms.
With Ultimate Forms, organizations can streamline workflows, improve efficiency, and eliminate manual processes. By leveraging components like Ultimate Forms: Forms, Ultimate Forms: Alerts, and Ultimate Forms: Actions, businesses can build advanced recruitment solutions with minimal effort.
For more details, check out the Ultimate Forms documentation and explore how you can enhance your SharePoint environment today!