
Introduction
Lookup fields have always been a popular feature in SharePoint. Especially in cases where there are lots of choices that you need to update frequently. These columns work great in simple scenarios. But what do you do when you want to access your lookup list across all your SharePoint sites?
In SharePoint Online (Microsoft 365), there is no convenient way to have this kind of functionality. Trying to implement it in any other way often leads to duplication of data.
SharePoint does offer Managed Metadata functionality, which is a separate module altogether. This means that you won't be able to tap into SharePoint lists which we may need for workflows or other updates. Additionally, many organizations do not use Managed Metadata functionality at all. So it might be best to not add another area to your environment which needs to be managed.
Data Connections to the Rescue
Data Connections functionality solves this challenge. They allow you to pull back data from other sites in SharePoint or even from external data sources. For example, you can use a variety of databases or 3rd party applications. This way you don't have to duplicate data that is stored somewhere else.
Is this article, we'll describe how you can create a cross-site lookup field. You can have a key SharePoint list called (our example uses Departments) in one central site. You then reference it from anywhere in your SharePoint environment, across all sites.
Note: data connections are only available in SharePoint Online (Microsoft 365). Our on-premises customer will have to find an alternative solution to this challenge.
Let's Try it Together
I suggest you begin by following this practice example. Then you can apply these steps anywhere you need in your live lists in SharePoint.
One note before you begin, the data connection step must be done by a Microsoft 365 Global Administrator.
If you are not a Global Administrator, please request their support. Note that once the data connection is created, the Global Administrator will not need to make any further updates. You can update the data in the source list as an regular SharePoint user.
Creating Lists
Begin by creating a simple list called Departments using the Title field for values as shown below:
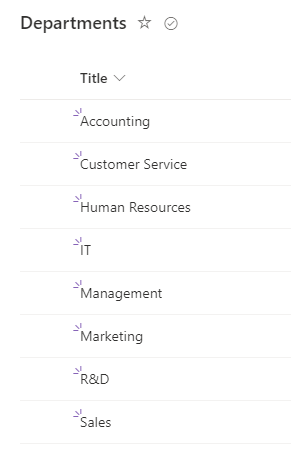
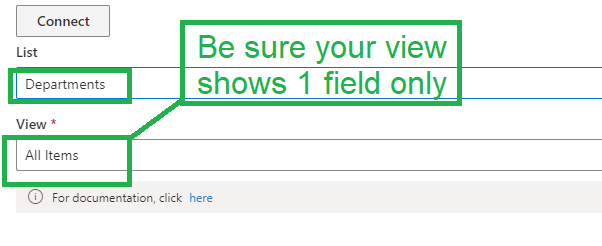
If your lookup list contains additional fields, be sure to create a view that shows only the ONE COLUMN. This is the column that you want to appear in your lookup field to be displayed in a dropdown. In our example, the default All Items view contains just the Title field which is exactly what we want. If you are already using this view for some other purposes, just create a new one and use it.
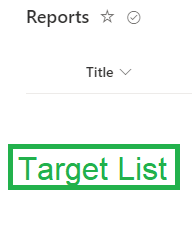
Now go to an entirely different site and add a practice list called Reports. For the purposes of our example, here too we will add no additional fields. This can also be a document library, there are no limitations.
Configuring Data Connection
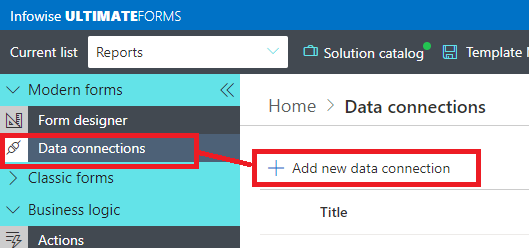
We will add the lookup field in the next steps. First we need to create a data connection that will make our lookup list available to all sites in your tenant. In the list toolbar click on Design to open Ultimate Forms, then select Data Connections » Add new data connection:
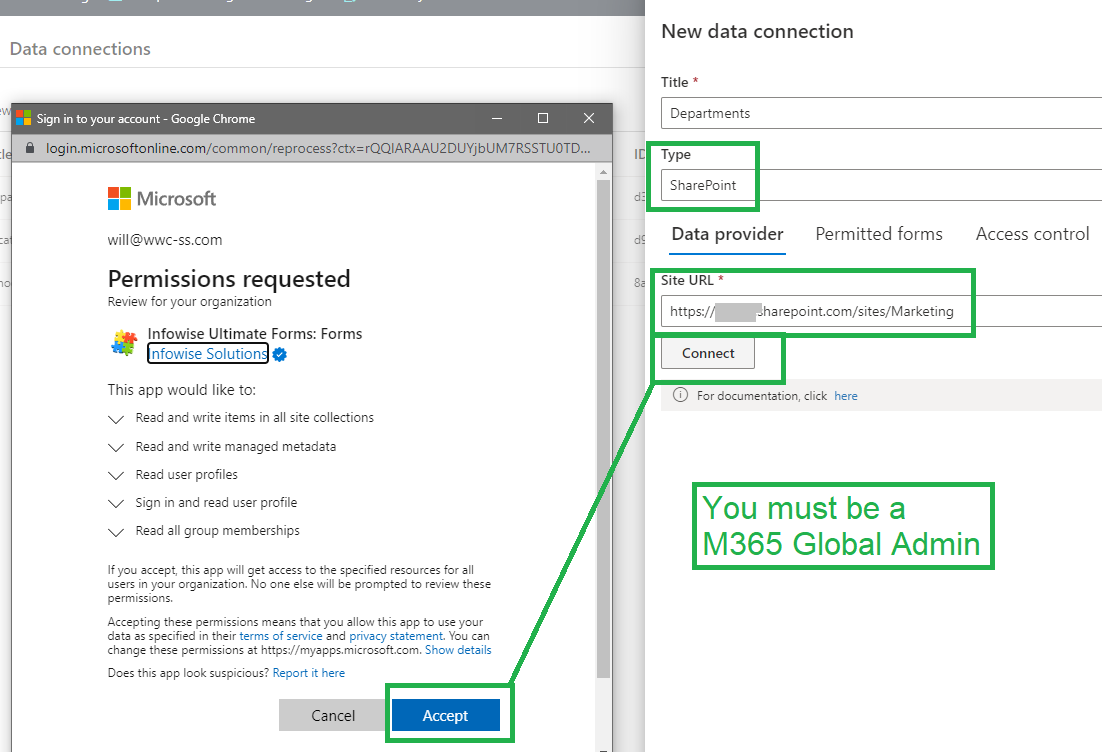
- Name the Data Connection Departments.
- Select SharePoint for Type.
- Copy and paste the URL of the source site where the list is located. This usually will include /sites/ in the URL. Make sure to only include the site and not any lists or pages.
- Click Connect to authorize the connection. This step must be done by a Microsoft 365 Global Administrator.
Select your lookup list Departments and the view that has 1 field showing, which in our practice example is the default All Items view:
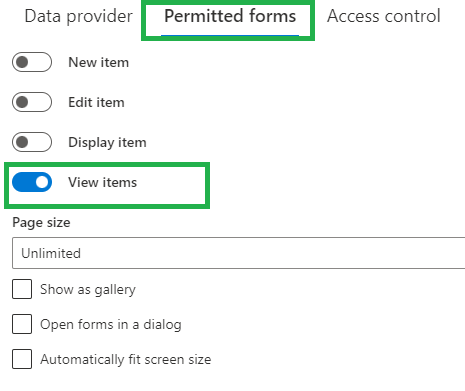
In the second Permitted forms tab, select only the View items option as shown below:
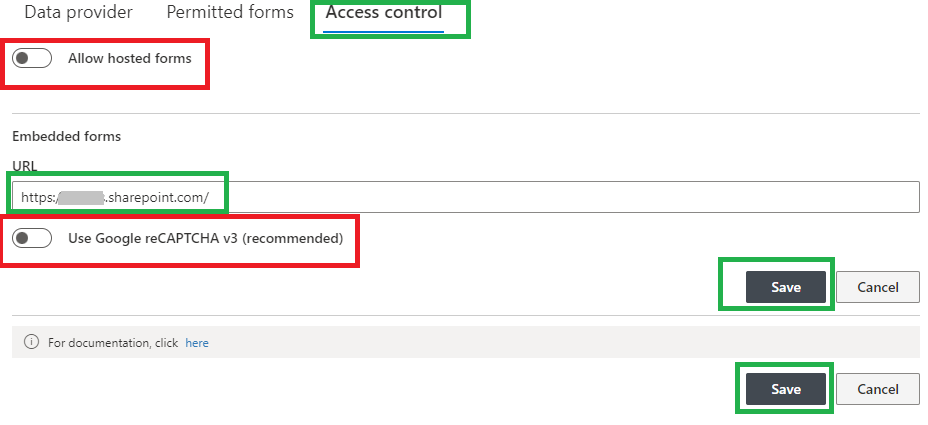
In the Access control tab be sure to carefully apply all settings below.
- Turn OFF Allow hosted forms. (This isn't for a public form.)
- Turn OFF the reCAPTCHA option. (This isn't for a public form.)
- ADD your ROOT SharePoint URL to indicate that this data connection is allowed across of of your SharePoint environment.
- Click the first Save button, then click the 2nd Save button to save your Data Connection.
Adding Lookup
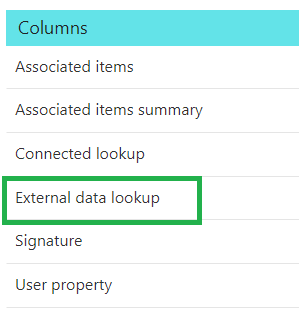
Go back to the main Ultimate Forms settings page and select External data lookup in the Columns section:
- Add a new field named Department using Source type Data connection.
- Select the Data connectionwhich we just created in the previous step.
- Select the four toggle options in the bottom exactly as shown.
- Select key values from dropdown - shows the columns as a dropdown instead of a free text entry.
- Preload all key values - makes sure all options are available when the form initially loads. The alternative is to allow auto-complete functionality, which is helpful in larger lists.
- Hide get button - without the Get button, you just need to select the value from the dropdown. It works the same as regular lookup columns.
- Show values in separate columns - this option controls if all values are shown in one column or split between a set of separate columns. As we only have one column in our source view, we should show it in separate columns. It prevents the value from including column headers.
- Ensure all other options are disabled.
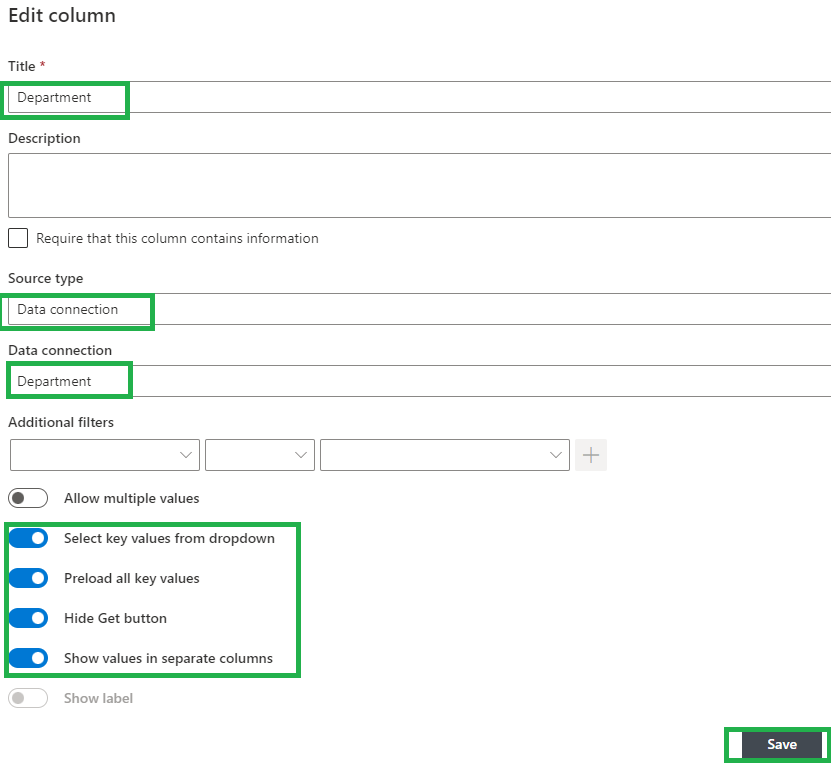
- Now you can save your column and add it to your form in Form Designer. Note that you could also create columns directly from Form Designer if you wish.
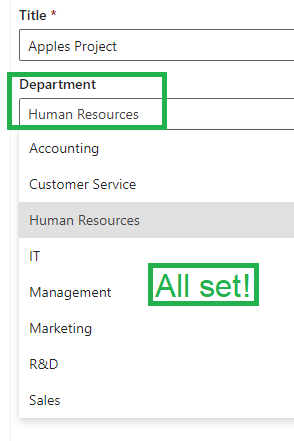
- Test your functionality to see your new cross-site lookup field in action.
Conclusion
Now you have something handy that allows you to not repeat data in lookup lists on multiple sites. We need a Microsoft 365 Administrator to help us create the initial data connection. Afterwards regular users can update the lookup list data as needed at any time after the initial setup.
As you can imagine, a lot of great opportunities exist here. Common scenarios for lists that would be useful across all SharePoint include:
- Departments
- Locations
- Products
- Divisions
- Buildings
- Building Rooms
- Makes / Models of equipment
Enjoy working with your SharePoint!