Introduction:
Managing structured data efficiently is a critical challenge in SharePoint-based workflows. Many business processes require users to input multiple related data points, such as order line items, approval tasks, or project milestones, within a single form. Traditionally, SharePoint does not natively support repeating sections, making it difficult to manage parent-child relationships between different pieces of information.
Infowise Ultimate Forms solves this challenge by providing an Associated Items field, which effectively acts as a repeating section within SharePoint lists. This functionality enables users to add multiple related records within a single parent item, creating a structured and dynamic data entry process. By leveraging this feature, businesses can streamline their workflows, enhance data integrity, and ensure consistency across related records.
One of the standout advantages of using repeating sections is automation. Instead of manually adding related records, organizations can predefine required sub-items that automatically generate upon form submission. This capability is particularly useful for approval workflows, where each new request should automatically trigger a set of predefined tasks.
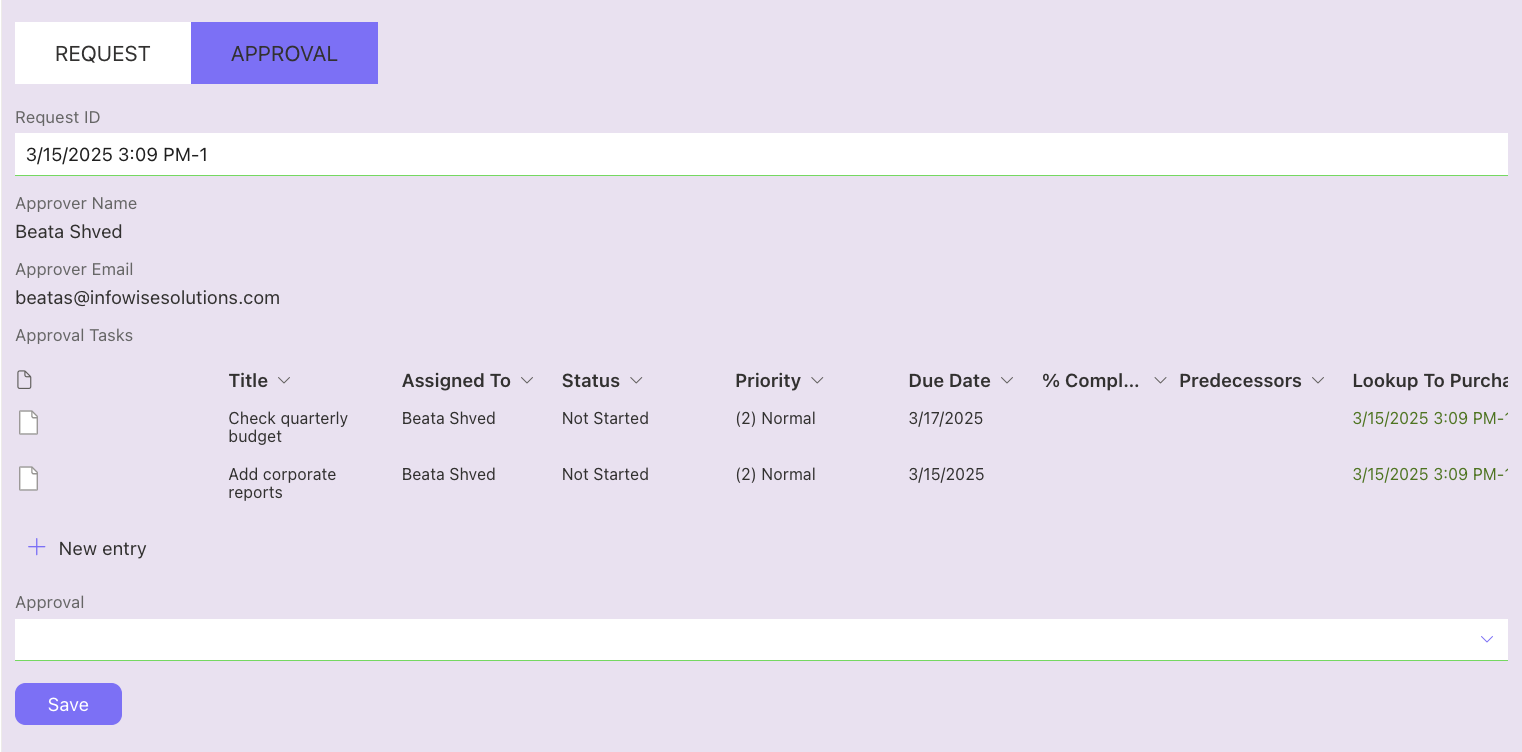
In this demo, we will create a Purchase Request system that automatically generates predefined approval tasks. This ensures that approvers receive a structured list of action items before approving a request, reducing manual effort and increasing workflow efficiency.
Required Products from Ultimate Forms Enterprise Bundle:
To implement this solution, we will use the following Infowise Ultimate Forms components:
- UltimateForms: Actions—Enables automated creation of child list items.
- UltimateForms: User Property—Retrieves default user properties from Active Directory to prefill fields.
- UltimateForms: Associated Items—Establishes a parent-child relationship between two lists and displays child list items on the parent list item.
- UltimateForms: Item IDs—Generates unique IDs for each request.
- UltimateForms: Forms—Provides a tabbed interface and allows permissions management for different tabs.
Creating the Lists:
We will set up two SharePoint lists:
1. Purchase Requests List
This list stores purchase requests and approval statuses. To set up this list:
- Create a new custom list and rename the Title column to Request ID.
- Add the following fields:
- Full Name (User Property Field)
- Email (User Property Field)
- Requested Item (Multiple Lines of Text)
- Cost (Currency)
- Quantity (Number)
- Approval (Choice)
- Approver Name (User Property Field)
- Approver Email (User Property Field)
2. Approval Tasks List
This list holds the approval tasks for each purchase request. To set up this list:
- Create a task list from the tasks template.
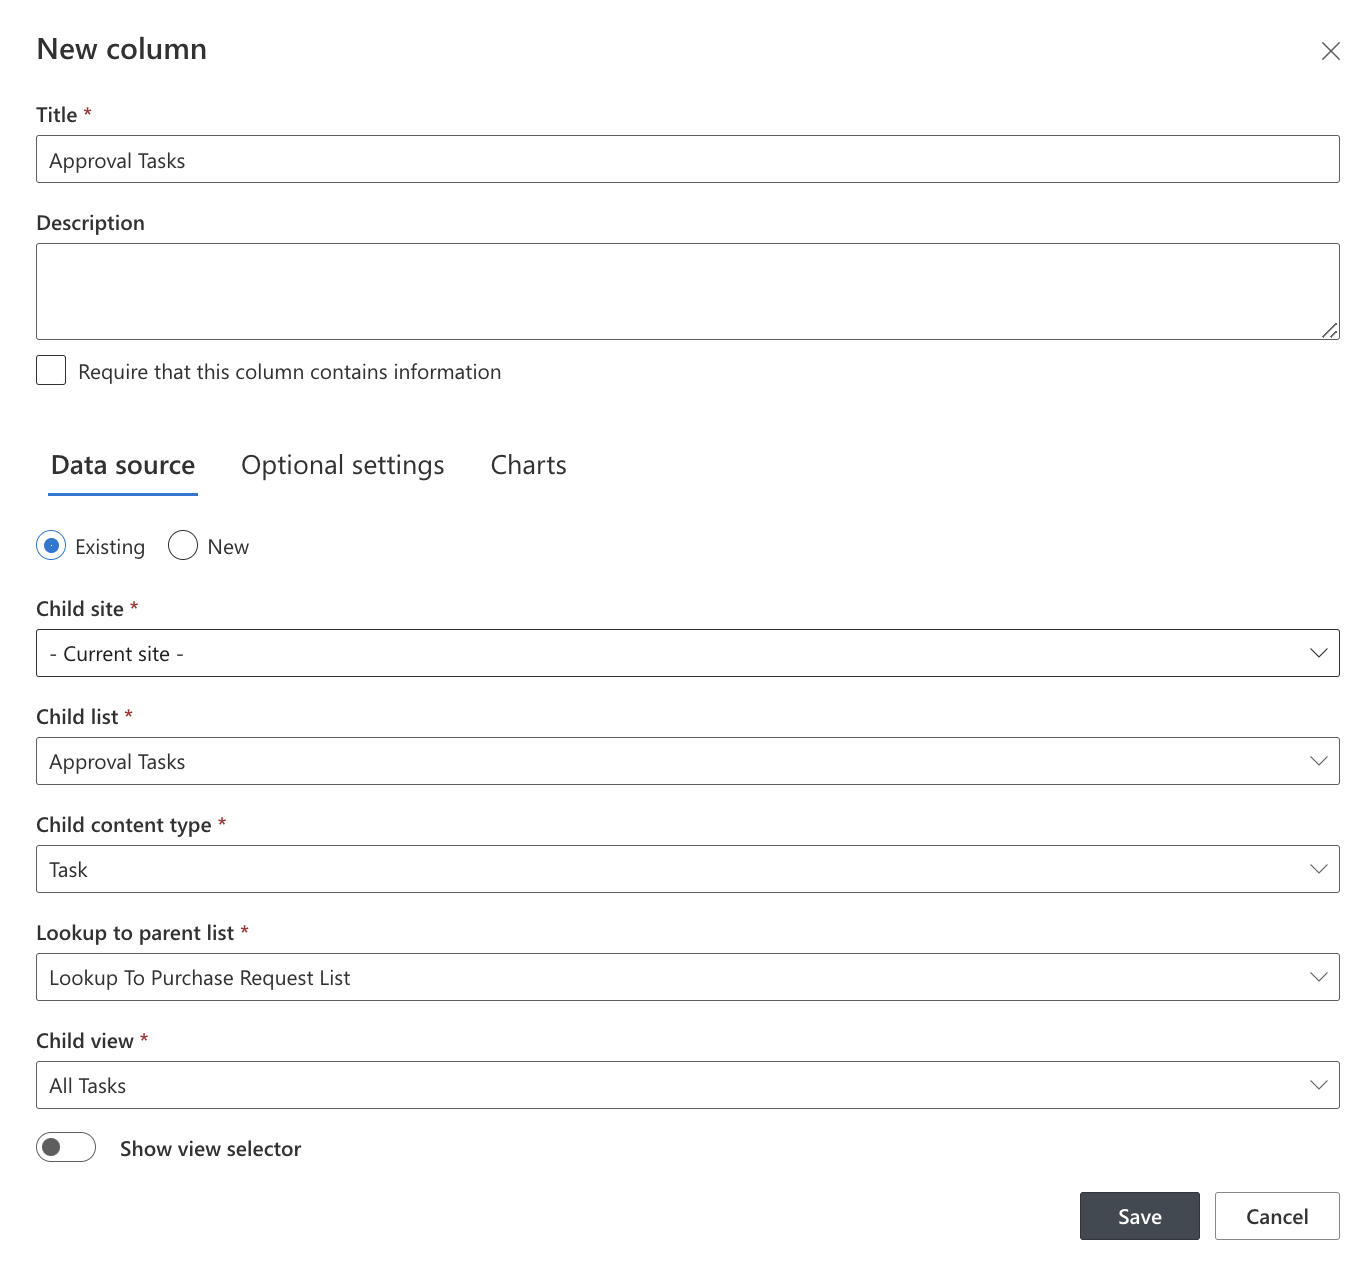
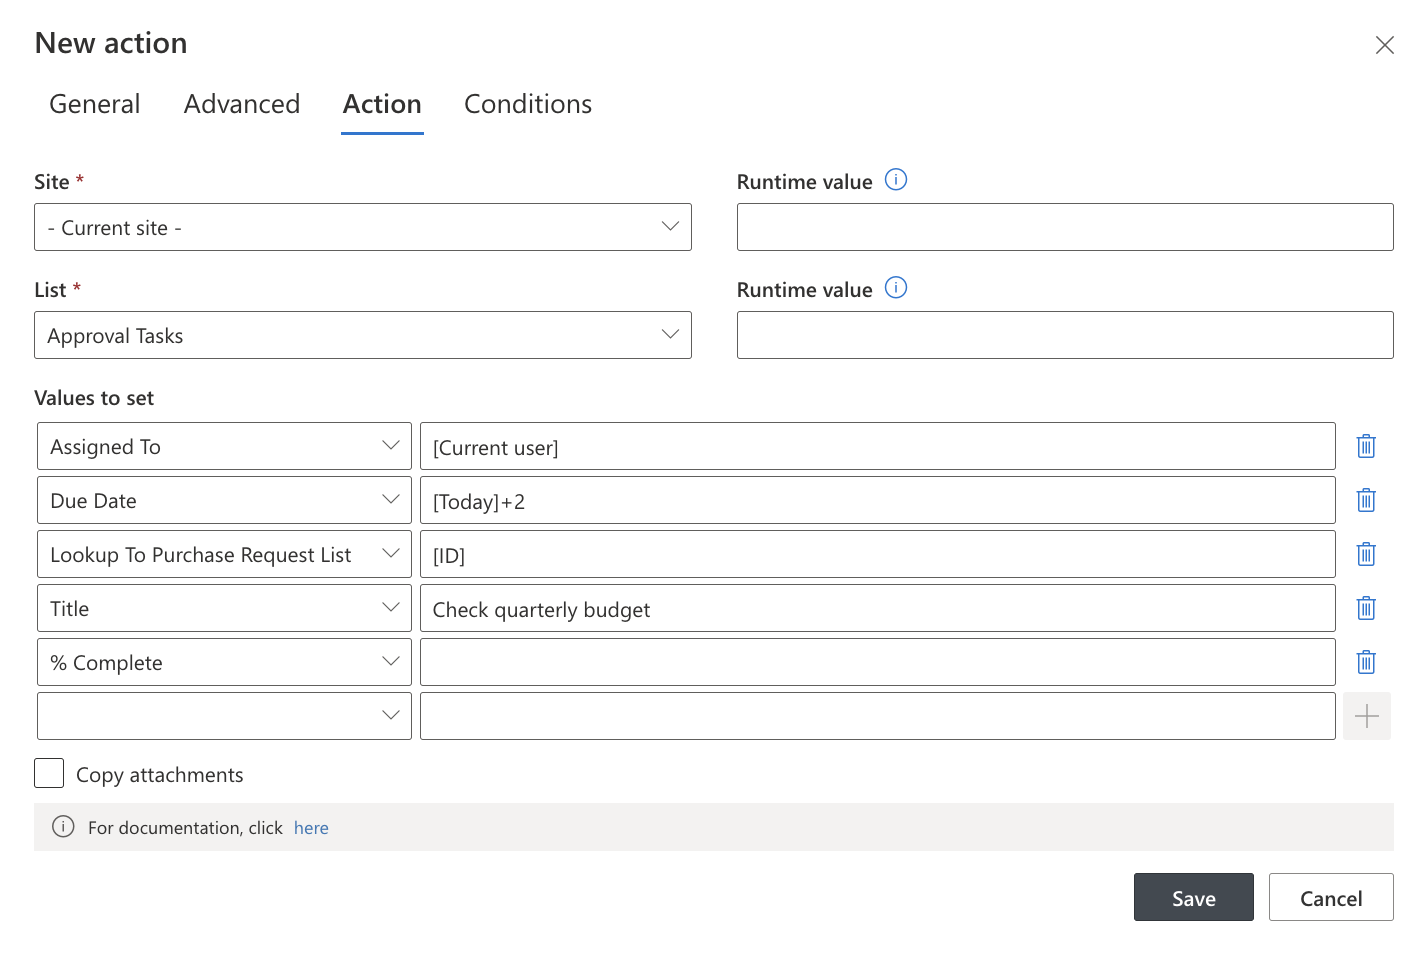
- Add a Lookup to Purchase Request List field:
- This should be a lookup column referencing the ID field in the Purchase Requests list.
- This lookup column is essential for the Associated Items Field to recognize the parent-child relationship.
Configuring the Solution:
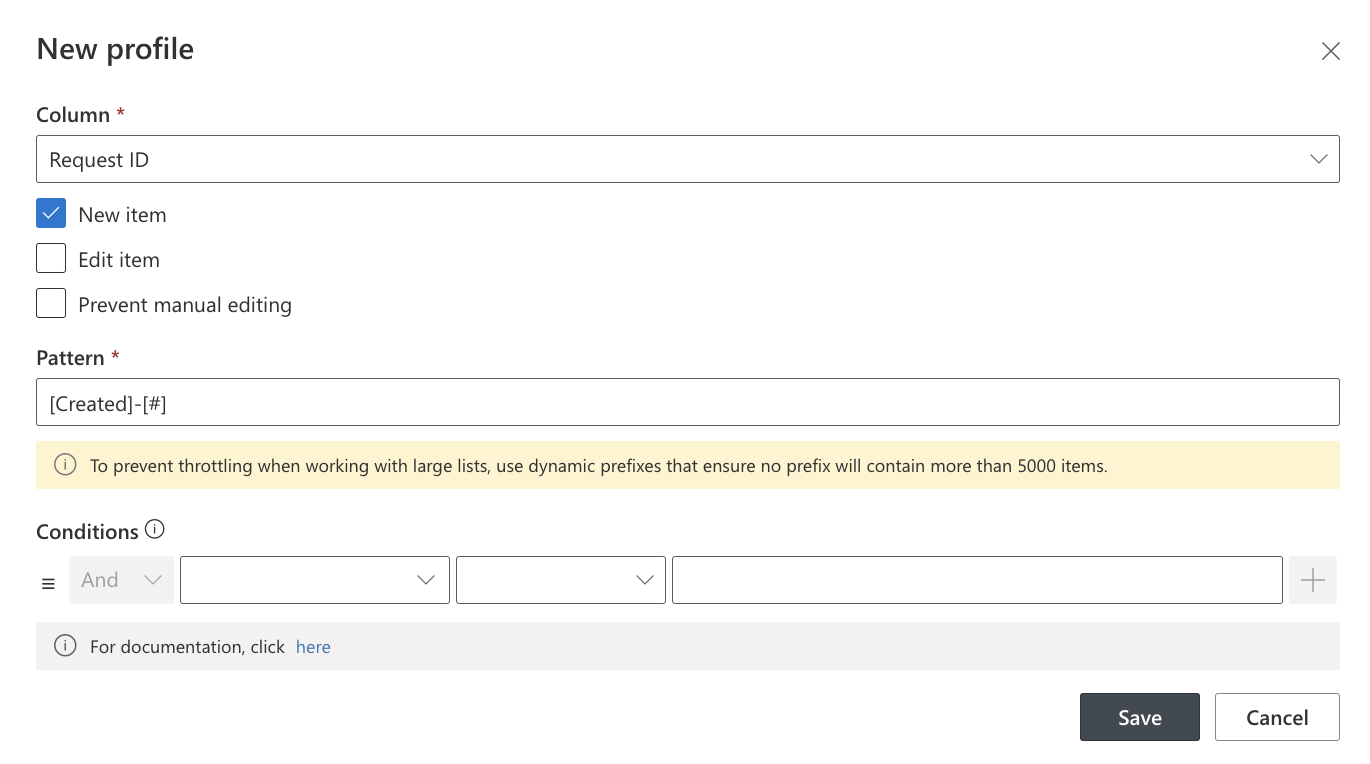
1. Generating Unique Request IDs
On the Purchase Requests list, use UltimateForms: Item IDs to configure the Request ID field by setting an ID template under Item ID Settings in design.
2. Adding the Associated Items Field
In the Purchase Requests list, add an Approval Tasks Field (Associated Items Field).
3. Creating a Tabbed Interface
Using UltimateForms: Forms, create two tabs in the Purchase Requests list:
- Request Tab – Contains fields related to the purchase request.
- Approval Tab – Contains approval-related fields and tasks.
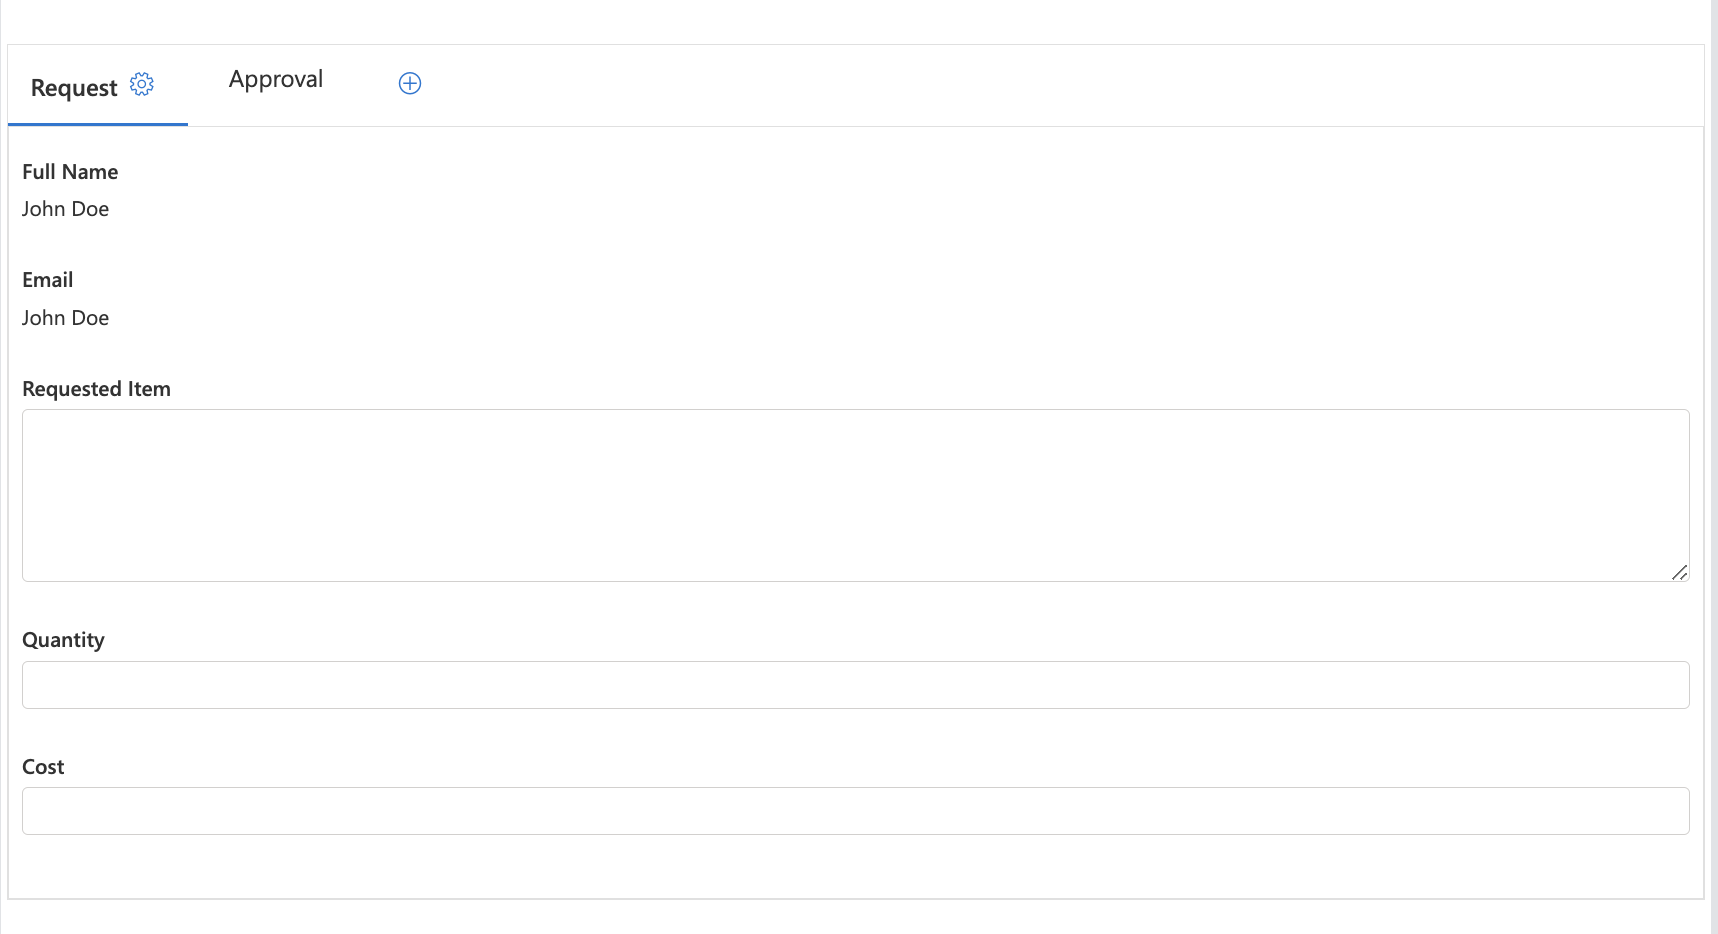
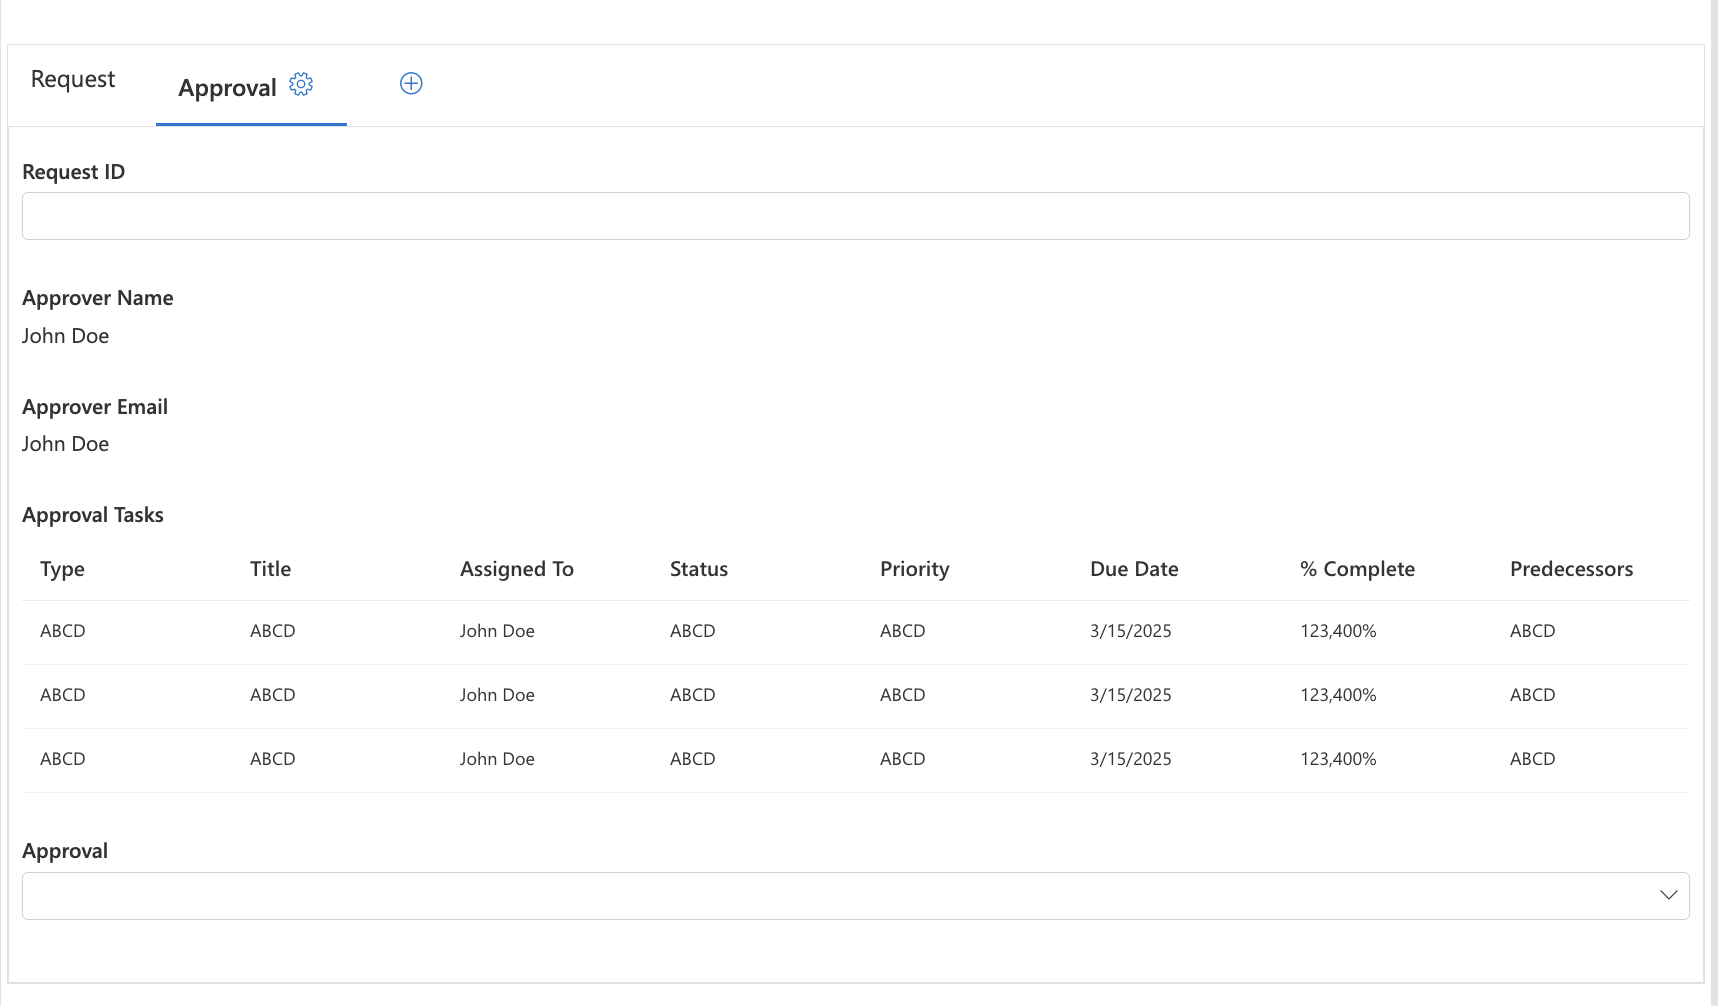
Each tab should be configured as follows:
- Add rules to the Approval Tab to make it visible only when the Request Tab has been completed.
- Restrict access to the Approval Tab by assigning permissions to the Purchase Requests Approvers Group.
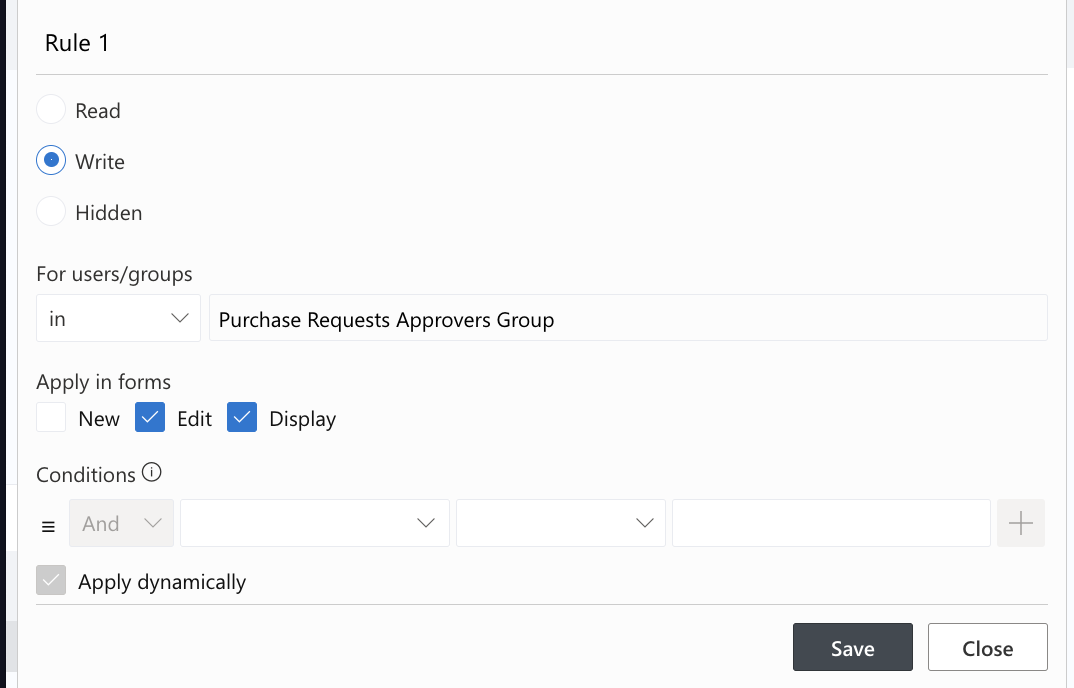
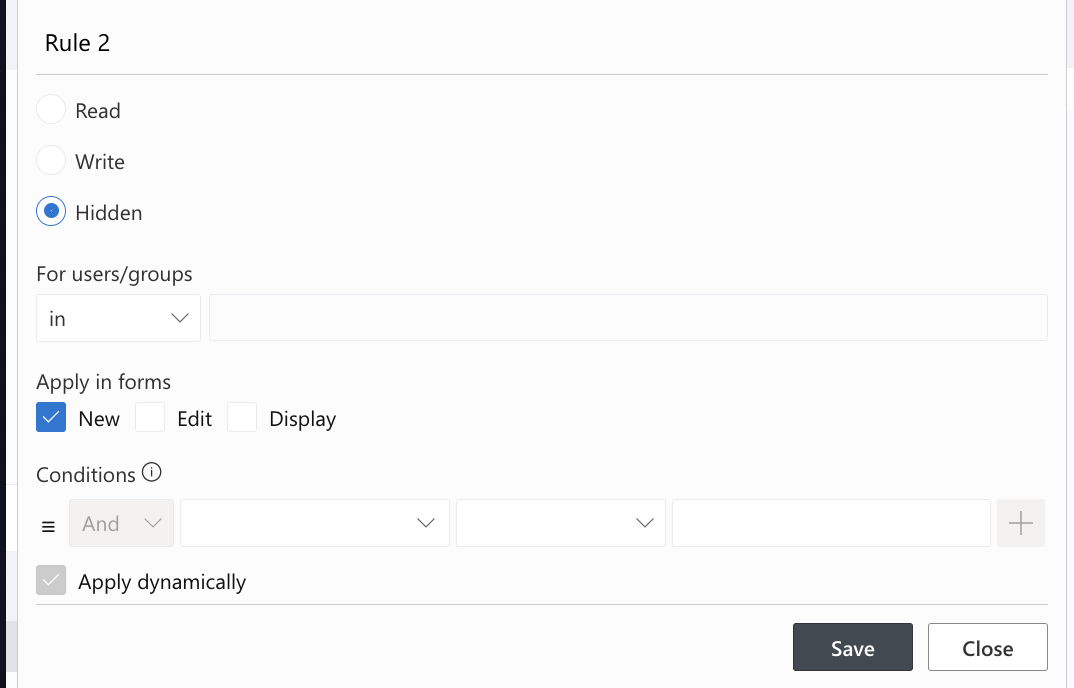
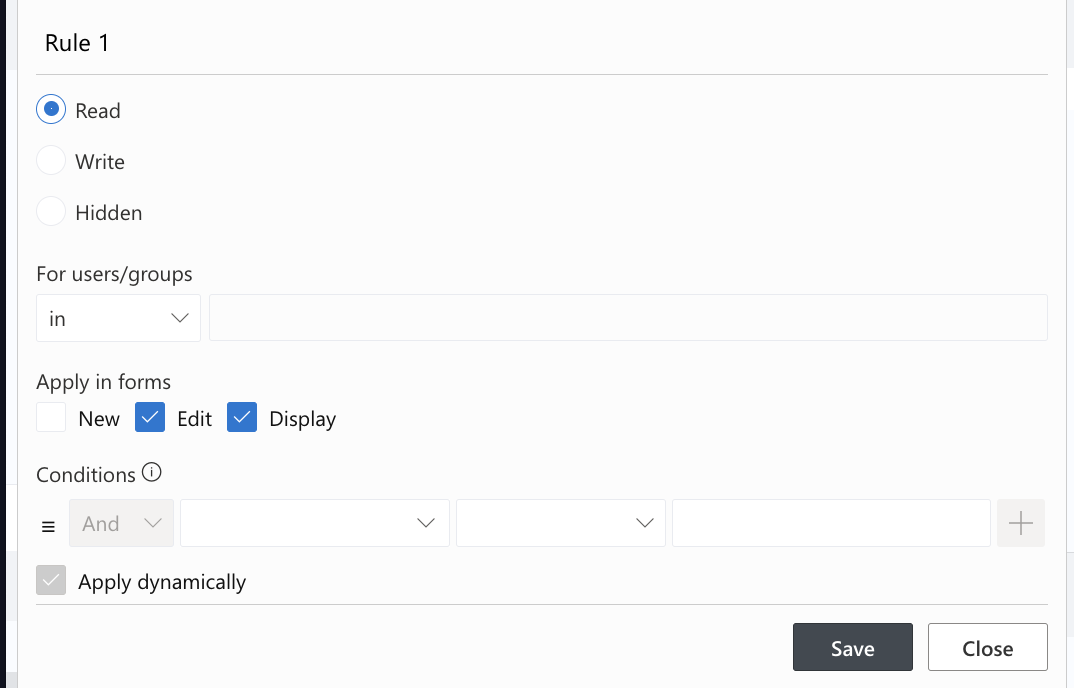
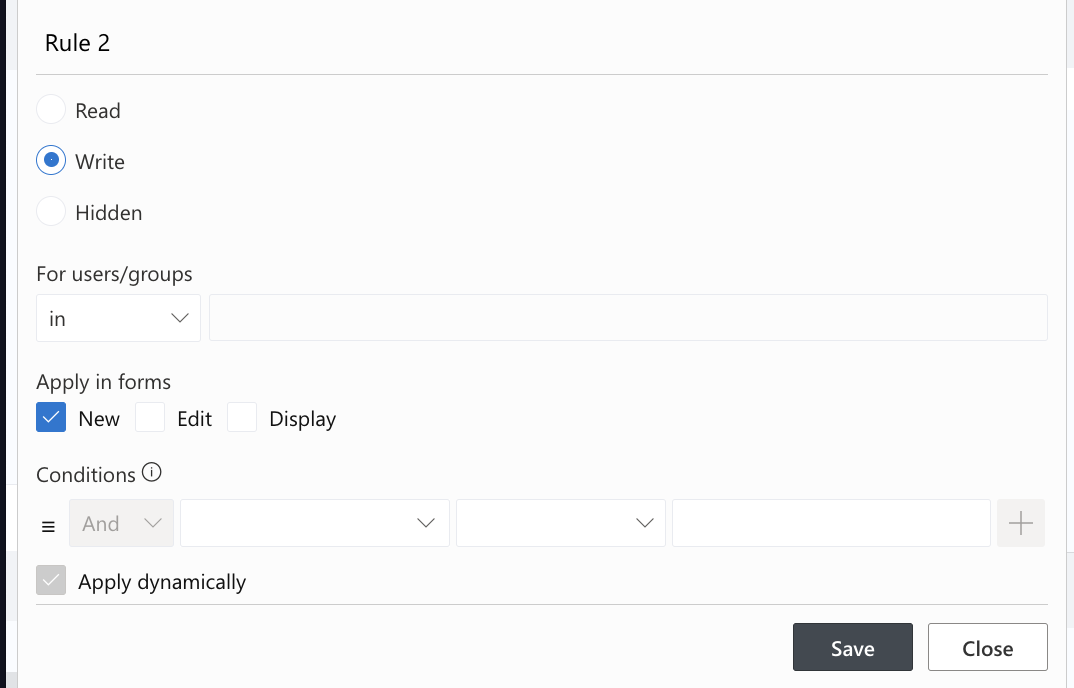
- Add rules to the Request Tab to make it read-only after submission.
4. Automating Task Generation
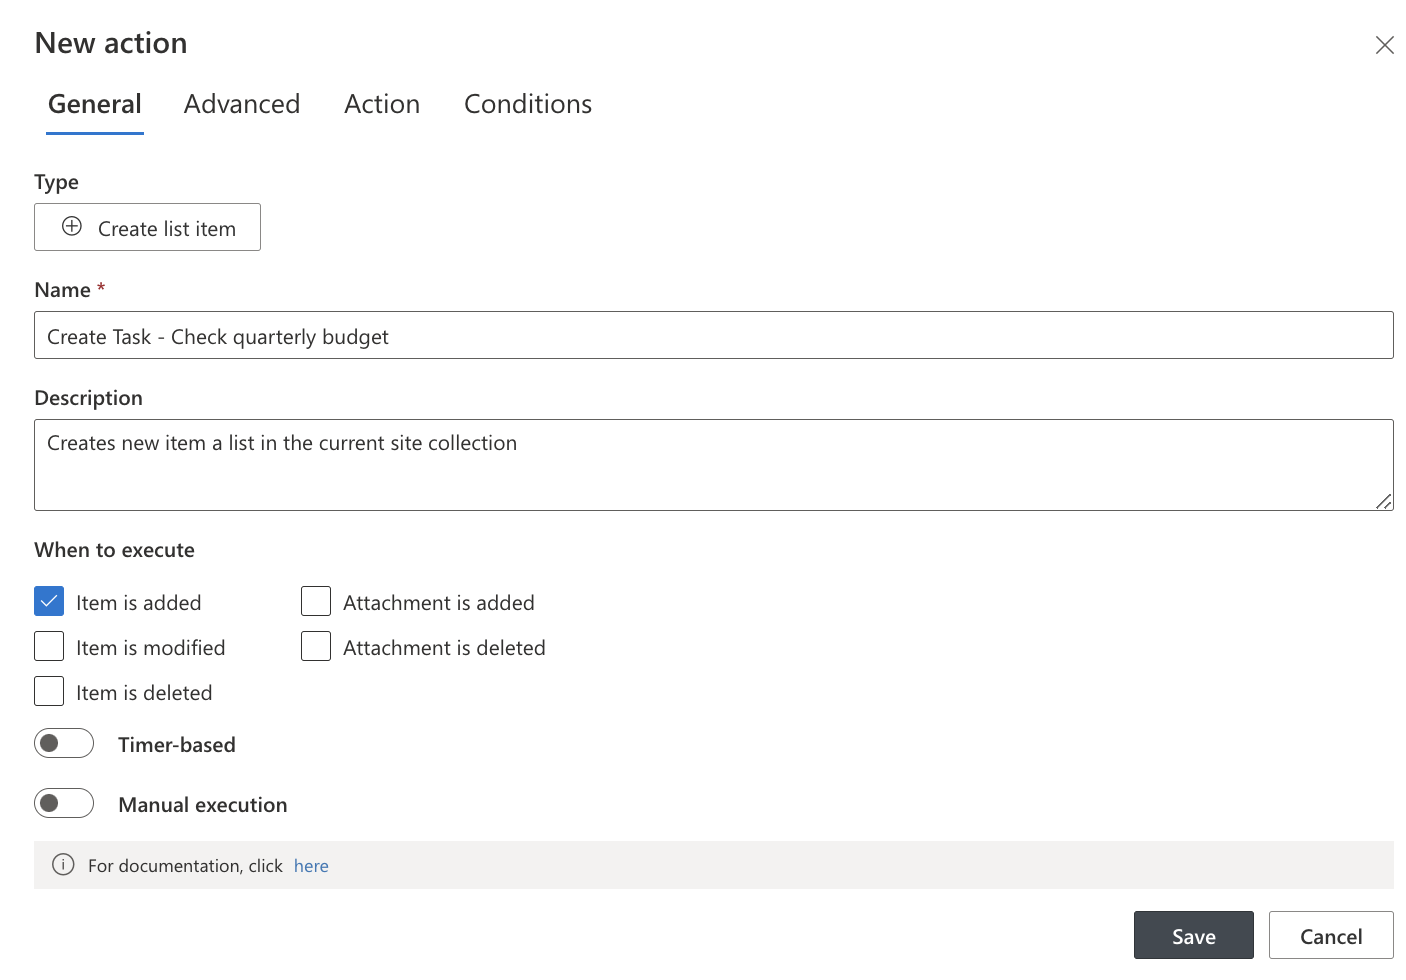
Using UltimateForms: Actions, automate the creation of approval tasks:
-
- In Purchase Requests list click on design, go to Actions.
- Add new Action.
- Use the Create List Item Action to generate predefined tasks in the Approval Tasks List whenever a purchase request is submitted.

Testing the Solution:
To ensure everything is working correctly, follow these steps:
- Create a new purchase request – Go to the Purchase Requests list and create a new item. You should initially see only the Request Tab.
- Fill out the form – Enter all necessary details such as requester information, item details, and cost, then save the request.
- Switch to an approver account – Log in as an approver and edit the purchase request.
- Verify the Approval Tab – The Approval Tab should now be visible. Navigate to it to view the auto-generated approval tasks.
- Check task assignment – Ensure that tasks are correctly assigned to the designated approvers and contain the necessary details for processing.
- Complete the approval process – Have an approver complete the assigned tasks and approve the request.
If any issues arise, verify that the UltimateForms: Connected Lookup, UltimateForms: Associated Items, and UltimateForms: Action settings are correctly configured.
Conclusion:
By leveraging Infowise Ultimate Forms components, we have created an automated Purchase Request system that dynamically generates predefined approval tasks. This ensures that the approval process is structured and streamlined, improving efficiency and compliance in SharePoint workflows.
One of the key advantages of this system is its ability to standardize the approval process. By automating task assignments, organizations can eliminate bottlenecks and delays caused by manual tracking. Additionally, having a predefined set of tasks ensures that all necessary steps are completed before final approval, reducing the risk of missing critical verification points.
Automating approval tasks reduces manual effort, minimizes errors, and ensures all necessary steps are followed before approving a request. This method can be expanded to other workflows, such as document approvals, onboarding processes, or project management, to further enhance automation in SharePoint environments. Organizations looking to improve efficiency can extend this solution by integrating additional automation features, such as email notifications and conditional task creation based on request parameters.
